OUR QUILT OF VALOUR (PART TWO)
The monthly meeting of the New Neighbors' Quilters (No we haven't come up with a name for ourselves yet. I told Kay, our "fearless leader" that I thought she was going to have to make an executive decision and choose a name for us. I'm not sure we, as a group, can agree on one. Much harder decision than the decisions involved with making a quilt.)
We usually start our meeting with a show-and-tell time. Fran brought a quilt top that she found in a box in the garage of a house that she and her husband had bought a number of years ago. It was sewed by hand and had some stains on it. She appreciates the hard work that went into making it and didn't want to throw it away.
I shared the four-patch quilt top that I finally finished sewing together for Hope Circle, the United Methodist Women's group that "ties" lap quilts for church members and family and twin size bed quilts for less fortunate families. Fran and Janice also attend Hope Circle and they had "laid out" the squares for it. It turned out pretty....good selection of colors and prints.
Sharon, who missed last month, shared her Trixi Purse that she made. We had seen one in a fabric shop earlier this month and she went home and made one. So pretty. She is trying to get rid of some of her "stash".
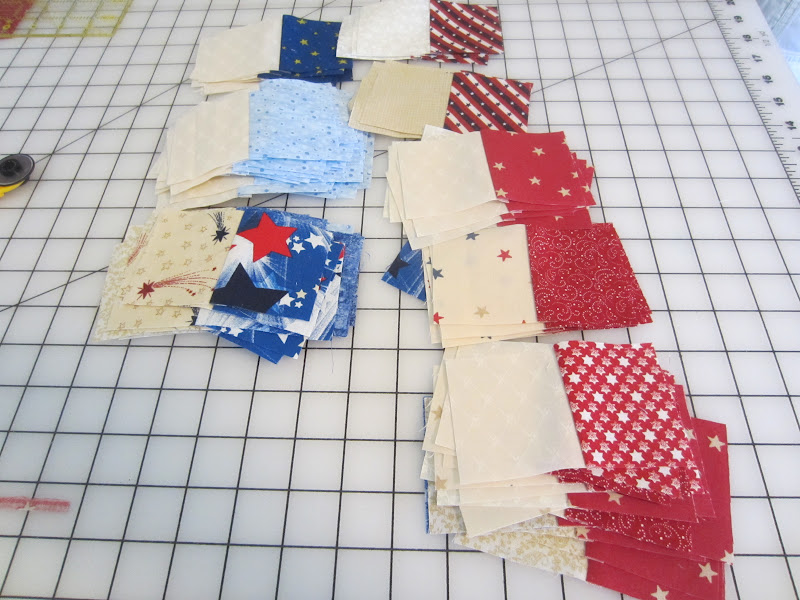
Last month, we packed up so quickly that I didn't get a picture of what we had cut. So I made sure that I got a picture of the basket before we got started. Quite a few of the 4 1/2" squares and some 2 5/8" strips were cut.
Today we needed to cut some more of the 2 5/8" strips especially from the beiges, but also the reds and blues.
Ellen did cut a few more 4 1/2" squares to add to last month's pile.
Rita grabbed the iron before Janice could get there. Some material needed to be pressed before it could be cut in the 2 5/8" strips.
TIP ALERT:
The strips are supposed to be 2 1/2" wide. We cut them wider since more than one person would be sewing them together. Just in case the 1/4" seams are not the same with the different sewers, we can trim them down to the size needed for the pattern.
Today Dorothy was also cutting some of the strips.
Kay planned to spend her afternoon sewing. We needed to sew a lot of two strips together -- one beige and the other one red or blue. From these two sewed strips, "twozies" would be cut (twozies are two smaller squares cut from strip piecing that you might think were sewed together individually, but weren't....I'll have a picture soon of Sharon cutting some.)
When I wasn't busy taking notes or pictures, I was also sewing on my machine some of the strips. Fran was my assistant. She prepared the two strips for me to sew deciding which red or blue strip to put with the beige one.
TIP ALERT:
To make sure that I was sewing my seam the 1/4", I placed some painter's tape on the 1/4" mark on my machine arm, and then tested a seam----took a scrap and sewed using the tape as a guide from the raw edge of the material. If the seam didn't measure the desired width, then I would lift up the tape and replace it. Then test the distance again.
Once the two strips were sewed together, they had to be pressed to cut the "twozies" from. Janice managed to get the iron from Rita and stayed busy with this chore the rest of the afternoon. She "set the seam" first (pressed the seam on the wrong side before opening it out) and then opening the seam out, pressed the seam open to the dark side.
TIP ALERT: Here is Sharon cross cutting the 2 5/8" wide "twozies" from the strips. This technique called strip piecing is so much faster than cutting a gazillion little squares and then sewing them together.
After Dorothy and Rita took a short break....
they both started pinning two "twozies" together,
Rita is choosing two "twozies" to put together for a "fourzie"
To make "fourzies"... Rita and Dorothy turned the
"twozie" so that a beige square on one matched up with a blue or red one
on the other "twozie".
Dorothy is "nesting" the seams and then holding the two "twozies" together with a pin just past the seam.
TIP ALERT: (When you "nest" the seams, if one is pressed going one way and the other one is pressed the other way, the two seams will "nest" together when you press with your fingers....then when sewed the seams will match up perfectly on the top side.)
Kay, who sat at her machine all afternoon, started sewing the "fourzies". Since her machine is older, she "chain pieced" them together.
TIP ALERT: (This means that when she finished sewing one set she took a couple of stitches and then sewed the next one -- not cutting the thread. This technique also saves a lot of time and thread....You might also notice, that Kay is sewing in the direction toward the pressed seam. Going this direction, will increase the accuracy of sewing the nested seams together.)
My machine has a cutter on it that will cut the threads when I press it...see the scissors symbol? (Sweet) Because of this it wasn't necessary for me to "chain piece".
Because the strips were different lengths though, we would often sew several different strips to one longer length.
Before Janice pressed them, Kay cut them apart cutting across the longer strip.
Before the afternoon was over, Ellen had taught Fran how to use the rotary cutter. GO, FRAN!
TIP ALERT: It was necessary to cut the threads between the "twozies" with Kay's "chain piecing". To do this faster and easier, Kay shared this really neat gadget she had bought that is called a clover.
She said someone developed it when the airlines stopped letting passengers bring scissors aboard the plane. It has a blade in between the two pieces of metal. She had a wooden stand that holds a spool of thread that it fit perfectly on.
Then Janice could quickly cut the threads.
After Janice "set the seam", I fingerpressed the seams open toward one side. Then I placed it on the board, and Janice could press it down with the iron.
When everyone had to leave, Kay said she would finish sewing the "fourzies" that Rita and Dorothy had pinned that we didn't have time to sew.
It may not look like much in the picture, but we really accomplished a lot for our second "day".
If you want to see what progress was made at our next gathering, read HERE.
If you missed out on our first work day, you can read all about it HERE.
I hope you are enjoying following our process to create our quilt of valour.


I would like to start quilting again. I "put it down" a while ago. You all have helped me see what I need to do is to search for a group to share my efforts. This has been fun to read. Please don't think it's not much, it really is encouraging.
ReplyDeleteYou have made my day, Nada. I will be sure to share your note with my friends when we meet next time. I have always enjoyed doing something with someone else so much more enjoyable than doing it alone. Hope you find a group. There are lots out there. If you have to, start your own. Not everyone in our group actually makes quilts, but her talents are definitely used in the group.
Delete