Friend Fran surprised me the other day by sharing a recipe she likes to make called Frozen Strawberry Dessert. She said it was just what hot days of summer called for...a very light and refreshing dessert. When Friend Phyllis, one of our former pastors when we lived in CA, came and stayed overnight with us, I thought it would be the perfect dessert to have available at home. She always wants some Kansas City BBQ when she comes and that is so filling I didn't want to make something heavy and decadent just in case she had room for dessert.
I love this crust/topping so much that I think I will use it instead of making a graham cracker crust when called for in recipes. And it was just as light and refreshing as Fran said it was. I am so glad that she thought to share the recipe with me.
FROZEN STRAWBERRY DESSERT
CRUST/TOPPING
1 cup sifted flour
1/2 cup chopped pecans
1/3 cup brown sugar
1/2 cup (1 stick) margarine, melted (I used butter.)
Preheat oven to 350 degrees F.
Combine the flour, pecans, and brown sugar together and
then mix in the melted butter. (I softened the butter by putting it in the microwave in a bowl for 30 seconds.)
Drop the mixture in a shallow pan or cookie sheet. You are not spreading the mixture but you don't want big clumps of the mixture so they won't be done.
Bake for 10 minutes. Cool, and
sprinkle 2/3 of the mix in the bottom of a 9 x 13 - inch pan. ( I crumbled mine to see how much 2/3 of the mix would be and it was 2 cups.) Reserve the other cup for the topping.
While the mixture is baking, prepare the filling:
FILLING:
1 10 - oz pkg of frozen strawberries, slightly thawed (I used unsweetened strawberries because that is what Fran told me she used. Her recipe didn't stipulate that.)
1 cup sugar (I used stevia since I had bought unsweetened strawberries)
2 egg whites
1 tablespoon lemon juice
* * * * * * *
2 cups Cool Whip (There is about 2-1/2 cups in an 8 - ounce carton of Cool Whip)
Chop the strawberries and add them with the other ingredients (except the Cool Whip) in a large mixing bowl with a stand mixer.
Beat 15 minutes at high speed.(Set your timer because this is a long time.)
Fold in 2 cups of Cool Whip.
Pour the whipped mixture over the crumbs in the pan.
Sprinkle with the remaining 1 cup of crumbs.
I used my Pyrex dish that was more like 8 x 12 - inches and I was afraid it wasn't going to hold all of it. So make sure whatever dish you use is 9 x 13 - inches. (My husband says, "But then it won't be as thick." "Yes, Dear, it won't but you don't want it to overflow either." Whipping the mixture for 15 minutes really adds the air and the mixing bowl was almost full by the end of the time. Fran actually makes this with a hand mixture because she doesn't have a stand mixer. I personally can't imagine making it that way.The 15 minutes was long enough my way.
Place in the freezer and freeze.
Remove 5 to 10 minutes before you are ready to serve it. It comes out so easy and everyone will love it!
Remember if you want to print this recipe using the print icon below, you will have the option to remove the images from the tool bar at the top of the print page that opens up. If you do not see the print icon, you need to scroll back up to the title of this post and click/tap on it. Then you will see just this post and the print icon will be before the share buttons at the bottom. Home will return you to the blog and the most recent posts.
"The most delicious cookies I've ever made!" That's how Phyllis Pellman Good and Rachel Thomas Pellman describe these Chocolate Chip Cookies in their from Amish and Mennonite Kitchens cookbook. I guess the person they got the recipe from (they don't credit anyone specific for the recipes) had the comment that said "They are more moist when they are kept in the freezer a while." (not in quotation marks - I added those because I was quoting from the book) Beneath that statement were several sentences in quotation marks (the book authors' comments?) To continue the quote - " They taste more-ish. I didn't get a chance to put any in the freezer."
I made the cookies and decided after they cooled that I would place a few in the freezer to see if I agreed with the comment. I personally didn't notice a difference. I just enjoyed the cookies (especially with a little glass of milk).
The cookies are a softer chocolate chip cookie (maybe that is due to the sour cream?) and not as sweet as most I have eaten. But then that is okay with us as we usually like our goodies not super sweet anyway.
When I made the cookies, I cut the recipe in half (easy to do) because I didn't want to make 8 dozen cookies. The recipe I am sharing is for the full amount. Also, since I was cutting the recipe in half, I did substitute the cup of sugar with 1/2 cup sugar/stevia baking blend.
CHOCOLATE CHIP COOKIES
makes 8 dozen cookies
1 cup shortening
2 cups sugar
4 eggs
1 cup sour cream (I used light sour cream)
4 cups flour
1/2 teaspoon salt
2 teaspoons baking soda
1 (12 oz) bag of chocolate chips
1 cup chopped nuts (I used walnuts)
2 cups raisins (boiled, cooled, and drained), optional (I did omit)
Preheat oven to 375 degrees F.
Cream shortening and sugar.
Add eggs
and beat til fluffy.
Add sour cream and mix well.
Combine the flour, salt, and soda and gradually add it to the mixture. Mix well.
Stir in chocolate chips, nuts, and raisins, if desired.
Drop by heaping teaspoons onto greased cookie sheets. (I used my cookie scoop and flattened the dough with my fingers as they didn't spread as they cooked.
Bake for 10 minutes. (This is a picture of my first pan...you can see how they didn't spread when they baked.)
Remove and cool on wire rack.
Remember if you want to print this recipe the print icon below will allow you to remove images when the print window opens. If you do not see the print icon, you need to scroll back to the title of this post and click/tap on it. Then you will see just this post and the print icon will be before the share buttons. Home will return you to the blog and the most recent posts.
Meat loaf is one of my husband's favorite entrees. When we go out to eat, if meat loaf is on the menu and he wants more than a salad, he will usually order it.
Friend Janice and I went to estate sales on Thursday last week so that Friend Fran could also go with us. (We also went to a couple Friday morning...it's just not Friday if we aren't going to estate sales.) I didn't see too many cookbooks but finally chose one at one of the sales. It was compiled by the Apache School PTA in Overland Park, Kansas (Apache Appetite Delights).
When I saw Sandra Moore's recipe for Pizza Meat Loaf, I knew I had to make it. I didn't tell my husband I was making it and when he saw it on the table when I called him to dinner, he grinned and gave me a big smile. Since he prefers ground turkey instead of ground beef, I made it using half of each. He thanked me for doing so when I told him.
PIZZA MEAT LOAF
1 can (10.75 oz) tomato soup
1/4 cup water
1/2 teaspoon crushed oregano
1 small garlic clove, minced (I used 1 teaspoon dried minced garlic)
1 cup oats or bread crumbs (I did use quick oats)
1/4 cup chopped onion
2 tablespoons parsley, chopped
1 large egg, beaten
1 teaspoon salt
1/2 teaspoon pepper
1 cup shredded Mozzarella cheese or 2 slices Mozzarella cheese
1 lb ground meat (I used 1/2 lb ground beef and 1/2 lb ground turkey)
Preheat oven to 350 degrees F.
Blend soup, water, oregano, and garlic in a bowl.
In another bowl, combine 1/4 cup of the soup mixture, with the oats, onion, parsley, egg, salt, and pepper using a wooden spoon.
Mix in the meat.
You get the best results if you are using two different ground meats if you use your fingers. If you are just using ground beef, a spoon will work to combine. The more you work with the mixture, the more compact the meatloaf will be when it is done.
Shape into a loaf pan.
Bake for 1 hour and 15 minutes. Spoon off fat. (I didn't have any.)
Pour remaining soup mixture over the loaf.
Top with cheese.
Return to oven and bake until cheese is melted and soup is heated (bubbly) 7 - 10 minutes.
Remember, if you wish to print this recipe using the print icon below, you will be given the option to "remove images" when the print window opens. If you do not see the print icon below, you need to go back to the title of this post and tap/click on it. Then just this post will open and the print button will be included with the share buttons at the bottom. Home will return you to the blog and the most recent posts.
Last week some of my quilting friends and I went to Hamilton, MO to experience the Missouri Star Quilt Co. The brother and sister who started the company recently received recognition for small businesses in the United States. The story of the company and how it saved the town of Hamilton is amazing.
When our group went earlier this summer, I wasn't able to go. So I was really looking forward to this trip. We all had so much fun visiting and revisiting the shops. Everyone seemed to have a different project in the works but also enjoyed helping and giving opinions when selections were being made. I did purchase some 30's prints to make a new shower curtain. I still have to add some more prints, but I hope to get it done by the end of the summer.
Janice noticed a non-quilt shop she wanted to go in. It was an Amish Country store that is also in Jamesport that we love, The The Farm House Collection. I hadn't purchased any material yet so when I saw the cookbook Farmhouse Kitchen, I decided to splurge and buy it. Many of the recipes in it uses ingredients I will need to buy in an Amish grocery store so it will be a while before I can make some of the things that sound really good.
I could make these Gooey Chocolate Bars contributed by Stevie & Rebecca Swarey though. I even made the homemade sweetened condensed milk that they indicated they used in the recipe.
I have seen recipes for homemade sweetened condensed milk but just never got around to trying it. I didn't take the time to see if my other recipes are different or not. I originally wanted to try it with Splenda when I first saw it about 8 years ago. I now cook with stevia so that is what I used in place of the sugar.
Since the powdered milk is nonfat, my homemade sweetened condensed milk was fat - free and sugar - free. How exciting! And it tasted good and did work well in the recipe for the bars. Of course the bars aren't fat - free and sugar - free but I did end up reducing the total calories which I feel is always good.
The Hillcrest Thrift Shop volunteers will get to sample them later this morning but my husband and I did an early taste test last night. Yummy.
GOOEY CHOCOLATE BARS
1 - 3/4 cups flour
3/4 cup powdered sugar
1/4 cup cocoa
1 cup margarine (I did use butter), 2 sticks
Filling:
1 cup chocolate chips
1 (14 - oz) can condensed milk (I used the homemade sweetened condensed milk below.)
1 teaspoon vanilla
Preheat oven to 350 degrees F. Grease a 9 x 13 - inch pan. (I used my homemade Pan Grease.)
Soften the butter in the microwave in a large bowl on High for 30 seconds.
In another bowl, combine the flour, powdered sugar, and cocoa.
Then add to the softened butter and work with a fork until it is well combined.
Sprinkle out over the bottom of the pan and
then press the mixture to evenly cover the bottom.
Bake for 15 minutes.
Prepare the filling while it is baking.
HOMEMADE SWEETENED CONDENSED MILK
1 cup instant dry milk (I used nonfat)
2/3 cup sugar (I used stevia)
1/3 cup boiling water
3 tablespoons butter
Combine the dry milk and stevia with a whisk in a mixing bowl. In a glass measuring cup bring the water and butter to a boil (about a minute on High in the microwave or longer if necessary for the water to be boiling.)
Add the boiling water mixture to the dry mixture and beat with a whisk until smooth.
Use in recipes that ask for 1 can of sweetened condensed milk.
Add the vanilla and the chocolate chips to the bowl of prepared sweetened condensed milk while it is still warm and stir til chips melt and the mixture is smooth. My mixture was still warm enough that the chips melted without too much trouble.
Pour over the baked bars after you remove them from the oven. Spread to cover.
Sprinkle about 1/2 cup chopped nuts (I used pecans) over top and return to oven to bake for 15 more minutes.
Remove and cool on wire rack.
Cut into bars/squares when cooled.
Remember, if you wish to print this recipe using the print icon below, you will be given the option to "remove images" when the print window opens. If you do not see the print icon below, you need to go back to the title of this post and tap/click on it. Then just this post will open and the print button will be included with the share buttons at the bottom. Home will return you to the blog and the most recent posts.
At an estate sale last Thursday I saw a recipe in a cookbook with zucchini and a box of cranberry and orange muffin mix. I love that muffin mix and thought it would be a good one to try.
When I got home I discovered that the last zucchini I bought had ruined in the refrigerator. (I surely wish I could be successfully grow them. Friends who are complain because they have more than they can do something with. It's just not fair!) Anyway I went to Hy Vee to buy one or two so I could make it.
Well, I mixed it up by the recipe (I remembered - it was fairly easy) and put it in the oven to bake. I was a little concerned because the batter seems a little thin, but I had followed the recipe. At the end of the baking time though the loaf was NOT done. I cooked it almost 10 extra minutes until the toothpick came out "fairly clean" (as the recipe stated). My toothpick was actually "clean" so that is why I was surprised when I cut a slice after it had completely cooled and the loaf was NOT done.
Fortunately I had another box of the muffin mix and some zucchini left so I got up Saturday morning and gave it another try - but with my recipe and not the one I had seen in the cookbook.
This time it was a totally different "ball game". The loaves (I decided to make 2 mini loaves) looked so pretty and even better when I finally cut myself a slice, it looked like it should look AND it was done.
I gave my husband a slice and he thought it was so good. Much better than other zucchini breads I have made - he said.
I froze one of the loaves and will have to buy some more of the mixes the next time I go to Aldi's. I will try to not let my "bought" zucchini ruin next time.
ZUCCHINI CRANBERRY & ORANGE BREAD
1 box Cranberry & Orange Muffin mix
1 teaspoon ground cinnamon
1 teaspoon McCormick's Valencia orange peel
1 cup grated zucchini, chopped
1 beaten egg
1/2 cup water
Preheat oven to 350 degrees F. Spray two mini loaf pans or one 8 - 1/2 x 4 - 1/2 inch loaf pan with cooking spray.
Combine the muffin mix, cinnamon, and orange peel in a mixing bowl.
Add the zucchini.
Add the beaten egg and water. (I just used a fork to beat the egg slightly.
Stir with a wooden spoon just til mixed.
Divide the batter evenly into the mini loaf pans.
Bake for about 40 minutes for the mini loaves. The single loaf will probably take at least 50 minutes. Check for doneness with a toothpick. Cook longer if necessary.
Remove from oven and cool in pan 10 minutes on wire rack.
The remove and finish cooling on the wire rack.
Slice when cooled. Can wrap one of the mini loaves and freeze for later enjoyment.
Remember, if you wish to print this recipe using the print icon below, you will be given the option to "remove images" when the print window opens. If you do not see the print icon below, you need to go back to the title of this post and tap/click on it. Then just this post will open and the print button will be included with the share buttons at the bottom. Home will return you to the blog and the most recent posts.

 Combine the flour, pecans, and brown sugar together and
 then mix in the melted butter. (I softened the butter by putting it in the microwave in a bowl for 30 seconds.)
 Drop the mixture in a shallow pan or cookie sheet. You are not spreading the mixture but you don't want big clumps of the mixture so they won't be done.
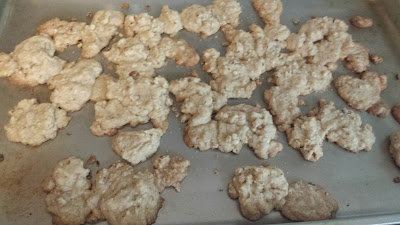 Bake for 10 minutes. Cool, and
  sprinkle 2/3 of the mix in the bottom of a 9 x 13 - inch pan. ( I crumbled mine to see how much 2/3 of the mix would be and it was 2 cups.) Reserve the other cup for the topping.
 Chop the strawberries and add them with the other ingredients (except the Cool Whip) in a large mixing bowl with a stand mixer.
 Beat 15 minutes at high speed.(Set your timer because this is a long time.)
 Fold in 2 cups of Cool Whip.
 Pour the whipped mixture over the crumbs in the pan.
 Sprinkle with the remaining 1 cup of crumbs.


