Friday, April 29, 2022

BLOCK 26: ARKANSAS TRAVELER

 Last year a certain fabric store came out with fabric for the 50 states. I was lucky that I could get fabric of course for Missouri but because Arkansas if just below us, I could get it also. They also sold material for Kansas, but then that is just miles from here depending on where you live in Kansas City. I was mainly getting Missouri for my son's family, but since he was born in Arkansas like I was, I really wanted to get the Arkansas print. I even went as far as contacting family members still living in Arkansas if they could purchase certain prints for me when I couldn't find all of them. I could order it online but you had to order at least two yards and I didn't want that much.

You may be wondering why I am telling you all this. I finally have gotten around to using some of the Arkansas prints. There just happens to be two ladies from Arkansas in the 30-Block-Exchange group. (Alas, no one from Missouri so I just need to get on the stick and make some for Patrick's family.) So this past weekend I spent a few hours making each one of them a block named Arkansas Traveler(s). I like to think it is plural since the block consists of four smaller identical blocks except for placement. That's one reason it didn't take too long to make them. It felt like an assembly line producing them.

I have six different prints for the Arkansas fabric so I only used half of them, but I tried to choose ones that would show off the pattern well. I will give you instructions for one block instead of two, but remember I had to cut twice as much pieces and was picking and choosing from both of the blocks on my design wall to get the best look from the fabrics.

Oh, by the way, if you are thinking "this block is meaningless to me because I'm not from Arkansas", the block actually goes by a number of names...Spools, for one. AND you can name it anything you like.


HOW TO MAKE THE ARKANSAS TRAVELER 12.5" BLOCK 

(using 1/4" seams and consists of four (4) identical - 6.5" squares)

CHOOSE three (3) different prints

CUT from Print #1 sixteen (16) - 2.5" squares

                Print #2 eight (8)  - 2.5" x 6.5" strips

                Print #3 four (4)  -  2.5" x 6.5" strips

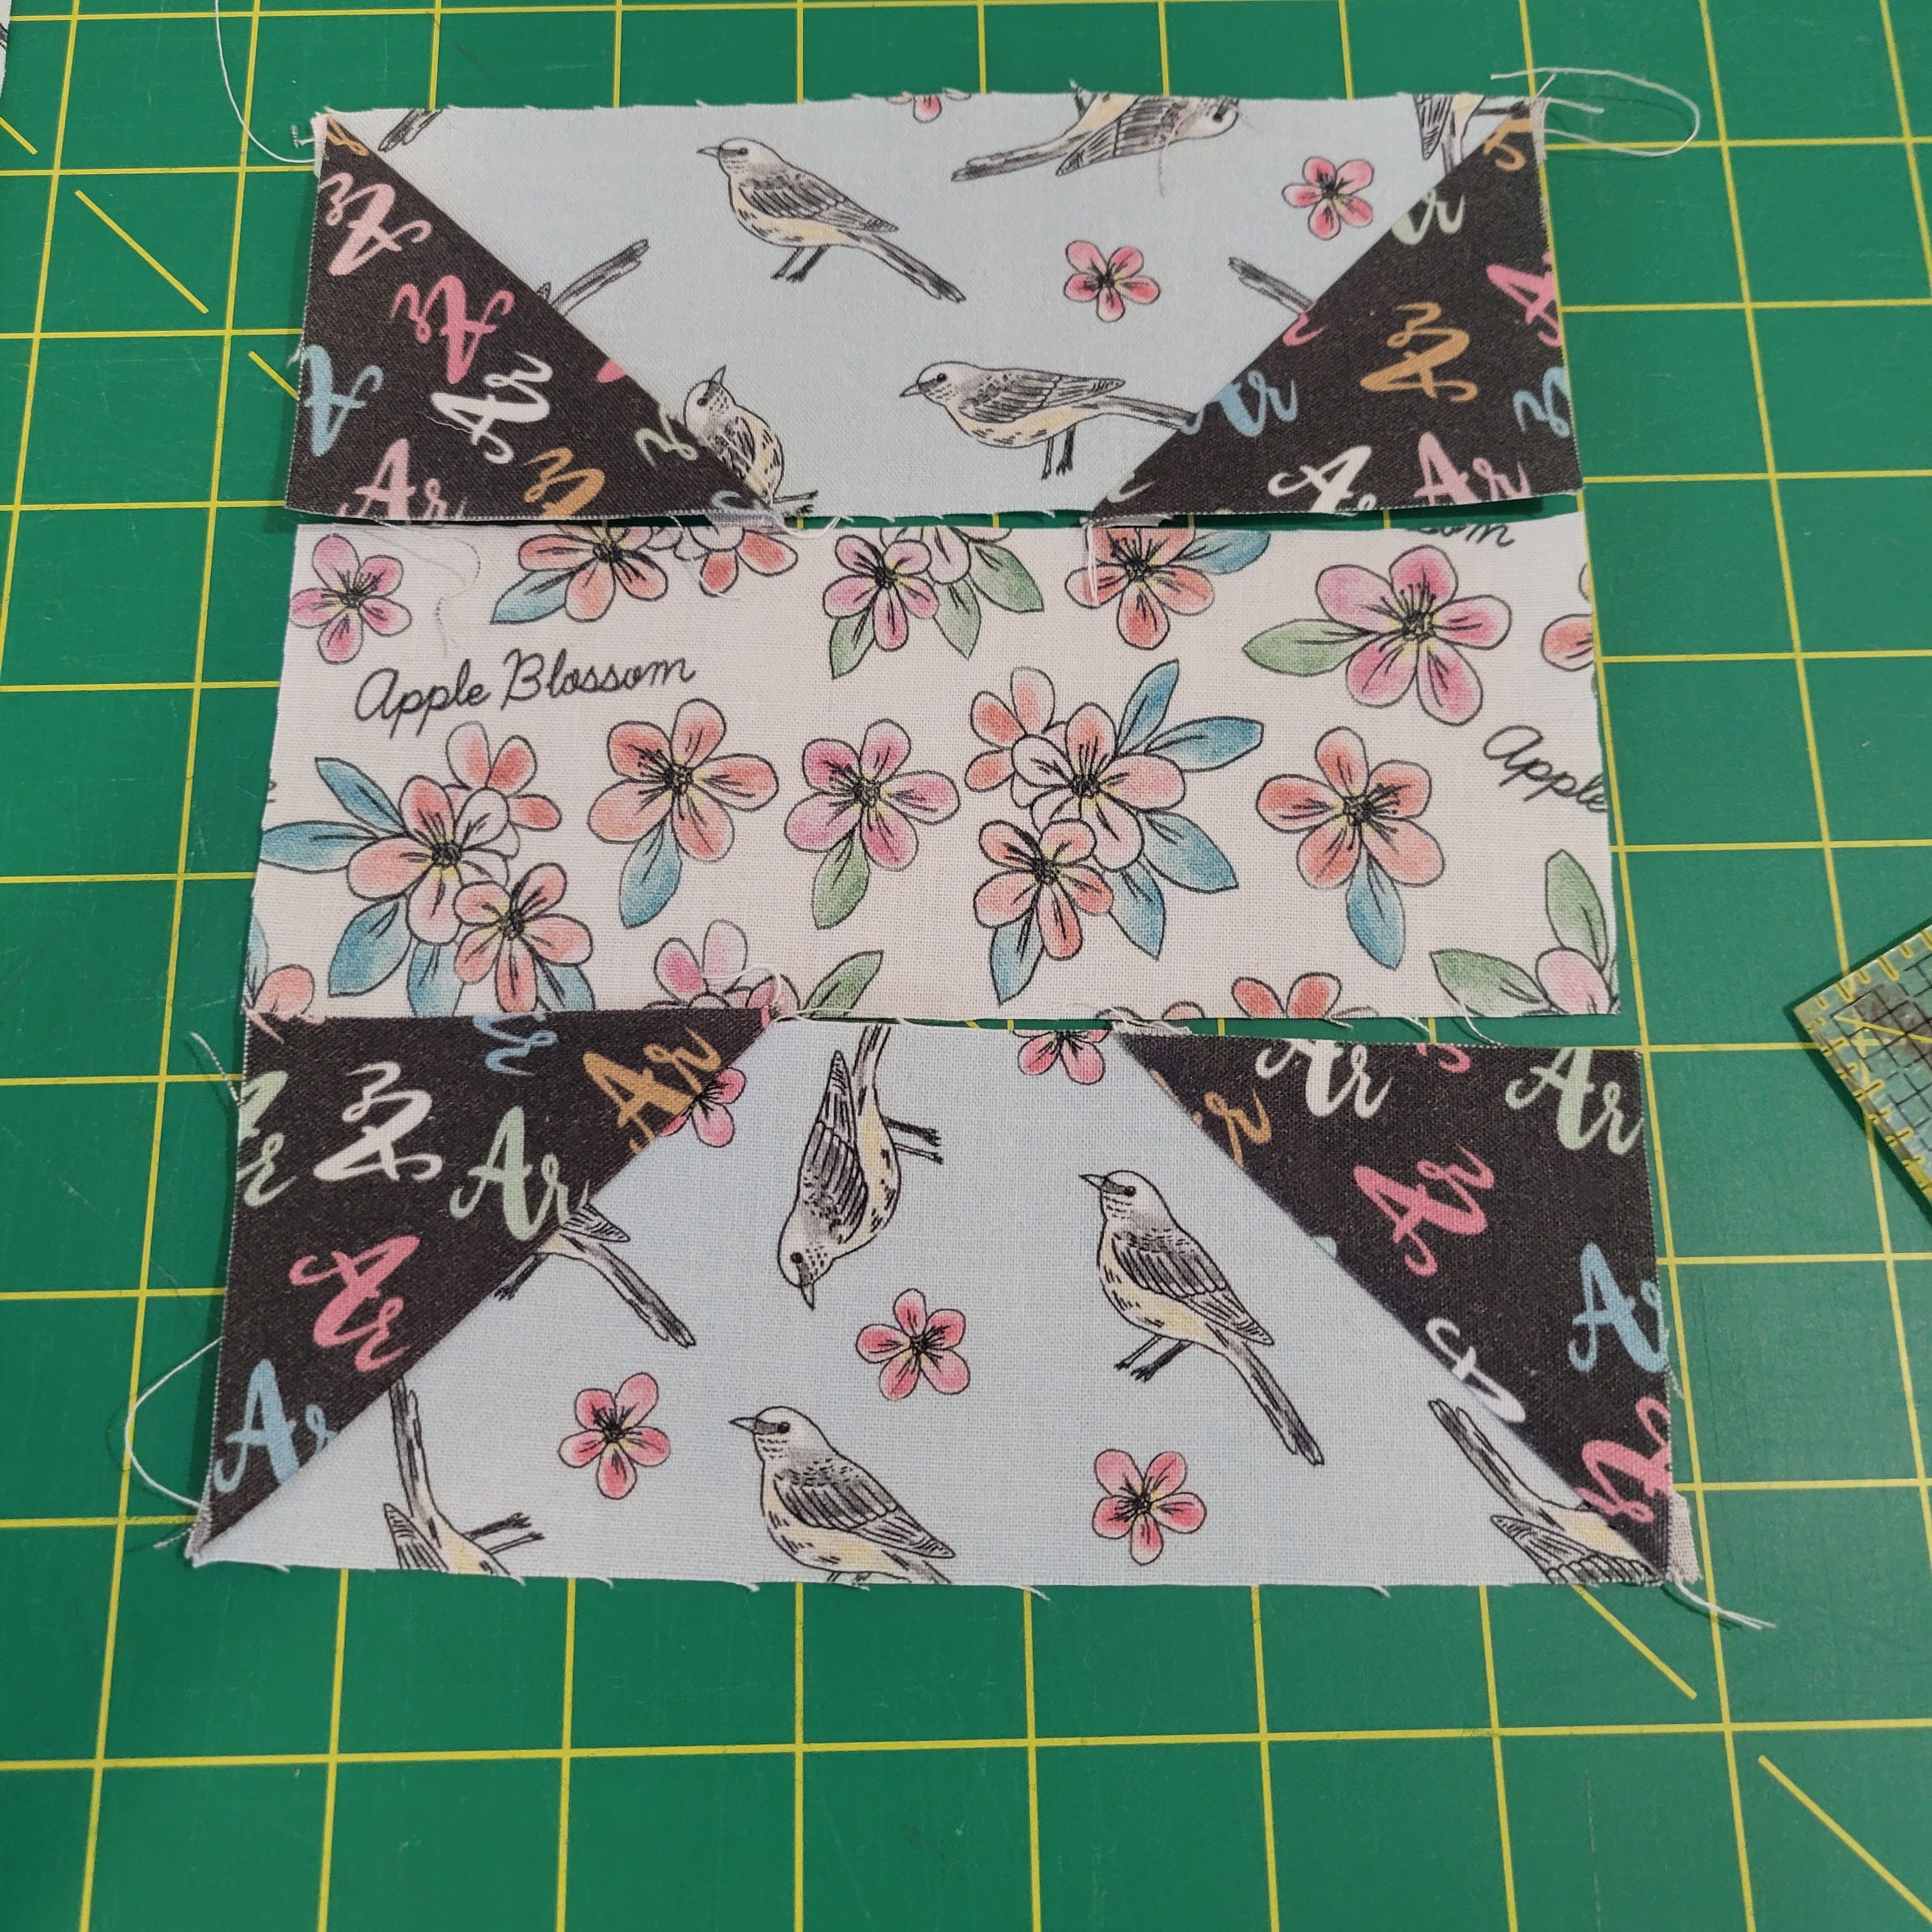
The top and bottom rows are made like "flying geese", if you are familiar with making them. The squares will be used on each end of the eight (8) strips for the corners.


Start by drawing a diagonal line on the wrong side of each of the sixteen (16) squares. They will be placed on the ends overlapping the strips with the line like this :  /. Also known as a forward slash.

I laid out the block on my cutting table because my design wall is full.
Carefully place squares matching corners on strip.


SITICH on the drawn line.


TRIM 1/4" from seams.


PRESS toward the dark print.

Ready to sew the three strips/rows together.
SECURE with pins to sew.

PRESS seams toward center row, the natural way they want to lean.

After you make all four smaller blocks, you are ready to sew them together to make the large block.


SQUARE it up to 12.5" and TRIM away excess.


It doesn't matter which small block is in the upper left hand corner. I just laid it the way I could see the words Apple Blossom, the state flower of Arkansas, best. The Mockingbird is the state bird, and of course, we abbreviate Arkansas - AR. 


Wednesday, April 27, 2022

BLOCK 25: SPRINGTIME QUILT BLOCK

 I can't believe I have made twenty-six blocks so far for the 30-Block Exchange. As I have said before this activity has been so much fun and I have learned so much. I am a much better quilter now than I was before I started it in February. I can't tell that my stash looks any different, but then I have been using a lot of scraps from previously made projects. I am making two blocks by the same pattern for two of the ladies who are from Arkansas. After that I may be finished. I have a couple of blocks I still need to write the tutorials for so will see. Then I have a home improvement project to work on that we planned to do last year and didn't get to it. And of course, I will always have the quilting group at church called Blanket of Hope. We make lap size throws.

For this block that I am calling Springtime, I am using scraps and fat quarters. I had a few more large flower prints to choose for, but these flowers just really reached out to me when I saw the small piece of fabric. I think they are in the tiger lily family but they don't have the "spots" on them.

My goal for this block is that you realize you can take a fairly simple, basic pattern, but use just the right fabric prints to make it an awesome block. The block consists of two large squares (6.5") and two "fourzies" or four patch. A quilting group I used to belong to called them fourzies and it has just stuck. The fabric I chose for the fourzies are the same print, just different colors and those two colors are in the large squares.

This block pattern would also be great for making a blanket/quilt for a baby or child. Use printed fabric for the large squares that would be appropriate for a baby or child and then two coordinating prints. The fabric for the large squares could be different for each block.


HOW TO MAKE THE SPRINGTIME QUILT BLOCK

(use 1/4" seam and press toward the darker print)

You will need a focal print and two prints that coordinate with the focal print.

CUT two (2) - 6.5" squares from the focal print

CUT two (2) - 3.5" squares from each of the other two prints


PLACE the squares on a table or design wall according to the pattern.


First SEW the two fourzies together by sewing one of each print together to make a pair,


PRESS on the wrong side and then the right time and then

sew two pairs together to make the fourzie "nesting"  or butting the seam together.


PRESS as before. (it doesn't matter which way you press this seam.)

SQUARE it up and TRIM, if necessary. and

then return to design wall to make sure you SEW the fourzie to the large square the correct way.

 no "nesting" necessary at this point but after your PRESS the seams open pressing toward the large square, you will nest the center seam when you sew these two together. Once again it doesn't matter which way you PRESS the seam.

SQUARE up and TRIM the block to 12.5". 


The finished block - wrong side 


Monday, April 25, 2022

BLOCK 24: TWISTED BOWTIES

April is almost over, even though it does feel like April. It feels more like February to me. Our temperatures are running about 15 degrees F below average for April. For most of the month I have been dealing with sinus problems and am looking so forward to when they are gone. I am so much better than I was the first week so I feel a little guilty complaining, but it will be nice.

The end of April is Wayne's birthday and when I have to have my 30 blocks finished for the 30-Block-Exchange Group. Gosh! That's a lot to celebrate. I think this year I will surprise him with a birthday cake. It's been a long time since we have had birthday cakes. 

Since I have a few more blocks to make and not much time, I have been looking for blocks that are simple but awesome enough that no one would think that. Today's block is one of those. All I had was my pencil drawing and I admit I couldn't picture it until I had it finished. After I had finished it, I quickly chose a name for the block. Twisted Bowties. That what it looks like. Well, maybe not twisted but two bowties crossing each other so that the center if both is the same square. I just liked the word "twisted". So twisted it is.


HOW TO MAKE A TWISTED BOWTIE QUILT  BLOCK

(all seams are 1/4" and seams are pressed to the lighter fabric)

CHOOSE three prints: a light toned, medium toned, and dark toned. (I chose the same print in those three tones)

CUT from light print : one (1) - 6.5" square

                                  four (4) - 3.5" squares

CUT from dark print : six (6) - 3.5" squares

CUT from medium print : six (6) - 3.5" squares


The center of this block is called a "square inside a square" which is easy but interesting to make. The opposite sides have the same color print to create the "outside" square and turns the inside square on "point" and makes it look like a diamond.

How to Make a Square-in-a-Square

Use the 6.5" square for the center square.


Draw a diagonal line on the wrong side of the 3.5" squares.

Start with two of the 3.5" squares from the same color and PLACE them on two opposite corners as pictured. SEW  on the  drawn line just make sure the corners match properly on the two prints. Remove one of the smaller squares when you are sewing the other one on.

TRIM 1/4th from sewn line on each square.


PRESS seam open to the darker print first on the wrong side and

then on the right side.

Do the same thing with the two medium toned 3.5" squares (SEW, TRIM, and PRESS)
The Square-in-a Square block.

PLACE all of the squares in the pattern.


Just start sewing the squares together. The bottom row is just SEWing one block to the next one across the bottom, Pressing, and RETURNing the strip to the design wall ... The middle two rows make up the sides of the Square-in-a-Square.

So complete the outside walls and then 


SEW them to the center section. After I finished the center section,

I checked to make sure it was 6.5" wide and TRIMmed away the excess before SEWing on the top row to complete the block.


SEW the top row, PRESS on the wrong side first and then on the right side (didn't take pictures since it was like with the bottom row) and SQUARE it up. 
TRIM it up to 12.5". (You will be glad you did this when you join this block with another one.)

The finished block 

and the other side.

Here are some pictures to show you why you are so careful as you sew the pieces together...

so that you get the look you want with the block.