I hope you have been enjoying the different blocks I have been making for a 30-Block Exchange Group I am a member of. There are 30 of us in the group and everyone makes thirty (30) 12" finished blocks. Then sends one to everyone in the group and keeps one for herself. Then we can make a Friendship Quilt after the blocks are received. Some members are making the same pattern just using different fabrics. A few of us are trying to make 30 different patterns with different fabrics.
I included myself in the latter group, but after I made this pattern called Peace, I realized it was the same pattern as the block I named Sara's Choice. I never noticed or thought about it when I made the two blocks. You see the pattern for the fabrics is so different, it can easily slip by you.
You might be asking yourself, "If they are the same pattern, why is she writing another tutorial?" Well, I thought it would be nice to show the requirements for the block since they are different and the placement is a little tricky.
I used my scraps again for this Peace block making it look more fitting for Peace. You can think it is "hippy" looking or you can think the different fabrics are symbolic of the different group coming together in Peace. I like the sentiment of the latter.

HOW TO MAKE A PEACE BLOCK PATTERN
(using nine (9) different prints and 1/4" seam)

CUT four (4) - 3.5" squares from B(ackground) fabric
four (4) - 4" squares from B(ackground) fabric
one (1) - 4" square from eight(8) different prints

CUT the 4" squares B(ackground) and eight (8) different prints in half diagonally to make HSTs.

Decide on the placement of the triangles on your design wall according to the prints of your fabrics.

If you need detailed instructions for making HSTs, please check out this here.
Here are some pictures I took as I made the HSTs...


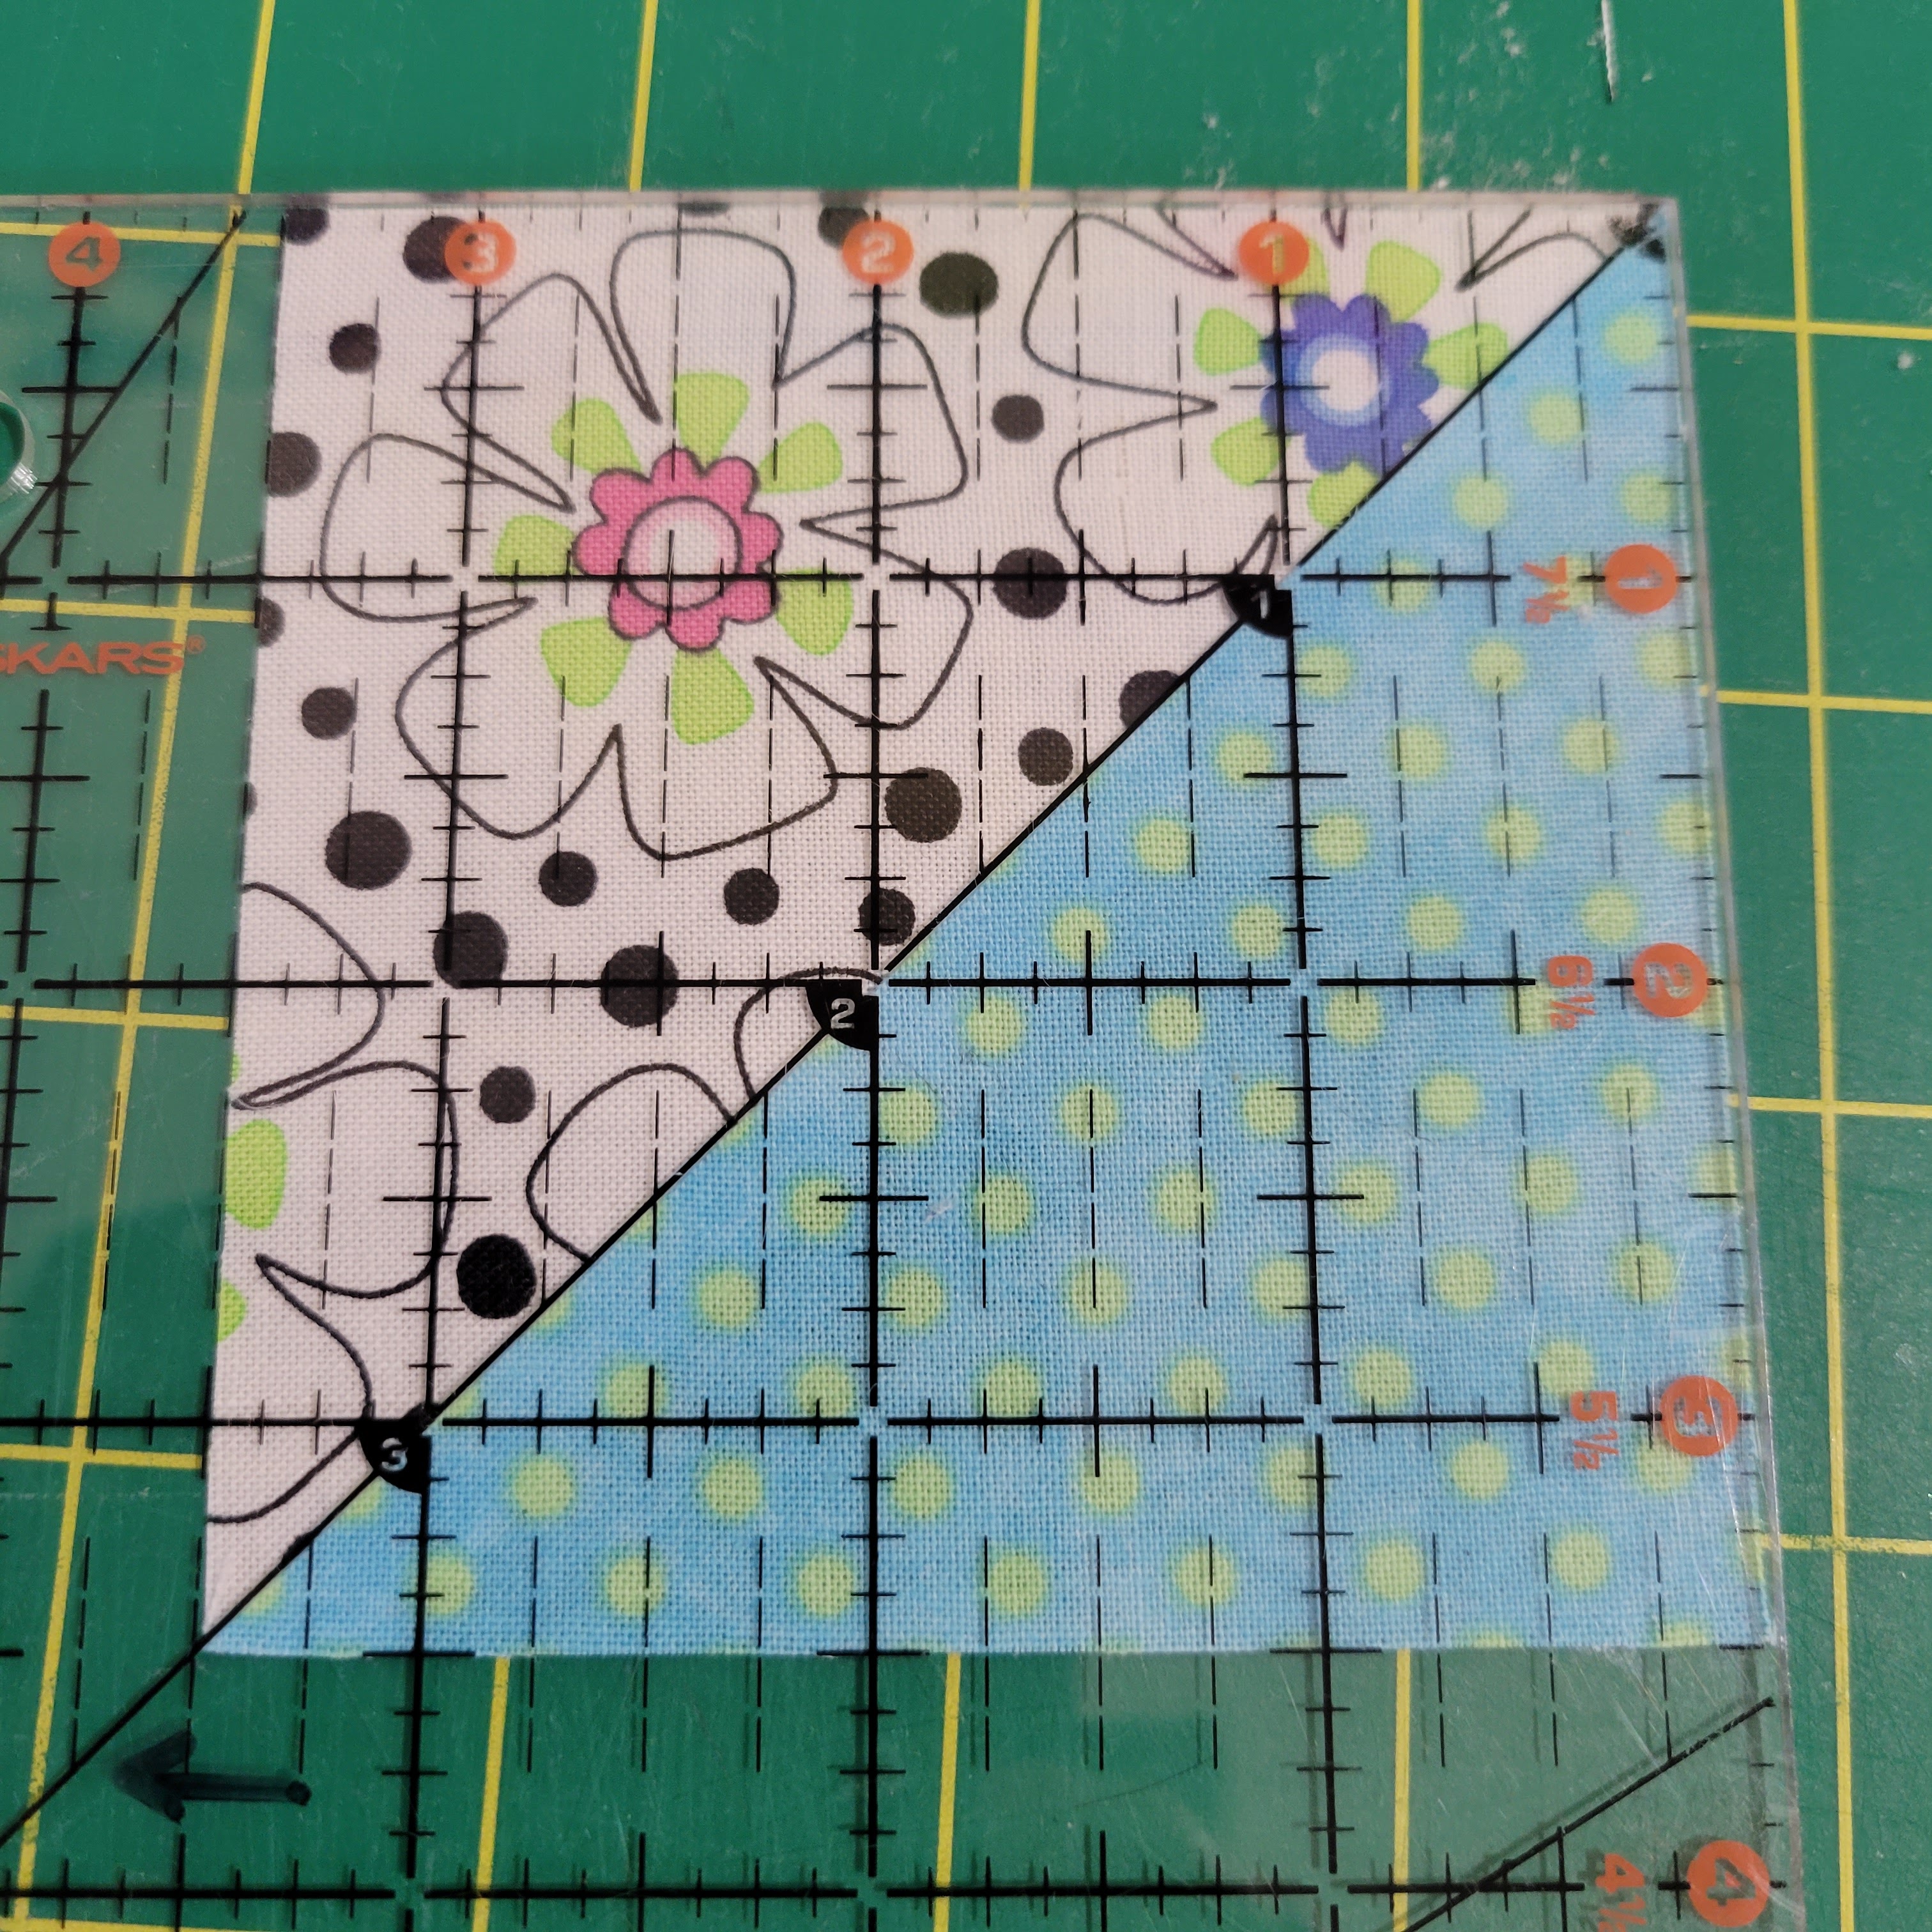
SQUARE UP and TRIM to 3.5" HSTs.

Return to Design Wall in the pattern. (I know this is the same picture from above. I just didn't take a picture at this time.)

It doesn't really matter where you start sewing, but I started on the bottom row sewing the pieces together.

I don't think I had this happen but a couple of times, but people generally press seams toward the darker print. Sometimes when you are working with HSTs to be able to "nest" or butt the seams together, that doesn't work because they are both going the same way. If that happens, just pin the seam the way you want it to go and you can press it that way when you are pressing the strip.


Don't be afraid to use plenty of pins to secure the pressed seams together when you sew the strips together.

Always remember to return the strips to the Design Wall so that if you have made a mistake, you can catch it right away.


SQUARE UP and TRIM to 12.5"

A look at the backside
OTHER BLOCK PATTERNS YOU MIGHT BE INTERESTED IN:
Block #31 Log Cabin Quilt Block
Block #1 Disappearing Nine-Patch Quilt Block
Block # 10 HEATHER'S PENNSYLVANIA
BLOCK #12 SUZETTE'S INDIANA PUZZLE
No comments:
Post a Comment