Friday, November 28, 2014

PARMESAN BAKED PORK CHOPS

Growing up in the south I thought the only way to cook pork chops was to fry them in a skillet with some oil. That's how my mother always did them. It took me a while (a few years) when I had to do the cooking for me to fry them "just right".  You see most of the time, I overcooked them.  I'm not sure if I read it somewhere or if it was just experience, but I finally learned to make perfect fried pork chops. Cook them 7 minutes on a side over medium heat.  That simple.

Now though I rarely fry pork chops.  There are so many more healthy ways to cook (bake) them and today I am sharing one of those ways. 

I only wanted to cook two since it is just my husband and me in the house.  It's easy to do....just cut the recipe in half. I sprayed the foil with cooking spray but the chops still stuck to the foil. I discovered that chicken tenders bake really well if you use a rack that you cool cookies etc on.  Just spray the rack and the chicken doesn't stick to the rack.  I described this technique in my recipe, but didn't have pictures to go along with it since I did just lay the chops on the foil. Absolutely loved the taste.


PARMESAN BAKED PORK CHOPS

4       boneless pork chops
1       tablespoon olive oil
3/4  cup Parmesan cheese 
3/4  cup Italian Bread Crumbs  (I used my homemade garlic bread breadcrumb and added 2 teaspoons Italian seasoning)
1      teaspoon pepper
1      teaspoon garlic powder

Preheat  oven to 350 degrees F.  Line a pan with foil (for easing cleanup). Place a cooling rack in pan and spray with non-stick cooking spray.


Mix the crumbs, cheese, pepper, and garlic powder together in a shallow pan (like a pie plate).


Rub the olive oil into the pork chops to coat.


Dip chops in mixture to coat.


Lay pork chops on rack and spray top of pork chops with cooking spray. (I baked them on the foil but they sorta stuck. I have baked chicken tenders using the rack method and was very happy with the result. I will do that next time I make them.)


Bake for 40 - 45 minutes.
Wednesday, November 26, 2014

PUMPKIN OATMEAL CUPS

Tomorrow is Thanksgiving Day.  Many families will be gathering to celebrate this day set aside for giving thanks. Many families may be celebrating sometime this weekend but just not on Thursday. Those people are truly blessed.

Today I find myself excited because my husband and I will be celebrating the day with my last remaining aunt and her family. Then Friday we will be visiting with my 90 year old uncle and his wife. It will be almost like long ago. We are truly blessed.

I also find myself thinking about and remembering those people who won't be celebrating tomorrow with family because they are serving our country away from home. I pray they stay safe and return home soon to family and a celebration.

Seeing the homeless man recently who was trying to find a family that would adopt him for the day reminds me of those people who also probably have memories of families gathered around a bountiful table but not anymore because they are alone and without a home. Hopefully they will be able to enjoy a special meal at one of the many available charitable locations.

The recipe I am sharing today is a good one for several different situations. I made them and my husband and I are enjoying one each morning for breakfast (storing them in the refrigerator and heating them up in the microwave.). If you have children, they would also be a good, easy breakfast for them.  They hold together so well, they are perfect for grabbing one on your way out the door to enjoy on your way to work or to run errands or maybe to get those good deals on Black Friday. I couldn't help but think how easy they would be for Thanksgiving morning when the "cooks" are busy in the kitchen preparing that bountiful feast everyone is going to enjoy later in the day, and not really wanting to be distracted by having to prepare breakfast.  Anyway, the recipe deserves a second look.  

    
PUMPKIN OATMEAL CUPS

1         15 - oz can pumpkin
1/2     cup skim milk
2        eggs
1         tablespoon baking powder
3        cups oats (I used old fashioned)
1         tablespoon pumpkin pie spice
1/3     cup brown sugar
2 - 3  tablespoons dried cranberries

Preheat oven to 375 degrees F.  Spray muffin tins to make 12 oatmeal cups.


Combine the pumpkin, milk, eggs, and brown sugar in a large bowl with a whisk.

Combine the oats, baking powder, spice, and cranberries.


Add dry mixture to wet mixture and stir til combined with a wooden spoon.


Fill the muffin cups full - it will not rise as it bakes.


Bake for 20 - 30 minutes until they are firm to touch and the edges are just starting to turn brown.


Cool a bit before eating.  May need to loosen edges with a knife to remove.

Tuesday, November 25, 2014

SNAPPY PUMPKIN DESSERT

Friend Fran agreed to host our Farkle group that met yesterday if I would furnish the dessert. She doesn't do much cooking anymore and I offered to make the dessert for her whenever she was the hostess. So far it has worked out well for both of us. 

I wanted to make a pumpkin cheesecake but it wasn't going to be enough for nine. I decided to make this pumpkin dessert since it would be more than enough to serve.  I have had the recipe for a number of years. Remember that 5 - subject spiral notebook I have talked about before that I started to organize recipes I wanted to try. If I make something and don't like it, I can simply remove it from the page. (Right after I started making it Sunday afternoon, Fran sent me a text telling me that one of the ladies wasn't coming afterall. Oh well, I will get that pumpkin cheesecake made eventually.)

You can reduce calories by using sugar-free instant pudding mixes and sugar-free whipped topping.  Since the layer of cream cheese is so thin, a fat-free cream cheese would work.

I also use my whole wheat gingersnaps that I bake and then crumble them and freeze to use for recipes. They are also lower in calories. You can find the recipe HERE.

The result is a light tasting pumpkin dessert that everyone enjoyed. 


SNAPPY PUMPKIN DESSERT

2-1/2 - 3   cups finely crushed gingersnaps (You want to cover the bottom of the baking dish.)
1/2            cup margarine, melted
1               package (8 ounces) cream cheese, softened or at room temperature
1/2           cup powdered sugar
2              tablespoons skim milk

Topping:

3              cups cold skim milk
2              packages (4 servings each) instant vanilla pudding mix (sugar free works)
1               can (15-oz) solid-pack pumpkin
2 - 1/2     teaspoons pumpkin pie spice
2              cups whipped topping
Additional whipped topping, optional

Preheat oven to 325 degrees F.


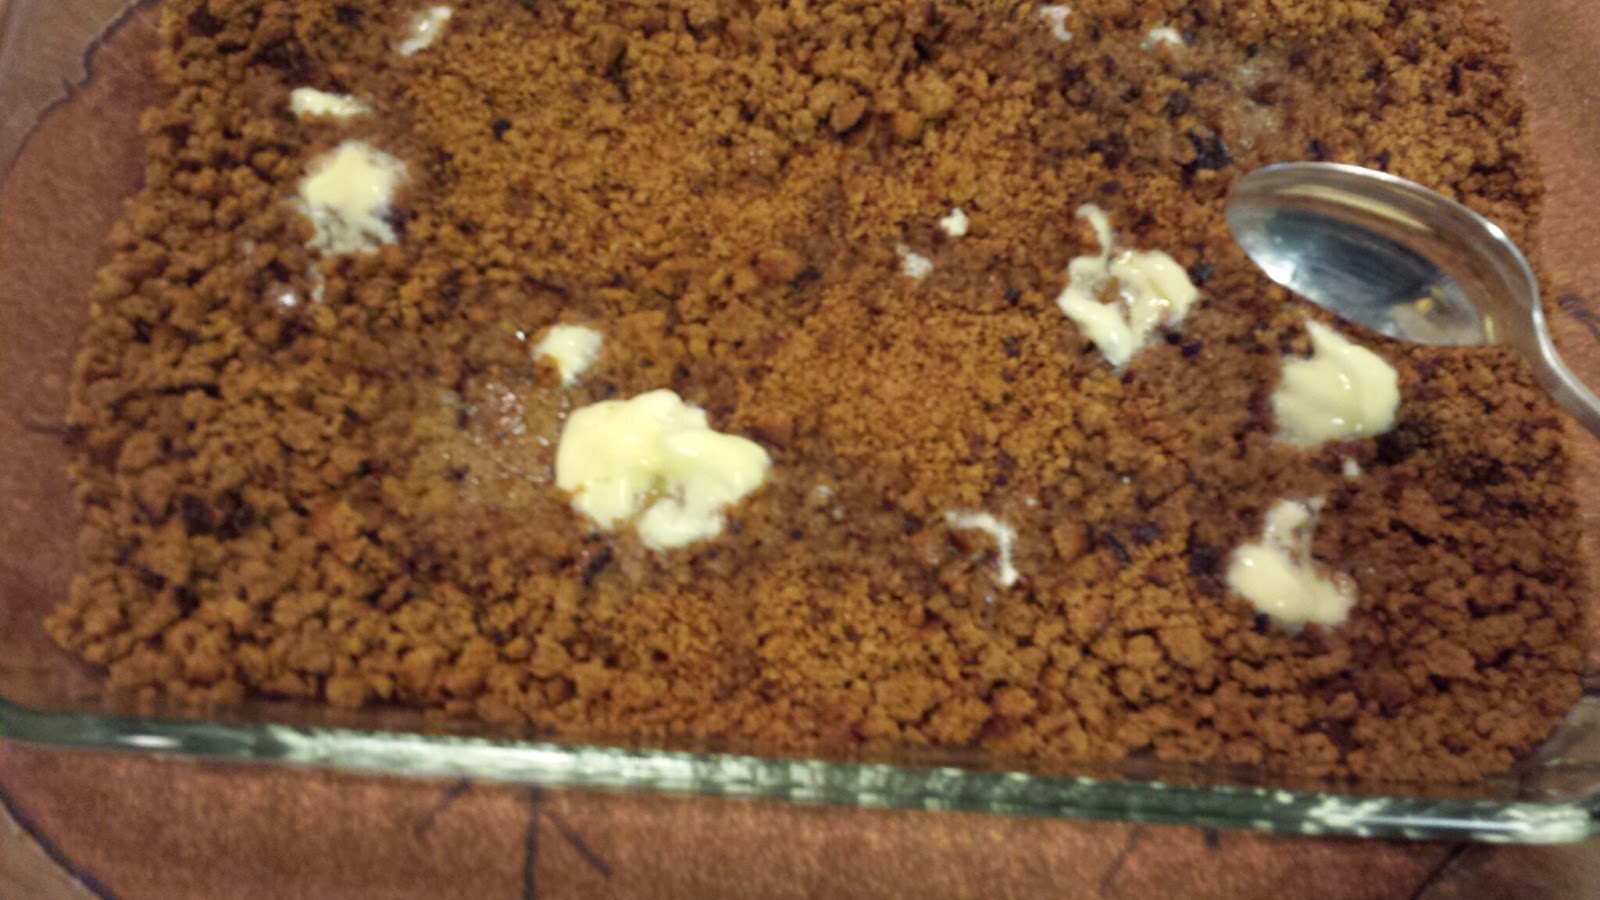
Combine crumbs and margarine in bottom of 9 x 13 - inch baking dish.
Press evenly in the dish.

Bake for 10 minutes and then cool.


In a mixing bowl, beat the cream cheese til completely smooth, and then add the powdered sugar and milk until fluffy. Spread over the crust. (It will be a think layer.)


In another mixing bowl, beat the milk and pudding mixes for 1 minute.


Add the pumpkin and pie spice to the pudding mixture; beat until well blended. Fold in whipped topping.


Pour over the cream cheese layer.

Cover and refrigerate for at least 3 hours. (I made mine the night before.)


Cut into squares...


and serve plain....


or garnish with a dollop of whipped topping sprinkled with additional pumpkin pie spice.

Monday, November 24, 2014

IRON SKILLET APPLE PIE

I can't think of any better way to spend a rainy, Sunday afternoon than baking an apple pie.  (Well, actually spending it with grandchildren would be the best, but....)

Friend Sandy posted a picture of this absolutely delicious iron skillet apple pie on Facebook several weeks ago.  I copied it down and told her I would give it a try.  I can't tell you how many times I have wanted to make it, but didn't have any occasion to do so.  I didn't want to have it in the house to tempt me but it wasn't enough to take anywhere. Well, yesterday afternoon, I decided it was time to make it and not worry about temptation.  My husband loves pie and so he will eat quite a bit of it.

The recipe was a little vague with precise directions (like - size of skillet, etc). I used just the 4 cups of apples as the recipe called for, but do admit, the next time I will use at least 5 cups and maybe even 6. (My skillet was a 10 inch skillet.) Mine didn't look exactly like the picture Sandy posted, but then that's not unusual as far as I am concerned.  I made an upside down peach cake twice and it never looked as good as the picture.  I know you know what I am talking about. The main difference with this one was the thickness of the pie.  If I had used more apples, it would have probably looked more like that picture.....but I was just following the recipe. Well, most of the time.

My husband and I both agreed this was possibly the best apple pie we have ever eaten.  Confession time again.  Because of this blog, I am always searching for new recipes to share. That means many of them I make only one time. (I do only share ones that we like though.  If we don't like it, you never see it here.) This one though I can promise you I will be making often.


IRON SKILLET APPLE PIE


1       stick + 1 tablespoon margarine
1/3   cup brown sugar blend (or 2/3 cup brown sugar)
3/4   cup stevia (or sugar)
1       teaspoon cinnamon
1/2   teaspoon nutmeg
5 - 6 cups apples, peeled & chopped 
1      box refrigerated pie crusts or homemade (I used Walmart's Great Value pie crust and they tasted like homemade)

Preheat oven to 350 degrees F.


In a large iron skillet (I used a 10 - inch iron skillet, but a smaller one will work.) melt the stick of margarine with the brown sugar blend. 
Cook just until the margarine melts. Remove from heat.


Center one of the pie crusts over the melted mixture.


Mix the stevia or sugar with the cinnamon and nutmeg in a small bowl.  Coat prepared apple chunks.


Pour apples over the crust and spread out evenly.


Cover with the second pie crust.


With a sharp knife, cut several slits.


Sprinkle top crust with a scant tablespoon sugar and dot with 1 tablespoon of margarine.

Bake for 30 - 45 minutes or until crust is brown and apples are tender.  I baked mine the full amount of time.

Cool and serve.


Saturday, November 22, 2014

PUMPKIN WHOLE WHEAT PANCAKE

Light as air! That's what these pumpkin whole wheat pancakes taste like. I had some canned pumpkin left over from making the pumpkin bars a few days ago. Since we often have "breakfast" for "dinner", I thought pancakes would be the perfect use of the leftover pumpkin.

I have a confession to make. I have often seen recipes for waffles especially made by separating the eggs and beating the egg whites til stiff and then folding them into the mixture. And every time I pass up the recipe because I don't want to fool with whipping the egg whites. Well, if the recipes turn out as good as these pancakes did, I will never be guilty of that again.

My husband compared them to crepes. That's how light these pancakes are. I can't wait until the next time I don't need to use the whole can of pumpkin. We will be able to enjoy these delightful pumpkin whole wheat pancakes again.


PUMPKIN WHOLE WHEAT PANCAKES


1       cup whole wheat pastry flour
1       tablespoon brown sugar blend (or 2 tablespoons brown sugar)
2      teaspoons baking powder
1       teaspoon pumpkin pie spice
1       cup skim milk
1       cup pumpkin
2      eggs, separated (eggs and yolks)

In a large mixing bowl, combine the flour, brown sugar blend, baking powder, and pumpkin pie spice with a whisk. Set aside.

In a medium bowl, combine the milk, pumpkin, and egg yolks with a whisk til smooth.

Pour the milk mixture into the flour mixture and stir til mixed.

Whip the egg whites til stiff.

Fold the egg white into the batter mixture.

In a heated skillet over medium heat with a little oil, pour batter into desired size. (I like my pancakes small and my husband likes big ones.) Cook until bubbles start to form on the pancake or edges turn brown.
Flip and cook a minute or two longer - til pancake is brown. 

Friday, November 21, 2014

A SURPRISE SCARF

I was doing much better by this time last year.  That's because I started scarves for grandchildren in the summer.  I realized the other night that I hadn't done anything for this year.

That's where the surprise comes in.  

I was checking out a couple of locations where I have yarn stashed. I know....that's not very organized.  I could use a "sewing room" about twice as big as my current one.  But I don't think that's gonna happen anytime soon if ever.


Where was I? Oh, yeah! I was looking in one choice spot behind my chair in the living room and there in my yarn basket was this finished/unfinished scarf I had made last year. I would say I almost don't remember making it, but that doesn't sound very good at my age. It looked finished, but after I looked at the directions still in the basket, I saw that it had called for fringe. I guess that's why it was still in the basket, but I don't think it needs fringe. 

The pattern for this scarf has no name. It is just one of those free ones you find with yarn. It is easy to do. Since I didn't take pictures when I made the scarf, I did a sample using a yarn that will show the stitches a little better.

PATTERN FOR SCARF

Use needle size US 8/5mm or whatever size you wish to use for desired size.

Cast on 22 stitches. (Make sure you cast on an even number of stitches if you wish to make it a different width.)

Rows 1 - 6 = Purl

Row 7 = P1. *yo, P2 tog*, repeat from * to * across until there is one stitch on the left needle, P1.

Rows 8 - 12 = Purl.

Row 13 = Repeat row 7.

Rows 14 - 18 = Purl.

Repeat these rows (7 - 18) until almost desired length.

Purl 6 rows.

Bind off.

Here are a few pictures that might help you if you are a beginner:


Cast on 22 stitches:


Purl the first six rows:


Purl means the right needle goes in front of the left needle not behind as with knit.


Purl 1, *yarn over, purl 2 together* repeat from * to * across, purl 1


After purling the first stitch, 


wrap the yarn around the right needle bringing it back in the position with purling.


to purl two stitches together, insert right needle in the next two stitches in front of the left needle and continue as if they were one stitch.


Continue across the row until one stitch is on the left needle. Purl this last stitch. (Purling the two stitches together creates the space you see in the pattern.) 


Purl rows 8 - 12 


When you are purling row 8, the yarn over from row 7 will look like this when you are purling...purl as normal.


This is what it will look after the first row in the series is purled.


Here is another picture of my finished scarf. It measures 5-1/2 x 71 - inches. I used Red Heart worsted (4) Black Fleck.


This is my current project I am working on.  It will be a scarf for someone. It is soooooo soft.
I cast on 16 stitches. The really great thing working with this fancy yarn, is you can just knit every row until you have the desired length.