Wednesday, March 29, 2023

WHITE CHOCOLATE SNICKERDOODLE PUDDING COOKIES

 Here is another one of the very popular Cafe Treats from this past Sunday. Several people came up and said they had heard about these cookies and wanted one of them. Because of their popularity I didn't get to eat a whole cookies. A piece of one broke off when I picked it up to arrange it on the platter and I grabbed it and ate it. Even with just a little bite, I knew why people were coming to find one of them.

Friend Cindy said her daughter had made them and recommended the recipe. This was the first time she had made them, but I doubt it will be the last.

I am so excited that our Cafe Treats are so appreciated by the membership and so successful. I am loving all of the different recipes and then being able to share them. I hope you are enjoying seeing all of the recipes.

PRINT RECIPE.


WHITE CHOCOLATE SNICKERDOODLE PUDDING COOKIES

1       cup (2 sticks butter, chilled)

3/4    cup brown sugar

3/4    cup granulated sugar

1       teaspoon cinnamon

1       (3.4 ounce) package white chocolate instant pudding mix

2       large eggs

1       teaspoon vanilla

2-1/2 cups flour

1       teaspoon baking soda

1       tablespoon hot water

1/2    teaspoon salt

2       cups white chocolate chips

1/3    cup cinnamon-sugar for rolling (1/3 cup sugar + 1 teaspoon cinnamon)

Preheat the oven to 350 degrees F.

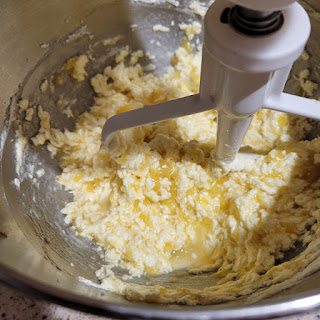
Beat the butter until smooth. The cookies will spread less if the butter is not at room temperature. Allow cold butter to set for 30 minutes before beating.

Add the brown sugar and sugar. Beat for 1 to 2 more minutes, until nearly creamy.

Add the eggs, one at a time and mixing in between additions.

Dissolve the baking soda in the tablespoon of water. Add both the baking soda mixture and the vanilla to the bowl and mix well. Mix in the salt and cinnamon.

Add the flour and pudding mix, and mix until dough forms.

Mix in the white chocolate chips using a wooden spoon or spatula.

Scoop dough by heaping tablespoons and roll in the cinnamon sugar before placing them onto a parchment lined or silicon lined baking sheet, 2 inches apart.

Bake for 10 to 12 minutes until edges are golden brown. Let cool on the baking sheet for a few minutes before removing to a wire rack to cool completely.

Store in an airtight container once completely cooled. Makes about 48 cookies.

Monday, March 27, 2023

APPLE - OATMEAL COOKIES

 Being gone for a week to go back to Ventura, CA to visit with friends was such a nice break. Getting settled back into being home has not all been nice. 

Our plane landed in a downpour (didn't it rain enough in CA while we were gone?) but our younger son, Patrick, came to pick us up. It was so good seeing him. He wasn't a happy camper though because of people not following the rules for picking up passengers.

At our old terminals people were used to driving up and parking until their family or friends came out with their luggage. It was nice, but now with our new airport terminal we have an upper departure level and lower arrival level and as in most every other airport terminal in the country a minimum parking at both areas. Some people who didn't think we needed a new terminal anyway, insist on the old methods. Well, Patrick was just complaining so about the new airport and how much he already hated it and we didn't need a new one anyway as he tried to pick us up in all of the traffic. Admittedly there is more traffic because the terminal is smaller across than the old ones where the different airlines were so spread out, but everyone just needs to follow the rules and be patient.

Anyway, Wayne, my husband, had already realized that he left his prescription glasses in the rental car after we got on the plane in Long Beach. After we got home, he realized he didn't have his cell phone and had left it on the plane.

Are you getting an idea about what I meant at the beginning about getting back hasn't been completely nice? 

BUT getting back for church yesterday was another nice thing about getting back. I do feel like church is one of my families and so seeing everyone at church, setting up for the Cafe Treats, helping with hospitality, and hearing an awesome message from our District Superintendent, helped my disposition greatly. I am enjoying my role with the Cafe Treats so much and the three friends who brought the treats yesterday outdid themselves. So many people are overjoyed having the treats being offered. 

The three treats were so pretty and delicious and I get to share one of them with you today. It was so hard to decide which one to share first, but I will share another one on Wednesday.

Friend Sharon brought these delicious Apple-Oatmeal Cookies. They were so moist, one person said. The chopped apples and the raisins looked inviting.

PRINT RECIPE.


APPLE - OATMEAL COOKIES

1-1/2   cups quick-cooking rolled oats

3/4      cup all-purpose flour

3/4      cup whole-wheat flour

1/2      cup brown sugar, firmly packed

1         teaspoon baking powder

1/4      teaspoon baking soda

1/2      teaspoon salt

1-1/2   teaspoon cinnamon

1/2      cup raisins

1         cup finely chopped, peeled apple (such as Granny Smith)

1         egg, slightly beaten

1/2      cup honey

1/2      cup oil

1/3      cup milk

Preheat the oven to 375 degrees F.

In a medium bowl, combine the oats, all-purpose flour, whole-wheat flour, brown sugar, baking powder, baking soda, salt, and cinnamon. Stir to combine.

Stir in the raisins and apples.

In a large bowl, combine the egg, honey, oil, and milk. Stir in the dry ingredients. Mix to form a smooth batter.

Drop batter onto ungreased baking sheets, using a rounded teaspoon of dough for each cookie, leaving 2 inches between. Drip fingers into water and press dough down to about 1-1/2 inch diameter.

Bake for 10 to 12 minutes, or until lightly golden.

Remove from oven and transfer the cookies to a cooling rack.

Makes 3 dozen cookies.

I hope you will check back on Wednesday for one of the other fabulous Cafe Treats from yesterday.

Hopefully Wayne's new cell phone will arrive this afternoon and it won't be too difficult setting it up. I'll update you in Wednesday's post.

Friday, March 24, 2023

BANANA NUT OATMEAL APPLE COOKIES

 Our vacation back in Ventura, CA is almost over and I'm sure you would not expect me to be in the kitchen baking something, but I couldn't help it. What is even crazier is I made up the recipe. I would never have guessed my brain would be so focused after I retired, but "it is what it is" as my friend Janice's husband Leon likes to say. 

When we arrived in Oxnard where we have been staying, after checking in, we headed to the store to get some bottled water and a few other items. We ended up at Big Lots and found $40 worth of things to buy that we felt we needed or would use while we were here for a week. 

One thing I saw, I didn't buy because I didn't know if we had a muffin tin furnished in the condo. I thought I would check first even though the package only cost 79 cents before buying it. Well, we weren't furnished a muffin tin or even a cookie sheet, but we had an aluminum round pan that Wayne got for his leftovers from lunch on Saturday that I could use. 

What I didn't buy was a 6.4 ounce package of  a Blueberry muffin mix that only required 1/2 cup of milk or water and  made 6 muffins. Well, the round pan wasn't going to make muffins, but with my crazy brain working, I decided I would try making cookies from the mix instead of muffins. I wouldn't be able to make many at a time, but that would be okay. I was more concerned that I didn't have anything to spray in the pan to keep them from sticking. I just solved that problem by washing the pan each time.

Later when we went by a Big Lots, I told Wayne I needed to stop because I wanted to get something.  At first I didn't think they had any because I couldn't find them...the store wasn't organized the best with their groceries. They did have them though. In fact they had the Blueberry ones and Banana Nut package. I decided to get the Banana Nut package instead and only had the one item to pay for.

Before I actually got to try it out, I decided I would add one package of the instant oatmeal I had bought and had been enjoying for breakfast each morning. I had found a box of Bob's Red Mill whole grain oats - gluten free Instant Oatmeal with apple pieces & cinnamon. I had forgotten how much groceries that Big Lots sold. I don't usually buy instant oatmeal, but was sold by the packaging and I have been really enjoying it.

I had to guess about the baking time and oven temperature, but after three "shifts", it seemed like 375 degrees worked out okay and about 13 minutes. I will be taking some of the instant oatmeal back home with us so will buy some more muffin mix and try them again at home. If I decide to change anything I will just come back and edit the recipe. I think the only change I will make will be baking the cookies on parchment paper or lightly spraying the cookie sheet.


BANANA NUT OATMEAL APPLE COOKIES

1     6.4 ounce package Banana Nut muffin mix that just needs water or milk added

1     1.23 ounce package instant oatmeal (I used Bob's Red Mill Instant Oatmeal with apple pieces & cinnamon)

1/2   cup milk

Preheat oven to 375 degrees F. Spray lightly a cookie sheet or use parchment paper.


Empty contents of the instant oatmeal in a small bowl and add the milk.

Stir and allow to set for 10 minutes to soften the oats and apple pieces.


Empty contents of the muffin mix in a small mixing bowl and add the oats and milk mixture.

Stir to mix up well.


Scoop our a heaping teaspoon and

place at least 2 inches apart on sheet.


Bake for 13 minutes or until lightly golden brown.

Cool a couple of minutes before removing the cookie to finish cooling. (You can see how mine "stuck" to the pan,

so I had to wash it before I could bake another four.

Made 13 cookies.

The thirteenth cookie was a little bigger so I cooked it 15 minutes.


These were so delicious and made just the right amount for us since we will be leaving in two days.

This post is my sharing with you a good example of "where there's a will, there's a way" idiom you may have heard from and also showing you how you can create your own recipe, if you are just willing to let your creative juices flow.

Wednesday, March 22, 2023

MOLASSES CRINKLES

 It has been a little rainy in southern California, but they need it so I try not to complain. Everything is so green which is the way it always is after it just rains one time so you can imagine the hills are really green with all of the rain they have been getting.

It felt strange not serving treats Sunday for the Cafe Treats at church, but Friend Liane filled in for me nicely. She displayed everything so attractively.

I wanted to share with you today Friend Nancy's mother's recipe for Molasses Crinkles. They look so pretty in the display. I'm sure they were delicious. I've made enough recipes to be able to just about look at a recipe and know if it is going to be a good one. This looks like a good one.

PRINT RECIPE.


MOLASSES CRINKLES

3/4       cup butter

1          cup packed brown sugar

1          egg

1/4       cup molasses

2-1/4   cup flour

2         teaspoon baking soda

1/4      teaspoon salt

1/2      teaspoon cloves

1         teaspoon cinnamon

1         teaspoon ginger

Preheat the oven to 350 degrees F. Grease baking sheets and set aside.

Mix together the shortening, brown sugar, egg, and molasses.

Sift together the remaining ingredients.

Add the dry ingredients to the creamed mixture and stir to combine.

Chill dough an hour.

Roll into balls the size of large walnuts. 

Dip tops in sugar. 

Place sugared-side-up 3" apart on the baking sheets. Sprinkle each cookie with 2 or 3 drops of water to produce a crackled surface.

Bake for 10 minutes. Bake just until set but not hard.

Makes about 4 dozen cookies.

The display...can you find the Molasses Crinkles?


Molasses Crinkles - Neiman Marcus Chocolate Chip

Sugar Cookies

Blonde Brownies with white chocolate chip or butterscotch chips

You can check back over the next week for the other two recipes.

Monday, March 20, 2023

OATMEAL RAISIN COOKIES

 While we are away from home and enjoying catching up with friends from when we lived in Ventura, CA for 21 years, I decided it was a good time to get caught up with some of the recipes for the Cafe Treats shared.

These Oatmeal Raisin Cookies were made and brought by my good friend Jean. They were so good. She told me that she had picked up the container of steel cut oats instead of the quick oats, but I told her I liked the steel cut oats in the cookies. It gave them a nutty taste without the nuts which was great since the Cafe is a "Nut-Free Zone" so no one has to worry about their allergy, if they have one to nuts.

PRINT RECIPE.


OATMEAL RAISIN COOKIES

1       cup (2 sticks) butter at room temperature

1       cup white sugar

1       cup packed light brown sugar

2       eggs

1       teaspoon vanilla

2       cups all-purpose flour

1       teaspoon baking soda

1/2    teaspoon baking powder

1/2    teaspoon salt

1/2    teaspoon freshly grated nutmeg (optional)

2-1/2 cups quick cooking oats (steel cut works great)

1-1/2 cups raisins

Preheat the oven to 375 degrees F. Lightly grease baking sheets. Set aside.

In a large mixing bowl, cream the butter with the sugars until light and fluffy.

Add the eggs, one at a time, beating well after each addition.

Add the vanilla. Set aside.

In another bowl, mix the flour, baking soda, baking powder, salt, and nutmeg, if using. 

Blend the flour mixture into the creamed mixture.

Stir in the oats and raisins.

Drop by heaping spoonfuls 2 inches apart on the prepared baking sheets. 

Bake 10 to 12 minutes, or until golden brown.

This recipe makes at least 4 dozen cookies depending on the size you make. 


The top tray - Chocolate Butter Cookies (still need to post recipe)

The middle tray - Oatmeal Raisin Cookies

The bottom tray Cherry Chocolate Chip Cookies


Thursday, March 16, 2023

NO BAKE CHERRY CHOCOLATE CHIP PIE

 Tuesday was PI Day - 3.14. I was able to enjoy a piece of Cherry Pie at Golden Corral, but then went home and made this delicious No Bake Cherry Chocolate Chip Pie to take to Friend Fran's house yesterday for dessert with the canasta group. It required you to refrigerate the pie for at least four hours so I made it the day before. I always like to do that to make sure the pie sets up.

I think the pie is one of the prettiest one I have ever made.


As I usually do, I reduced the sugar and or calories as much as I could or wanted to by using a No-Sugar-Added Cherry Pie Filling, 1/3 Less Fat Neufchatel Cheese, and Zero Sugar whipped topping. I bought Truvia powdered sugar recently but didn't use it for this recipe. Everyone at canasta really enjoyed it.

It was so easy to make also, which is always important to me.

PRINT recipe.

NO BAKE CHERRY CHOCOLATE CHIP PIE

1     ready made chocolate pie crust

1     (8-ounce) package softened cream cheese (I used 1/3 less fat Neufchatel cheese at room temperature.)

1      (20-ounce) can cherry pie filling (I  used a No-Sugar-Add can)

1       cup powdered sugar

1       cup thawed whipped topping (I used Zero-Sugar whipped topping)

1-1/4 cup mini-chocolate chips, divided


Beat the cream cheese and powdered sugar until smooth. Scrape the sides of the bowl as necessary.


Fold in the cherry pie filling until completely blended.


Fold in the cup of whipped topping completely.


Add 1 cup of the mini-chocolate chips


Spread into the pie crust.


Sprinkle the remaining 1/4 cup of chocolate chips on top.


Refrigerate four hours before serving. (I made mine the day  before.)


Refrigerate any leftover.

Monday, March 13, 2023

BANANA OATMEAL COOKIE

 I have come up with several ways to remember how to keep up with a recipe I make and really liked until I have time to share it, but I haven't made any of them a habit. That means I repeatedly spend too much time trying to find where I put the recipe or which cookbook I found it in. 

FYI You have to do something 30 times before it becomes a habit. You are welcome.

But back to this recipe. I spent more time than I like to waste trying to find the recipe for these delicious, healthy banana oatmeal cookies. I had vague memories of making them and having to put something heavy to hold the pages down so that meant I found it in a bound cookbook and placing an envelop to mark the page, but I didn't remember that until I had searched at least 30 minutes through my phone saves and searching through loose papers. That actually wasn't too long, I have spent a day or two searching. 

I found it when I decided to give up.  I got up and noticed a bound cookbook on a table by my glider. The light bulb came on; I saw two marked pages with envelops and there it was. What a relief!

The cookbook was a favorite's one I bought at an estate sale (where else do you buy a great cookbook?) called Carla Lawhon Heartland Baking from the Jerre Anne Cafeteria. I just love cookbooks from businesses. Most of the ones I find at estate sales no longer exist which is sad, but the recipes are always so good. The Jerre Anne Cafeteria opened in St. Joseph, MO in 1930 and closed in 2008. Wow.

I can't say "cafeteria" without recalling memories of eating at Morrison's Cafeteria with my parents in Greenville, MS when I was growing up. We lived in the extreme southeast corner of AR in the Delta in a small rural town. If we went shopping, we drove either to Greenville, MS or Monroe, LA. We always ate at the cafeteria when we went shopping or to the doctor's in Greenville.

I chose to make these Banana Oatmeal Cookies for the church's Cafe Treats because I had bananas I needed to use and because the sugar was such that I could use stevia for it. I like having something for diabetic people at church on Sundays, but that isn't always the case. I also used 2/3 cup butter because I didn't have any margarine. I did omit the raisins, also. These cookies turned out delicious and gratefully appreciated.

As always with my recipes that I make with no added sugar or less sugar, you can make them with sugar if you like. Afterall, that's the way the recipe started out.

PRINT RECIPE.


BANANA OATMEAL COOKIES

1/3      cup butter, softened

1/3      cup margarine, softened (I just used 2/3 cup of butter)

1         cup sugar

1         egg

1         cup mashed bananas (about 4 small ripe bananas)

1-1/2   cups sifted flour

1/2      teaspoon baking soda

1         teaspoon salt

3/4      teaspoon ground cinnamon

1-3/4   cups rolled oats

1/2      cups raisins (optional)

Preheat the oven to 375 degrees F.


In a large mixing bowl, cream together the butter, margarine, and sugar.


Add the egg and

then the bananas, mixing well after each addition.


Sift together the flour, baking soda, salt, and cinnamon.

(Sift 1 1/2 cups of flour and

then measure 1-1/2 cups to use for the recipe.

Return the leftover flour in the flour jar.
)

Mix in the oats and

add the dry ingredients to the creamed mixture. Fold in the raisins, if you are using them.


Using a small scoop or a heaped teaspoon, drop the dough about 2 inches apart onto ungreased cookie sheets.

Bake for 8 to 10 minutes or until the cookies are golden. Allow the cookies to cool for a few minutes, then remove them to a rack to cool completely.

Saturday, March 11, 2023

PATTERN with a FOCAL PRINT

 You know when you have one print that you want to focus on in a quilt pattern? Well, this pattern is a good one for a focal print and it goes together fairly easily. You just have a square and a HST (half square triangle). The pattern develops by the placement of the HST.

Now don't let HSTs scare you. Just stay with me and I will show you an easy way to make them. Here is a picture of two of the squares and two of the HSTs in their placement. Pretty, right? You just keep reproducing them and add a narrow "ribbon" border from another color (I'm going to use gold) and a bigger border using the focal print. 


My center portion will be 36 x 36 inches. The borders will increase the finished size to 44 x 48 inches.

The center design contains 36 blocks - half (18) of those will be cut 6.5" squares from the focal print and then half (18) HSTs. The HSTs will be made from nine (9) squares cut 7 inches from each of the two solid colors.


Don't count the squares...I changed my mind after I cut them.

Since the squares are done, you only have to make the HSTs and then you are ready to sew them together in your pattern.

I cut the solid colors 7 inches instead of 6.5 inches like the squares. This is a 1/8" bigger than really needed but I will trim off any excess after I make the HSTs. (I also do this because it is much easier to add 1 inch to the finished size than adding 7/8ths to the finished size and then measure it.) You know your finished size will be 6 inches because you cut the squares 6.5 inches and a 1/4" seam all the way around reduces the square to 6 inches  when finished. Since you will be making two (2) HSTs from one (1) square you only need half as many larger squares cut , thus nine (9). I guess I should say from two(2) squares because you will be sewing two (2) squares together - one of each color, but that is a total of nine (9) of each color to make eighteen (18) HSTs.

Making a HST...


4) Line up two of the squares one of each color to fit perfectly over each other as shown in 1). Then draw a diagonal line from two opposite corners. 3) Yes I used a pencil to draw my line on the light colored square. 2) You will be cutting on the line. 9)


5) I set the machine for 1/4" seam measurement and lengthened the stitch to 2.2. First stitch 1/4 " from the drawn line from corner to corner. 6) Then rotate the square around and stitch 1/4" from the drawn line on the side of the line. 8) May be hard to see. Then using the ruler as you guide, cut on the drawn line 9) making two triangles and press the seam open pressing away from the right side 10).

Once you have all of the HSTs made, you can trim off the excess making the HSTs 6.5 inches square.

Having a 6.5" square template helps to do this. You can use a larger square. It just means you will have to move the template as you work around the HST. Line the diagonal seam with the 45 degree line on the template 11) and trim off the excess. 12)


Here are the squares and HSTs on my design wall...


 Even though I showed you the pattern at the beginning of this post as a 12.5" block, that isn't how I sewed it. I wanted you to see what the pattern looks like with four (4) of the thirty-six (36) blocks.

Instead it is faster to make six (6) rows and then sew them together.


To make the rows, start with the first block on the left side and sew it to the second block (HST). Continue across with the other four blocks.

After I had each row made, I pressed the seams toward the focal print. 


You can sew two rows together as you finish the second one or wait until you have all six rows made; it doesn't matter.

Remember when sewing two rows together to "nest" the seams together and secure the left side with a pin. If you pressed correctly, this will be easier to do.
Ease the space between the seams together and secure them with several pins. 

All six rows sewed together...

I pressed the seams for the rows toward the top. It doesn't really matter.

To complete my quilt top, I cut  four (4) strips 1.5 inches wide across the WOF (width of the fabric). 


I am measuring the strip with the "yellow" ruler. The "black" ruler is placed next to it before removing the yellow one to cut the strip. That way I will be cutting on the right side of the ruler.


I sew the side strips/borders first and then add the top and bottom strips/borders last. When I have a narrow "ribbon-like" border, I press the seams toward the strip. When I do the machine quilting, I will stitch close to the inside of the seams so that it looks like a ribbon sewed on top of the quilt.

Trim off the excess...

The first border is added...

Then I cut the outer border. Because my quilt top right now is square, but I want my finished quilt to be a rectangle, I will sew a narrower border (Cut 2.5" x wof) on the sides and a wider border (Cut 5" x wof) on the top and bottom.
Once again I will sew the side borders first, trim the excess on the ends and then sew the top and bottom borders and trimming off the excess. Before sewing the top and bottom borders, I pressed the side borders toward the ribbon border. After sewing the top and bottom borders, I pressed again toward the ribbon borders.


It is ready to take to Blankets of Hope Tuesday when we meet and be pinned with backing and batting for me to machine quilt.

This was really a fun quilt top to make. I hope you will give it a try.