Tuesday, November 28, 2023

WHITE CHOCOLATE PEPPERMINT PRETZEL RICE KRISPIE TREATS


When I encouraged the Cafe Treats Bakers that they could bring Christmas treats, Baker Charlotte came up with this recipe for White Chocolate Peppermint Pretzel Rice Krispie Treats. The title just about says it all as just about every ingredient is in the title. 

One patron after enjoying one piece, commented that the combination of sweet and salt was delicious! And she was so right. I wonder how many different things you could add to a traditional Rice Krispie Treat recipe to get a different flavor? I bet the list is endless.

I think Charlotte plans to make these again for next Sunday. I'm sure they will be a popular selection again. 


PRINT RECIPE

WHITE CHOCOLATE PEPPERMINT PRETZEL RICE KRISPIE TREATS

6    tablespoons unsalted butter

1    16 oz bag mini marshmallows + 2 cups more mini marshmallows

1/4  teaspoon peppermint extract

1/2  teaspoon sea salt, plus more for sprinkling

8     cups crispy rice cereal

2     cups chopped pretzels

3/4  cup white chocolate chips

1/3  cup crushed peppermint candy

TOPPING

1/2   cup white chocolate chips

1/4   teaspoon oil

1/4   cup chopped pretzels

1/4   cup crushed peppermint candy

Flaky sea salt, for sprinkling on top


Grease a 9 x 13 - inch baking pan with non-stick cooking spray.


In a large pot, melt the butter over medium high heat. Add the 16 oz bag of mini-marshmallows and stir until the marshmallows are completely melted.


Remove the pan from the heat and stir in the peppermint extract and the sea salt.


Add the cereal and pretzels; gently stir until well coated with the marshmallows.


Stir in the remaining 2 cups of marshmallows, white chocolate chips, and crushed peppermint candy.


Spoon the mixture into the pan and press down and flatten using wax paper. Set aside.

Prepare the topping by pouring the white chocolate chips and oil in a small bowl. Heat in the microwave in 30 second intervals, stirring in between, until melted and smooth.

Drizzle the white chocolate over the top. Then top with chopped pretzels, crushed candy, and seat salt.

Allow the treats to sit until chocolate is hard, about 1 hour. Cut into squares to serve.


Cover the pan with plastic wrap or put the treats in an airtight container and store on the counter for up to 3 days.

Monday, November 27, 2023

ORANGE CRANBERRY MELTAWAY COOKIES

 The weather forecaster got it right Saturday when they said we were going to get some measurable snow. It even started when they forecasted it to start between 2 and 3 o'clock. We went to Cracker Barrel for a later lunch and didn't realize it was snowing outside when we left a little before 3. The interesting thing was Friday on Facebook one of the memories was from 5 years ago and we had had a measurable snowfall of probably 3 inches at least. We didn't get 3 inches this time, but the roads were covered and messy in places. 

Church attendance was down because so many didn't want to risk the roads and streets but the Cafe was a busy place with less than a normal assortment of treats. It is such a fun place to be on Sunday morning.

I made these Orange Cranberry Meltaway Cookies because I love anything orange and cranberry and they sorta looked like Christmas. Now that Thanksgiving has come and gone, the Cafe Treats Bakers can make some festive Christmas cookies. I can hardly wait.

I decided to chop the dried cranberries because they were such large cranberries and I want to make sure there were ample cranberries in each cookie and I'm so glad I did. I always use dried orange peel so since the recipe called for 1 tablespoon of orange zest, I thought 1/2 tablespoon of the dried would be enough. I also drizzled the glaze over a cookie after mixing in 2 tablespoons of orange juice and took a picture. As you can see below, the glaze is a nice solid glaze on it. Then I added another tablespoon of orange juice and the glaze was thinner. I just did have enough to cover the almost 3-1/2 dozen of cookies. So if you only use 2 tablespoons of orange juice, you will probably have to mix up a little extra.

I was not disappointed in the cookies and they were well received in the Cafe. 


PRINT RECIPE.

ORANGE CRANBERRY MELTAWAY COOKIES

1      cup diced dried cranberries

1      cup butter, at room temperature (2 sticks)

1      cup granulated sugar

1      tablespoon orange zest (I used 1/2 tablespoon dried orange peel)

1      egg

1       teaspoon vanilla extract

3/4    teaspoon baking soda

2-1/2 cups flour

Glaze

1-1/4 cups powdered sugar, sifted

2-3    tablespoons orange juice


Preheat the oven to 375 degrees F. Line cookies sheets with parchment paper. Set aside.


Dice the dried cranberries and cover with warm water in a medium sized bowl for 5 to 10 minutes. Set aside.


In a larger mixing bowl, beat the butter and sugar on medium speed for 2 minutes.

Scrape the sides of the bowl as needed.

Add in the zest, egg, vanilla, and baking soda.

Mix for 1 minute until combined, scraping the sides of the bowl as needed.


Turn the mixer to low (stir) and slowly add the flour. (I did about three or four portions.)


Drain the cranberries and

pat dry on a double thickness of paper towels.

Add to the mixture and stir until the cranberries are

well mixed up.


Using a tablespoon cookies scoop, scoop the dough on the cookies sheets about 2 inches apart.


Bake for 8 to 10 minutes, until the edges are slightly golden. Cookies will be puffy.


Allow the cookies to cool on the baking sheet for 5 minutes before removing to finish cooling on a wire rack. The cookies will be flattened.


Whisk together the powdered sugar with the orange juice to make a glaze suitable for covering the cookie.

(I sifted my powdered sugar so I just used a teaspoon to mix up.)

Two tablespoons make a thicker glaze (the cookie on the left) and three tablespoons make a thinner glaze (the cookie on the right) .

Drizzle 1 teaspoon of glaze over each cookie.


(Place a sheet of wax paper under the wire rack to catch the glaze as it covers the cookies.)


Store in a closed container when they are completely cool with wax paper between the layers.

The views from my windows yesterday morning...


The weather forecaster said we got 2.2 inches of snow. The sun did come out and the temperatures rose to 37 so the roads were clear by evening.


Friday, November 24, 2023

PUMPKIN SPICE PANCAKES

 With Thanksgiving over, you might have some leftover pumpkin that you want to use. I love these pancakes so much, I opened a new can just to make them. Since it only uses 1/2 cup of pumpkin, that means I can make them several more times over the next seven days.

I love pumpkin pancakes and have been disappointed at every restaurant this fall that I have ordered them. One restaurant the pancake was so bad, I had to ask them to bring me something else to eat. I just decided I would have to make my own ones if I wanted some delicious pumpkin pancakes. The recipe makes enough pancakes that we can save the batter in the refrigerator and then make some more the next morning. We prefer that method instead of making them all at one time and then just heating them up the next morning.


PRINT RECIPE.

PUMPKIN SPICE PANCAKES

2     cups buttermilk biscuit and pancake

1     egg

1     cup milk

1/2  cup canned pumpkin

1/4  teaspoon pumpkin pie spice

Combine the first four ingredients with a spoon in a mixing bowl until most of the lumps are gone. Add the pumpkin pie spice.


Allow the batter to rest a few minutes. (You can heat the griddle or skillet you are going to be using.)


Spoon out batter on hot griddle.

Cook until bubbles form and pancake has browned.


Flip the pancake and cook on the other side until brown. (Oops, one of them stuck to the griddle.)


Butter if you like, sprinkle with powdered sugar, add syrup...whatever you like.

Here is a picture of the pecan pie I made for our Thanksgiving with our younger son and his family


and the turkey that Patrick, our son, smoked. It was so-o-o-o good and moist.


Wednesday, November 22, 2023

CHUNKY APPLE CAKE with CREAM CHEESE FROSTING.

 Nothing says fall better than apple cake. At least to me. I have a number of recipes for apple desserts and can't believe it is already Thanksgiving Eve and I have yet to make any of them. And I even bought some Granny Smith Apples. Oh! Well! I will just have to make something in December, or January, or February. Apples can be baked any month of the year. Right?

Friend Susan made this delicious Chunky Apple Cake with Cream Cheese Frosting for us the last time she hosted canasta. Susan often makes recipes from her Southern Living cookbooks and they are always so good. 

I always have to make a Mother's No-Fail Pecan Pie for Thanksgiving so that is what I will be doing this afternoon. I will probably go on and make the cornbread for the dressing too. The sweet potatoes and dressing though will have to wait until Thursday morning. We will be celebrating Thanksgiving with our younger son Patrick and his family here in MO. Then we will be heading to CO to celebrate an early Christmas with our old son Jeffrey and his family the first weekend in December. It will be a busy time for us.


PRINT RECIPE.

CHUNKY APPLE CAKE with CREAM CHEESE FROSTING

1/2      cup (1 stick) butter, melted

2         cups sugar

2         large eggs

1         teaspoon vanilla extract

2         cups flour

1         teaspoon baking soda

1         teaspoon salt

2         teaspoons ground cinnamon

4         Granny Smith apples, peeled and sliced

1 - 1/2 cups chopped walnuts, toasted


CREAM CHEESE FROSTING

1          8 - ounce package cream cheese, softened

3          tablespoons butter or margarine, softened

1-1/2    cups powdered sugar

1/8       teaspoon salt

1          teaspoon vanilla extract


Preheat the oven to 350 degrees F. Grease a 9 x 13 - inch baking pan. Set aside.

Stir together the first four ingredients in a large bowl until blended.

Combine the flour and the next 3 ingredients with a whisk; add to the butter mixture, stirring until blended.

Stir in the apple slices and walnuts.

Spread into the baking pan.

Bake for 45 minutes or until a toothpick comes out clean when stuck in the center.

Cool completely in the pan on a wire rack.

Spread with the Cream Cheese Frosting. Sprinkle with toasted walnuts, if desired.

Store in the refrigerator.

Prepare the Cream Cheese Frosting:

Beat the cream cheese and butter at medium speed with an electric mixer until creamy.

Gradually add the powdered sugar and salt, beating until blended. Stir in vanilla.

Yields 1-2/3 cups.

Cut into squares to serve.


Tuesday, November 21, 2023

PUMPKIN SNICKERDOODLES


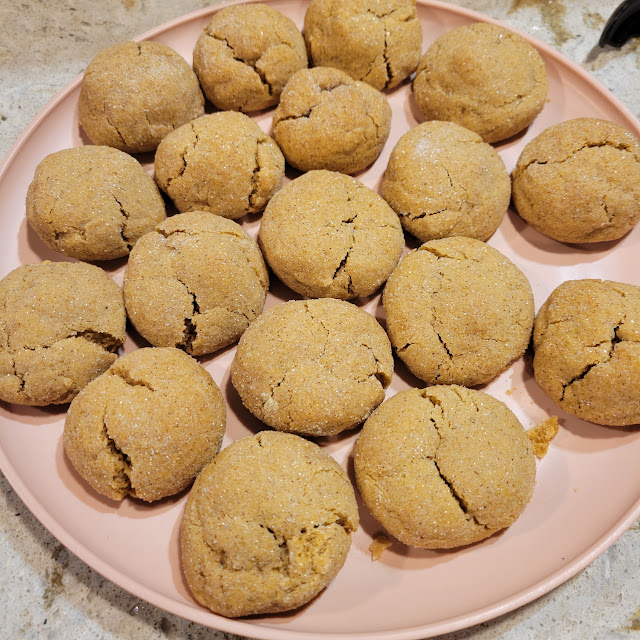
Cafe Treats Baker and Friend Charlotte made these Pumpkin Snickerdoodles I think for six weeks in a row as our Gluten-Free, Egg-Free, and Dairy-Free option by using gluten-free flour and use shortening instead of butter. That thrilled snickerdoodle friend Nelson tremendously. He doesn't care that they are G-F, E-F, and D-F at all and doesn't even notice it either. He just loves Snickerdoodles. After not making them the seventh weekend, Charlotte had them back this past weekend. Nelson's grin was from ear-to-ear!

I don't know any better recommendation I can give you for this recipe!


PRINT RECIPE.

PUMPKIN SNICKERDOODLES

1       tablespoon cinnamon

1/4    cup sugar

*     *     *     *

1       cup shortening

3/4    cup sugar

1/2    cup brown sugar

1       tablespoon vanilla

1/2    cup pumpkin puree

2-2/3 cup flour

1-1/2 teaspoon cream of tartar

3/4    teaspoon salt

1-1/2 teaspoon pumpkin pie spice

1       teaspoon cinnamon

1/2    teaspoon nutmeg

1/2    teaspoon ground cloves

Preheat the oven to 375 degrees F. Slightly grease or line with parchment paper two cookie sheets. Set aside.

In a small bowl, mix the cinnamon and sugar. Set aside.

In a large mixing bowl, cream the shortening and sugars. Add the vanilla and pumpkin, mixing well. Wet aside.

Combine the flour, cream of tartar, salt, pumpkin pie spice, cinnamon, nutmeg, and cloves with a whisk until no streaks of flour show.

Add the dry ingredients with the wet ingredients.

Using a tablespoon cookie scoop, make balls to roll in the sugar/cinnamon mixture.

Place on cookie sheets 3 inches apart. Flatten with the bottom of a glass to 1" thickness.

Bake for 10 minutes.

Allow to cool before removing to a wire rack.

The recipe makes 30 cookies.


Monday, November 20, 2023

LEMON - COCONUT BUTTERMILK BARS


I saw this recipe in one of my cookbooks (Quick Mixes with Fixes - Cakes, Cookies, Bars & Goodies by Lia Wilson) and marked it to try sometime along with a whole bunch more. I don't often buy lemon cake mixes and especially not one that contain a pudding mix, so I haven't gotten round to trying it. I've been making so many treats with pumpkin, I thought it would be nice to try something different. And I love lemon.

Trying to find a lemon cake mix with pudding was an interesting trip to the grocery store. In all of the different companies offering cake mixes (and there are quite a few), I found only one brand that fit the bill. I have been aware for several years that cake mixes are smaller than they used to be. It seems to be the thing companies do - reduce the size but charge the same. This lemon cake mix with pudding was even smaller at 13.25 ounces.

I was concerned that with removing 1 cup of the smaller cake mix, would mean I wouldn't have enough to cover the bottom. I started to add quick oats and I still think that would have been okay, but decided on coconut at the last minute. It did mean I had to add a little bit extra oil so that the mixture would clump together. It was a fairly thin layer and thought of things I could have done, so I added them in the instructions. As I was writing this I thought about the 2 - quart glass baking dish I have that measures 8 x 12 - inches and realized that would have worked better. The crust wasn't too thin after it baked; it just took some work pressing it out to cover the whole bottom.

The end result was a very delicious lemon coconut bar and they didn't last long in the Cafe at the church. I will definitely consider making them again.


PRINT RECIPE.

LEMON - COCONUT BUTTERMILK BARS

1       (18.25 ounce) lemon cake mix with pudding, divided

1        cup coconut

4        eggs, divided

2 - 3   tablespoons oil

1        cup buttermilk

1/2     cup (1 stick) butter or margarine, melted

3/4     cup sugar

1        teaspoon vanilla


Preheat the oven to 350 degrees F. Grease a 9 x 13 - inch baking pan. Set aside. (You could also use an 8 x 12 - inch baking pan.)


Reserve 1 cup dry cake mix and set aside. Add the coconut to the larger amount of dry cake mix.


In a large bowl, combine the remaining cake mix, 1 cup coconut, 1 egg, and oil; blend well. (If you need to add a little more oil so that all of the cake mix is moistened, do so a little bit at a time.) (My cake mix was only 13.25 ounces, so I added the coconut to replace the dry cake mix I removed.)


Press the cake mix mixture in the bottom of the baking pan.

(It is best if you spread the crumbled mixture over the whole bottom as the crust will be very thin since the cake mix was smaller than what was called for in the recipe. I didn't spread my out enough at first to make this easier to do.)


In a mixing bowl, beat the remaining eggs, buttermilk, butter, sugar, and vanilla until well blended. (I accidentally added the reserved cake mix too and then did my best to spoon it out.)


Slowly add the reserved cake mix and beat on medium speed until the mixture is smooth (about 2 minutes.)


Pour the mixture over the batter in the cake pan and

bake for 35 to 40 minutes, until lightly browned on top.


Cool and cut into bars. Store in the refrigerator overnight if you like.