Showing posts with label Crocheting. Show all posts

Tuesday, September 8, 2020

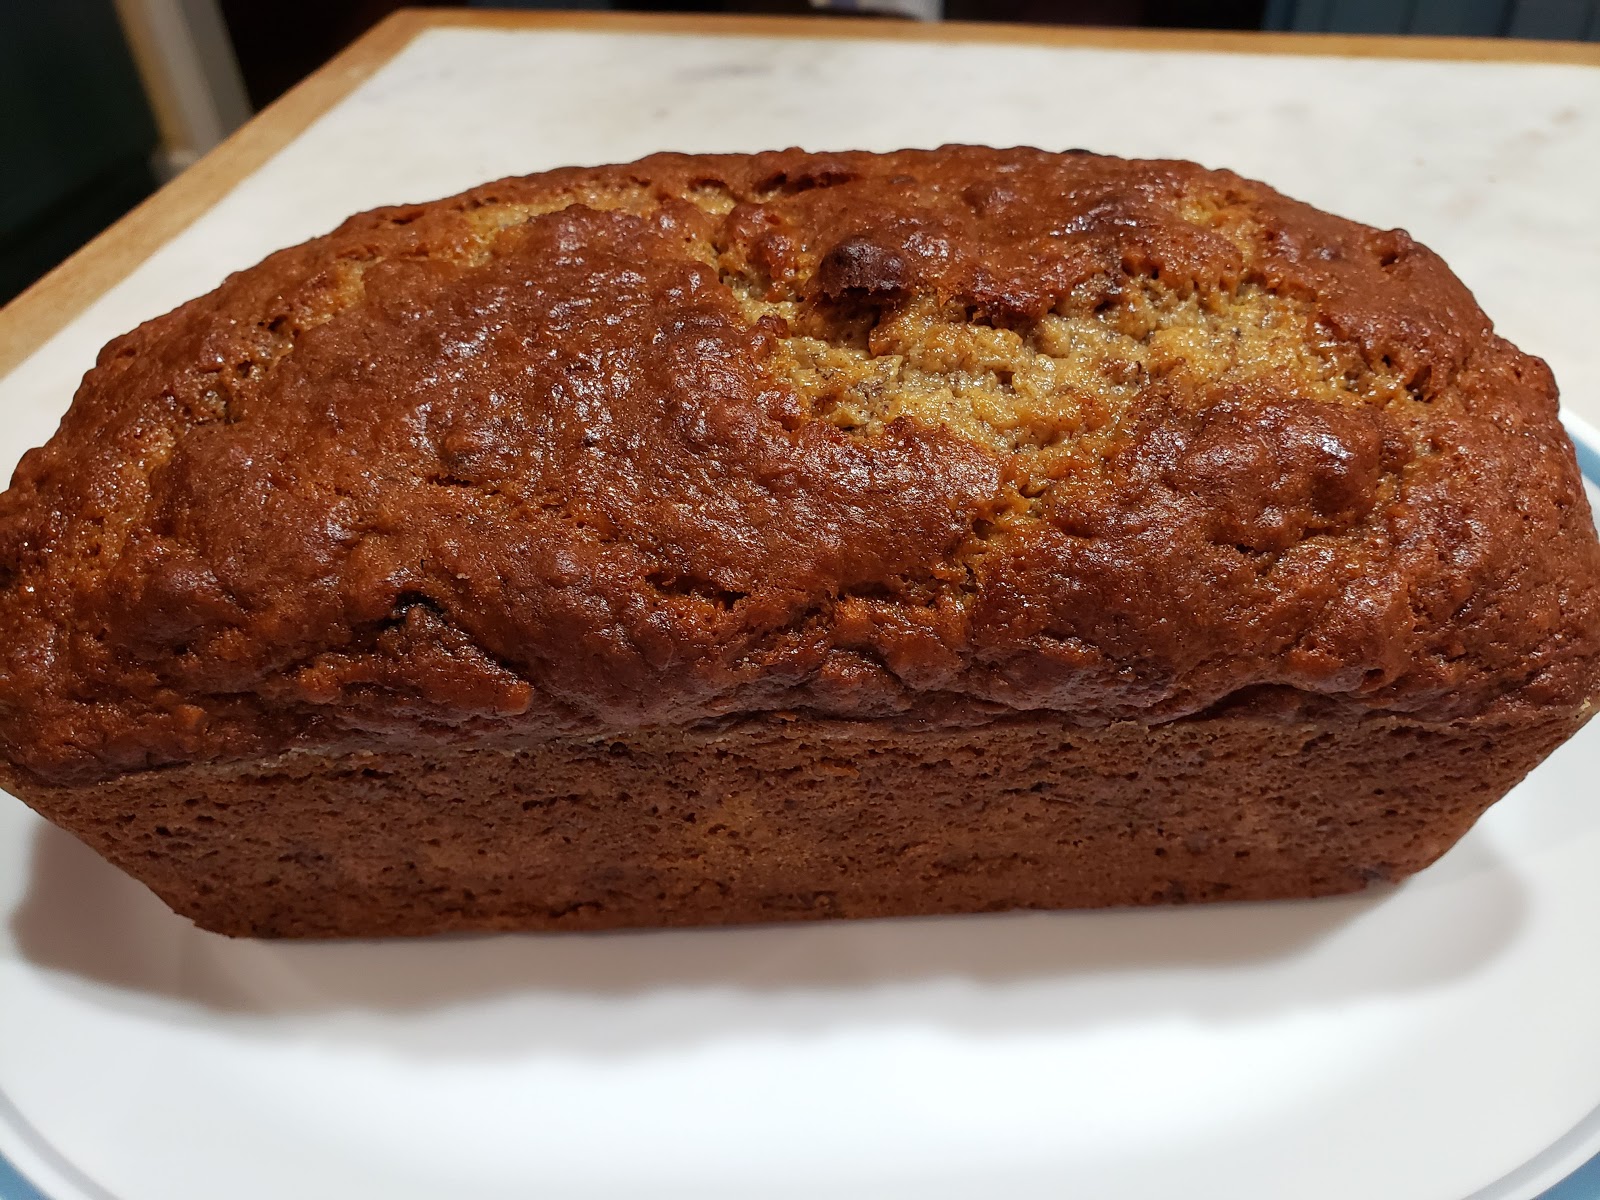
DAY 180 - SIX-BANANA BANANA BREAD

I hope everyone had a marvelous Labor Day Weekend. It was a busy one for us, I guess, because we were pet sitting for our younger son Patrick and his family. They went camping for the weekend and we shared responsibilities for the pets with Lori's mother. Carol went to their house in the morning and we took the evening shift. She lives closer than we do so we don't have to get up as early to let Dakota, the dog, out for a bit and feed him. They now have two cats, but they can take care of themselves fairly well. They eat canned cat food so that does mean we have to feed them also. We usually go up around 5 to let Dakota out and then stay until 8 or so to let him out one more time before bedtime.

Sunday morning I decided to do a little baking and thought I would make a banana bread recipe that Friend Ellen shared with me a couple of weeks ago. I didn't have six fresh banana, but had some I had frozen in the freezer to add to my two fresh ones. I like to make quick bread the day ahead and wrap it in foil and then cut it the next day. That way it seems so moist. I thought I would cut us two slices and then rewrap it and take it to Hillcrest on Tuesday. BUT after eating my slice I decided I was  going to keep it. Hillcrest won't know about it.

After I gave Ellen my verdict, I asked her if she had used sour cream or yogurt. She told me she actually used Coconut Greek Yogurt. Wow! Wayne would have really liked that if I had used that. He is always telling me to add coconut to recipes. Next time I will.


SIX-BANANA BANANA BREAD

1/4     cup unsalted butter (1/2 stick), melted.
3/4     cup granulated sugar
1/4     cup light brown sugar, packed
1/4     cup sour cream or thick Greek yogurt (coconut Greek yogurt is great)
2        large eggs
1        tablespoon vanilla extract
6        medium/large very ripe bananas, mashed (1/2 cups mashed bananas)
1        3.4 ounce box vanilla instant pudding mix (not cook 'n serve) (I used sugar free)
2-1/4  cups flour
1-1/2  teaspoons baking soda
1        teaspoon cinnamon
pinch of salt, optional and to taste


Preheat oven to 350 degrees F. Grease and flour a 9 x 5 loaf pan, set aside.


Melt butter in microwave. Pour into a large mixing bowl and add sugars, sour cream or yogurt, eggs, and vanilla.
Whisk to combine.


Add the bananas and stir incorporate.


Combine the dry pudding mix, flour, baking soda, cinnamon, and optional salt with another whisk. 
Add to liquid batter and
fold in with a spatula or
stir gently with a spoon. Don't overmix or bread will be toucher.


Pour batter in pan and
bake 60 to 75 minutes or until top is domed, golden, and the center is set. A toothpick stuck in the center should not come back with any batter.

Allow bread to cool in pan on wire rack for 20 minutes before removing from pan.
I ran a knife around the inside of the pan to make sure the bread was loose.

Store wrapped in foil.


I also was in the mood to make some new crocheted top towels this weekend.


Here are some of the large sunflowers blooming in my son and his family's yard. Granddaughter Madison just loves the sunflowers.


HERE is a link to my post on how to make the hanging towels. Have fun!

Tuesday, January 3, 2017

CROCHET LACY SCARF

I got off to an early start this year making a scarf since I didn't make my grandchildren any. I guess I got in the mood when I decided to make them the crochet candy cane stockings. (See picture below.) I also made some darling snowman gift card holders that can hang on the tree (I need to write up a post for them. They were really cute and the grandkids all liked them.)

I picked up a couple of those free instruction sheets in the yarn section of a store and one of them was for a crochet lacy scarf. I rarely crochet scarves. Not sure why. I just usually knit them. I know I have had the instructions before to make a scarf that I liked the looks of but they crochet it horizontally and you have to chain a gazillion to start which I do not enjoy doing. 

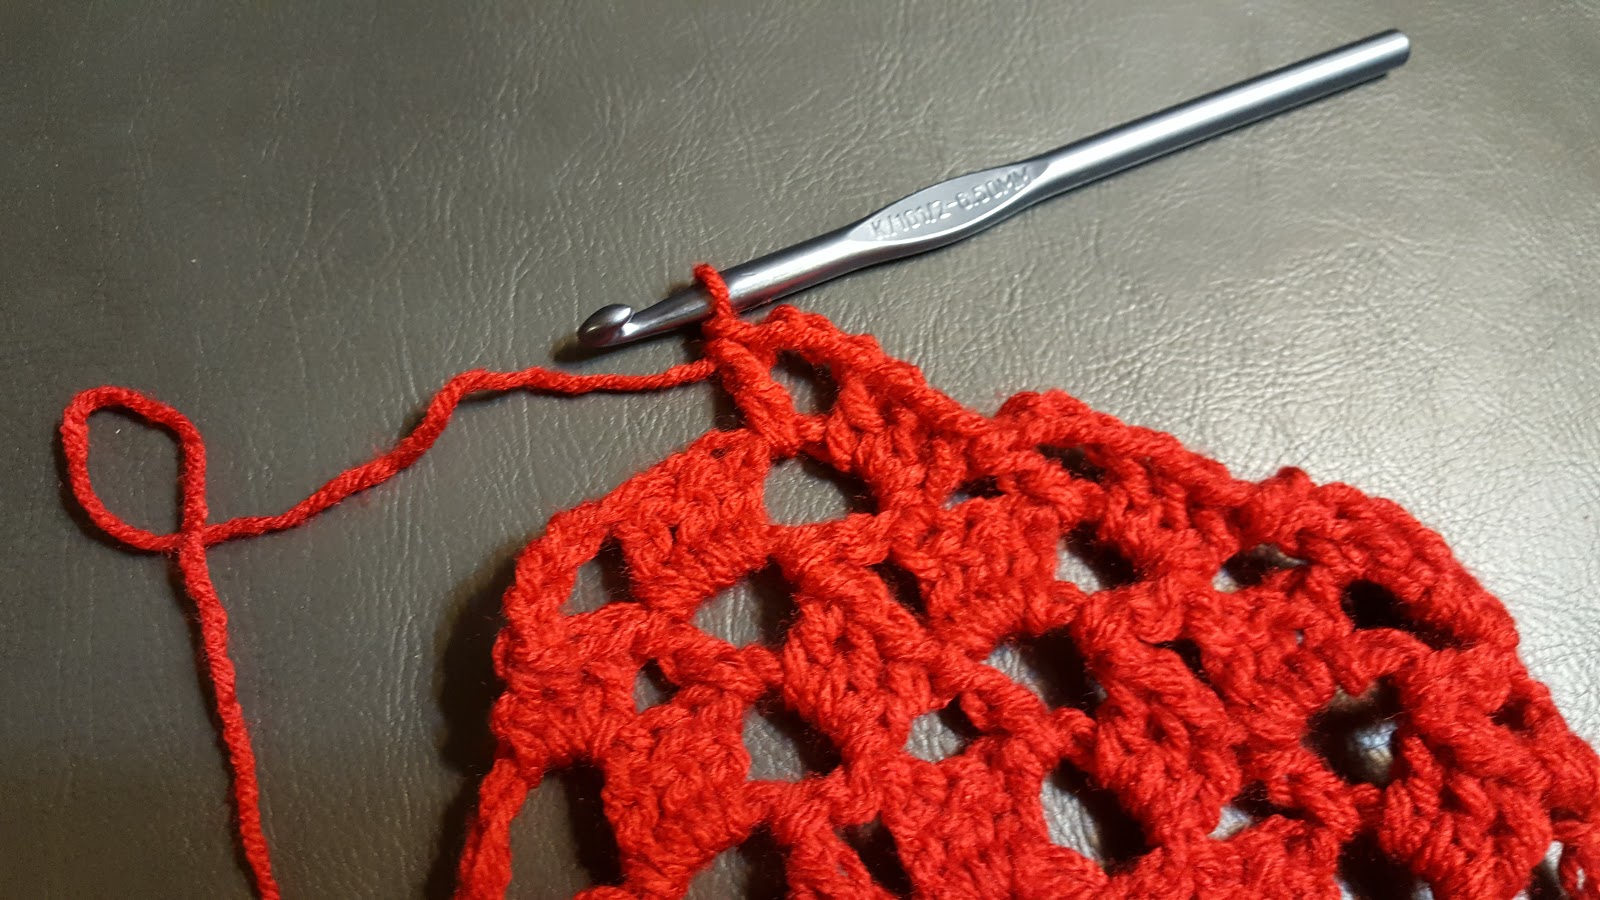
This one was especially easy after I was able to see the pattern. (Not a good idea for me to start a project and watch television at the same time. I had to take out and almost start over a number of times. I took a few pictures for visuals just in case you are like me.) I didn't use the size needle the directions called for. I think I have a crochet hook size N but I couldn't find it. I used my size K and was happy with the gauge. It will certainly make a larger "lace" with the N.


CROCHET LACY SCARF

Size N crochet hook. Anything from a size K up will work - just depends on the size you want your scarf.

Chain 19

Row 1: Dc in 5th ch from hook (first 4 skipped chs make turning ch-sp),  *(dc, ch 3, dc) in next ch, skip next ch, dc in next 2 ch; rep from * across to last ch, dc in last ch - 3 pattern reps at the end of this row.

Row 2: Ch 4 (for turning ch-sp), turn, *(3 dc, ch 3, dc) in next ch-3 sp; rep from * across to turning ch-sp, 3 dc in turning ch-sp.

Rep last row until almost all the yarn has been used (or the scarf is the size you want it)

Weave in ends to finish.

You may not be like me but as I was into the pattern, I felt like the ch 4 was the end of the row. It is actually the beginning of the row. At first I found myself ch 4 when I was finished and ready to cut the yarn and weave in the ends. That's when it really hit me that the ch 4, turn was the beginning of the row and that the row ended with the 3 dc in the turning ch 4 from the previous row.


3 dc,ch 3, dc in ch 3 sp from previous row
(Slide the 3 dc to right in the ch 3 sp to get the diagonal look.)


The first dc in the turning ch-sp

The second dc in the turning ch-sp

The 3rd dc in the turning ch and then the ch 4 to start the next row. You can see the 3 pattern repeats (3 dc, ch 3, dc) 
The finished size of my scarf using the crochet hook size K was almost 6 x 68 - inches. If you used the recommended size N, the directions said make the scarf 9 x 76 - inches.

Here are some pictures of the crochet candy cane stockings I made for my grandchildren.


Tuesday, December 20, 2016

CROCHET CANDY CANE STOCKING

When I decorated our Christmas tree the other day, I didn't have any small candy canes to place in each of the crochet candy cane stockings that my mother made years ago. They are so cute and different. 

I have never seen a pattern for these but it was fairly easy for me to figure out a pattern just by looking at the ones Mother had made. I used to have some variegated yarn that was red and green that I wanted to use but I couldn't find it. I think it would make cute ones. Instead I just decided to use some red, green, and white yarns like two of the ones Mother had made. She made one just from green yarn and bound it in red. 

At first I thought it was just a granny square but when I finished making the square, it didn't look right when I folded it in half. Then I noticed my mistake. Redoing the round with the white yarn, it worked perfectly. I am so excited! I think I will make one for each of my grandchildren. Hopefully they will keep them and just add another candy cane next year. They can hang it on the tree and then enjoy the candy cane on Christmas.


Instructions for the Candy Cane Stocking

With color 1: 

Make a slip knot . Chain (ch) 4.

Create a ring - (insert hook in first chain closest to slip knot and pull the yarn through making a slip stitch (sl st)

Round 1: Ch 3 (counts as the first dc), 2 dc in ring, ch 2, 3 dc in ring, ch 2, 3 dc in ring, ch 2, 3 dc in ring, ch 2. You should have 4 sets of 3 dc clusters.

Join to first set by inserting needle in top chain of the ch 3 and sl st forming first round. Cut the yarn leaving a couple of inches and then pull through stitch and tighten to a knot.


Round 2: With color 2, you can start the second round in any of the ch 2 spaces from the first round. Insert needle in space and bring color 2 yarn and make a sl st. (This stitch counts as your first ch in the ch 3)

(Make a corner) Ch 3 (counts as the first dc), 2 dc in ring, chain 2, 3 dc in same space (You will need to slide the dcs over to make room for all 6 dc in each space), Ch 2 and continue in each Ch 2 spaces from the first round with 3 dc, Ch 2, 3 dc making the corners. When you have 8 sets or 4 corners made, join together with a sl st in top chain of the Ch 3. Cut yarn leaving several inches.


Round 3: With color 3:

You can begin round 3 in any of the ch 2  spaces. (I started in the "side" left of the side you ended round 2 in the picture below. You can also start in the corner just left of where you tied off round 2.) As with Round 2, you will connect Color 3 and ch 3, 2 dc to form first set. (This forms the "side" for Round 3 in this example.) ch 2 and then make a corner with 3 dc, ch 2, 3 dc.,  ch 2, 3 dc, ch 2. In the ch 2 space that you ended with in round 2, make 11 dc. (You will need to slide the dc to make room for all 11.) ch 2, 3 dc, ch 2, 3 dc in next ch 2 space to form another corner and then ch 2. (You should now be on the opposite side from the side you began this round.) 3 dc in this Ch 2 space from Round 2. (Picture below.) 


Ch 2 and then form the next corner. (3 dc, ch 2, 3 dc) ( Remember you always have a Ch 2 between each set of 3 dc.) ch 2. You should be back where you started this round. sl st to join the first ch 3, tie off and cut yarn leaving a couple of inches tail.


(Round 1 has 4 sets of 3 dc, Round 2 has 8 sets.)

If you are changing colors with each round, you can catch the end when you make the 3 dc or work the tail in later. The picture of the back side shows how I "caught" the end/tail each time. Then just cut off the extra yarn.


 You are now ready to fold the piece in half with the 11 dc on the bottom to form the "toe" of the boot. Match all of the stitches together.


Using color 1 you will "sew" the sides and bottom together leaving the top side open. When you fold the piece in half you should have 5 dc on each side forming the toe with 1 dc forming the end. 


I came in from the inside on the left side of that middle stitch and then came back around the other side of it. (In my picture the end of the hook looks like it is further down, but you want to match up the stitches on each side as you work your way around.)


When you get around to the top of the stocking, ch 8


You can bring the hook back down into the last worked stitch and sc it to connect. 


Tie it off, cut a tail, and weave it into the edging. Cut off excess.


I ended up making 6 for my 6 grandchildren and added the candy cane.


Here is one of the stockings my mother made that I have hanging on my Christmas tree.


I found the candy canes at a Dollar Tree store. The package of 12 looks like the package you can buy in other stores. The great thing about theirs is they are slightly shorter making them the perfect size for the stocking.

You can also use the stocking to leave $$ for your special ones.


Friday, February 26, 2016

CROCHETED HANGING TOWEL

My friend Lynn from California asked me to teach her to crochet. We were retiring from the same middle school.  I think she wanted to be able to do some things she never had time to do when she was a counselor. I taught her the basic stitches and then how to crochet a "hanger" for towels to use for drying your hands. That was 10 years ago. The last time I heard from Lynn she wrote that she was still making the towels.

I thought I would show you how easy they are to make. I hope you will be comfortable enough with the process that you will learn to experiment on your own. You can't make them wrong. While the start is always the same, the rest is rarely the same when I make them.

You start by cutting a kitchen towel in half. I usually buy the towels that have a design that fits half of the towel, but you don't have to restrict yourself to this kind of towel. If you do though, you will be able to make 2 hanging towels from the one towel. You probably will not want to use a towel in which the design/picture would be upside down. I have used solid towels that turned out really pretty. I usually use a variegated yarn then for sure.

After you cut the towel in half, I stitch about 1/4 of an inch from the raw edge. (You don't have to do this if you don't have a sewing machine. You will just have to make sure when you "punch" the hole in the towel to "cast on" the stitches, you are a good distance from the raw edge. I have also seen people fold the towel under slightly on the raw edge and cast over this folded edge.)

I usually use a knitting needle to punch the hole. I have used the crochet needle, but this is hard to do if you are using a good quality towel. I see directions that tell you to cast on a number of stitches. I don't worry with this. I just keep about the same distance between each hole. 


Once you punch the hole below the 1/4 inch stitch you sewed with a machine, insert the crochet needle in the hole from the front and catch the yarn in the back. Bring it through the hole pulling the loop up even with the top.


Then I wrap the yarn around the needle and pull it through to make a stitch. This is a single crochet (sc) stitch.


Finished across the top of the towel. Count the number of sc stitches that you cast on.


Usually for the first row, I double crochet across the towel. Remember to chain three before you turn the work to crochet across. This chain 3 (ch 3) counts as the first double crochet (dc) for the next row (always). That means that you don't work in the first stitch of the row. You will skip over and insert the needle in the second stitch to "make" the first dc on this row. By making a dc in the last stitch, you will have the same number of dc stitches on this row as when you cast on.


Important to remember - You can use any pattern you want to work down from the number of stitches you cast on to between 8 and 11 stitches for the "handle" part. You will reduce the number down by skipping stitches on the previous row as you work across with dc stitches. You can take as many rows as you like to accomplish this. That is where the fun is (for me). I love to experiment with different looks. Sometimes I will have "skipping rows" after each other and sometimes I will put a "solid row" between them. A solid row just means that you dc in every stitch and the number of stitches will remain the same. Sometimes I will dc a # of stitches (2 or 3) and then skip the next stitch and then repeat. It often depends on the total # of stitches I have worked down to (might want to do a little math to see what combination will work with the number of stitches you will be working with). If you get to the end of the row and you still have one more stitch you need to do but you have finished the "pattern" you were using on that row, just do another dc in the last stitch. You want to make sure you end each row in the last stitch (that ch 3). Once the towel is hanging, you won't notice it.

Here is one pattern you could use.

In my example, I ended up casting on 81 stitches.

Row 1  - Cast on 81 stitches, ch3 turn

Row 2  - dc across same 81 stitches, ch 3 turn

Row 3  - *3 dc skip 1* repeat across , dc the last 4 stitches, ch 3 turn (61 dc)

Row 4, 5, 6, 7, 8, 9, 10 - Repeat Row 3, until you are down to 8 - 11 stitches (11 dc )

Row 11  - dc, sk 1, 2 d, sk 2, 2 dc, sk 1, 2 dc (8 dc), ch 3, turn

Row 12 - dc across, ch 3, turn (8 dc) 

Continue this until you have the long enough to go double back over to hang. (Usually about 11 times.)

To make the button hole. dc a few stitches (3 in my example), chain 2, dc the last 3 stitches (8 stitches)

Last row  - dc across. Cut yarn leaving a couple of inches to weave through the finished work and then cut off excess.

Finished towel....


Hanging on the door of my oven....


It is the one on the right. The one on the left I obviously used a different pattern.


This is the one on the left. For the fourth row, I repeated the pattern of a *sk 1 dc*, across. Then went back to the *sk1 3 or 4 dc* and then came back with the *sk 1 dc* pattern. Like I said you can make any pattern you want.


This is another towel I made. This time when I started a "reducing row" I did the *sk 1 dc* across. The next row I dc across to have the same number of stitches I had had in the previous row.


In this one I  *DC, sk 1* across for 2 rows and then DC across.

I didn't mention it, but you probably know from the pictures. After you are finished just sew a button on the "hanger" on about the second row once you start it.

When the towel has worn out, just remove the button and use it on another towel. I like to do seasonal towels to have hanging in my kitchen. 

I hope you will give this a try. Let me know how it turns out. You may have discovered a new hobby to pass the time. You can easily complete one in an evening while watching television. You can keep it for yourself or give them to your friends as Lynn does.