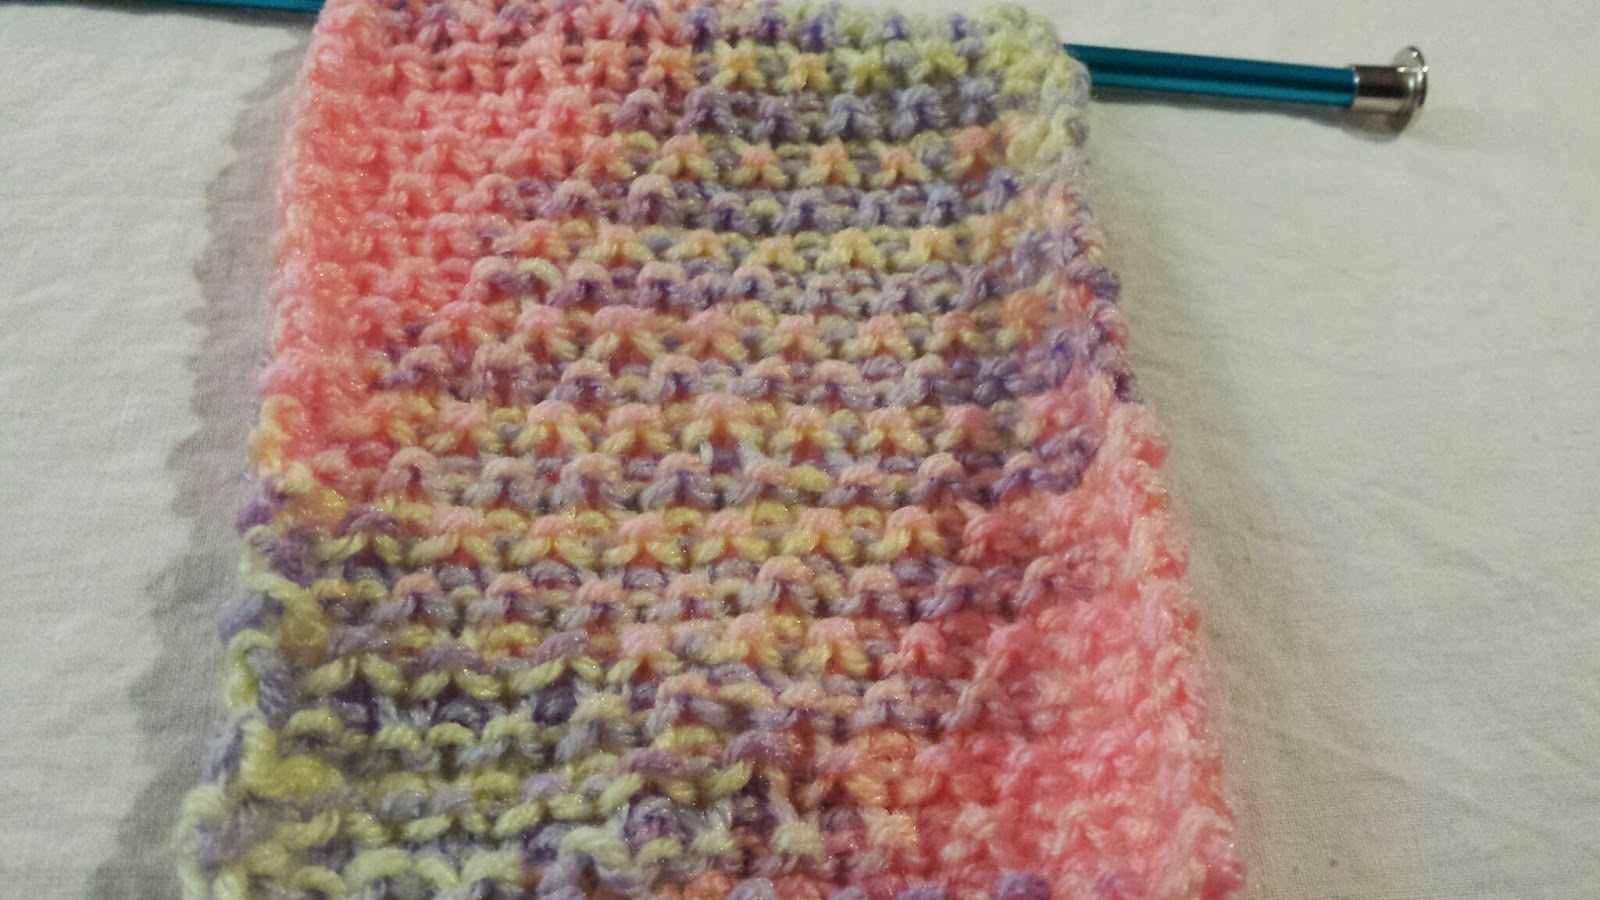
Here is a fun pattern to try for you knitters. I think it is even more fun when using variegated yarn.
CROCUS BUDS
Cast on multiple of 2 stitches + 1
ROW 1 (RIGHT SIDE): K 1, (YO, K2) across
ROW 2 : P4, with left needle bring the third stitch on right needle over the first 2 stitches and off the needle, *P3, with left needle bring the third stitch on right needle over the first 2 stitches and off the needle; repeat from * across.
ROW 3 : (K2, YO) across to last stitch, K1.
ROW 4 : * P3, with left needle bring the third stitch on right needle over the first 2 stitches and off the needle; repeat from * across to last stitch, P1
Repeat Rows 1 - 4 for pattern until desired size. May end with either Row 2 or Row 4.
Bind off all stitches in knit.
Often I knit while I am watching TV. That can cause some problems with the pattern if I get more interested in what is on TV instead of what I am knitting. Once I get used to seeing the knitting on the needles, it helps me with the pattern .... knowing which row to do next. This may sound silly for skilled knitters. But if you are a knitter like I am, mainly easy, beginner knitting patterns, you know what I mean.
Help if you need it to understand the instructions:
The instructions are fairly easy to follow especially rows 1 and 3. They are on the right side and rows 2 and 4 are the back side.
Right side.
 Back/Wrong side.
Here is what your work will look like when you are finished with ROW 4 and ready to do ROW 1. You see the stitches in pairs on the needle with a single stitch at the beginning.
In ROWS 1 and 3, you knit both of the stitches (separately) and then bring the yarn over (YO).
To do this you bring the yarn to the front like you would if you were going to purl.
Then bring the yarn back over the right needle to knit the next two stitches.
Since Row 1 has a single stitch first on the left needle, you will knit it and then the YO. You will always do a YO when you have a SPACE.
Finished with ROW 1 and ready for ROW 2. The other needle is pointing to the yarn over (YO). This is what it looks like from the back side. You will always purl one more stitch after the yarn over. In ROWS 2 and 4 you are working with trios instead of pairs. The three "stitches" or trio are a P, YO, and then another P.
The first purl stitch in the trio will be pulled back over the YO and last purl stitch you made and then taken off the needle.
You have to hold the thread tight so that the two stitches you are passing over - the YO and purl - don't fall off the needle. This gets easier as you go along.)
Row 2 starts with purl 4 (P4) and then continues with the repeated pattern of P3 and then the pass over.
This is what the work on the left needle will look after you have finished ROW 2 and ready for ROW 3. Once again you notice the stitches in pairs with a space in between. Knit the two stitches and then the YO ... bringing the yarn from the back (like you were going to purl) but take it over the right needle to knit the next stitch. For ROW 3 you will knit 2 and then YO..... until there is only one stitch left on the left needle. You will do the YO to end the repeated pattern and then knit the last stitch.
So in ROW 1 the single stitch is at the beginning and in ROW 3, it is at the end.
ROW 4 is similiar to ROW 2 except the YO is the second stitch on the needle, so you will only P3. Your "pass over" is always after the purl stitch after the YO. Remember with the "pass over" your trio is a P, YO, P.
One last picture to share with you.
When you purl the YO, it looks a little strange, like you dropped a stitch. But you haven't.
I hope you will try the Crocus Buds pattern and that the pictures have been helpful if you are a beginner.
I enjoy trying out new and easy knitting stitches. Any I do have to be easy because my knitting is limited to scarves and dish clothes. I did knit my oldest granddaughter a poncho when she was 2 but it was just two rectangles that you end up sewing together. Very cute on her but so simple.
When I find myself wanting to truly relax, I will generally start looking for something to knit or crochet. One time I went to the doctor and took my knitting with me to do while I was waiting. By the time I got in, I was so relaxed that the nurse couldn't get a blood pressure reading. She tried several times.
This stitch called Andalusian is a simple pattern just using knit and purl stitches. There are 4 rows in the pattern but two of them are the same. I thought I would show you what the "work" looks like when you are ready for the next row to help you with the pattern.
Sometimes I like to knit while I watch television and if the pattern is several rows, I will make a tally mark on a piece of paper when I finish each row in case I start watching television more and not paying attention to what I am doing. It slows the process down, but it's better than messing up and having to rip out. I just use enough of the instructions for the row to remind me what I am doing and just make a tally mark after I finish the row. It is also helpful if I stop and leave it for a bit.
If the pattern is one that I can recognize the "look" of each row I don't have to do the tally marks. This pattern is one of those.
ANDALUSIAN STITCH
Number of stitches to cast one: Multiple of 2 + 2 (in other words and even number of stitches)
Instructions:
Row 1 (right side): Knit across.
Row 2: K1; purl to last st, K1
Row 3: K1; (K1, P1) to last st, K1
Row 4: K1; purl to last st, K1.
You will notice that the even rows are always the same pattern. I like that in a pattern. After you finish an odd number row (the right or front side) and turn your needle and work over to start the next row, this is what your work will look like....
This is the wrong side or back side of your work.
* * * * * * * * *
It is row 3 that creates the horizontal "pattern" of the work. On the front or right side of the work it looks like a "bump".
That row is your clue as to whether you are ready for Row 1 in the pattern or Row 3.
* * * * * * * *
Ready for Row 1...
* * * * * * * *
Ready for Row 3....
For my sample I am using size 10 US 6.0 mm needles and I cast on 22 stitches. I think it will make a pretty scarf. If you wanted to make a dish cloth, I would cast on 40 or so stitches depending on how large you wanted the cloth to be and stop after Row 4 when it is about square.
Hope you will give this Andalusian Stitch a try. Would love to hear about your experience.
I love trying out new stitches to produce pretty and different patterns. I usually just attempt scarves since I am not that experienced. I have also made some pretty dishcloths using cotton yarn. This pattern would work well for both. My purpose is really just to share the pattern with you and let you decide what you want to make. I would love to hear from you if you are willing to share with me what you made with the pattern.
TWEED STITCH
Multiple: 2 + 2
Stitch Guide
wyif : with yarn in front
wyib : with yarn in back
sl : slip
Pattern:
Row 1 (right side): K1, *K1, wyif, sl 1 as to purl, wyib; rep from * to last st, K1.
Row 2: K1, purl to last st, K1.
Row 3: K1, *wyif, sl 1 as to purl, wyib, K1; rep from * to last st, K1.
Row 4: K1, purl to last st, K1.
Repeat Rows 1 through 4 to desired length.
Help/explanations for the less experienced knitter:
Multiple: 2 + 2 When you are deciding how many stitches to cast on, the number must be a multiple of 2 or in other words, an even number and then 2 additional stitches. (I cast on 22 stitches for my sample.)
wyif When you are going to purl, you have or bring the yarn to the front of the needles. Just bring the yarn in front of your work.
wyib When you knit, the yarn is behind your work or behind the needles. Move the yarn behind your work.
Row 1: (right side) This is what the work looks like on the right side.
K1 Knit the first stitch.
*K1, wyif, sl 1 as to purl, wyib; rep from * to last st Knit 1 (the second stitch), then move the yarn to the front of your work and slip the next stitch on the left needle to the right needle by inserting the right needle in the stitch in front of the left needle (as if you were going to purl, but you don't follow through). Next move the yarn to the back (you can think of it as securing the slipped stitch on the right needle). Repeat this pattern until there is only one stitch remaining on the left needle.
K1 Knit the last stitch.
Row 2: K1, purl to last stitch, K1 You will Knit the first and last stitches and Purl all of the ones in between.
Row 3: K1, *wyif, sl 1 as to purl, wyib, K1; rep to last stitch, K1 Begin this as you do all rows by knitting the first stitch. Then bring the yarn to the front of the needles and slip the next stitch off the left needle as you did in Row 1. Next move the yarn to the back of the needles (securing the slipped stitch on the right needle) and knit the next stitch on the left needle. Repeat this pattern until there is only one stitch on the left needle and knit it. That means the last two stitches on this row are knit stitches.
Row 4: K1, purl to last stitch, K1 This is a repeat of Row 2.
This is the end of the pattern. Start back over by repeating Row 1, etc.
Two things to remember for the pattern:
I. The even rows are always the same -- Knit the first and last stitches and Purl the ones in between.
II. The difference between Row 1 and Row 3 is Row 1 has 2 knit stitches at the beginning of the row and only 1 at the end of the row and Row 3 has 1 knit stitch at the beginning and ends with 2 knit stitches. The number of knit stitches at the end of the odd row is the number you will have at the beginning of the next odd row. (Row 1 ends with 1 knit stitch so Row 3 starts with 1 knit stitch....Row 3 ends with 2 knit stitches so Row 1 ((when you are repeating the pattern)) starts with 2 knit stitches. I have to remember this because sometimes I am watching television when I knit and I can forget where I am. I am able to remember what I did at the end of the last odd row.
This is what the work looks like on the wrong side. Remember this is when you will knit the first and last stitches and purl all the stitches in between.
If you look closely at the pattern on the front, you will see the short horizontal bars that appear with every other stitch. That's what occurs when you move the yarn from the front to the back. As you progress with your work, you will notice that this bar alternates with the bar two rows above or below it. If you aren't sure if you are at Row 1 or Row 3 of the pattern, notice where the "bar" is two rows below your current row. This is help you decide if you need to knit 1 and then move the yarn to the front to slip the next stitch or knit 2 before doing this.
This is really a pretty pattern. I used a variegated yarn for my sample and you can see what unique pattern it is going to make with the colors. It would also look pretty in a solid color. You can use any size needle. I used a size US 10 , 5.75 mm.
I'm off to a late start, but I have one scarf finished and am working on my second one now. I like finding different patterns to knit and make scarves.
You see...I'm not too advanced at knitting. As with so much, I know just enough to get me into trouble. I tried making a vest when I was a lot younger, but never got more than the front made. I did make a poncho for my oldest granddaughter Hallie when she was around 2. It was very easy to make. I just made two rectangles and then sewed them together. I should ask my granddaughters if they would like one.
The pattern I chose for this scarf was one I saw online. The person called the pattern Indian Corn. I liked how it looked in her picture, but I had some questions with the pattern instructions. I thought I would search Indian Corn Pattern and see if I could find answers to my questions. Fortunately I found quite a number of sites. I didn't have to visit many though before I realized the pattern she created didn't look anything like all of the sites I was visiting.
SO...I'm not sure what you call this pattern, but I like it and it's fairly simple to produce.
This is what it looks like so far:
Scarf Pattern:
Cast on a number of stitches that is a multiple of 4 (evenly divisible by 4). I cast on 24.
Any size needles. I used US 8.
Cast on stitches.
Row 1: *YO - K2, (Pass the YO over the K2), K2* repeat pattern across
Row 2: Purl across
Row 3: *K2, YO - K2 (Pass the YO over the K2)* repeat pattern across
Row 4: Purl across
Repeat these four rows until you have the desired length.
I had to experiment with the pattern before I could get started with the scarf. (That's why the yarn is different in these few tutorial pictures.)
The first YO is hard to show in a picture but just wrap the yarn around the needle in your right hand.
You can tighten it when you knit the first stitch.
Knit 2 and then pull the YO over
the two knitted stitches.
Things to remember....
There are two knit stitches between the two knit stitches that you pass the yarn over.
The Purl Row ... you are always looking at the wrong side.
When I am finished, I will have to block it as the edges curl. (I tried to flatten it as much as I could for the pictures.)
I was doing much better by this time last year. That's because I started scarves for grandchildren in the summer. I realized the other night that I hadn't done anything for this year.
That's where the surprise comes in.
I was checking out a couple of locations where I have yarn stashed. I know....that's not very organized. I could use a "sewing room" about twice as big as my current one. But I don't think that's gonna happen anytime soon if ever.
Where was I? Oh, yeah! I was looking in one choice spot behind my chair in the living room and there in my yarn basket was this finished/unfinished scarf I had made last year. I would say I almost don't remember making it, but that doesn't sound very good at my age. It looked finished, but after I looked at the directions still in the basket, I saw that it had called for fringe. I guess that's why it was still in the basket, but I don't think it needs fringe.
The pattern for this scarf has no name. It is just one of those free ones you find with yarn. It is easy to do. Since I didn't take pictures when I made the scarf, I did a sample using a yarn that will show the stitches a little better.
PATTERN FOR SCARF
Use needle size US 8/5mm or whatever size you wish to use for desired size.
Cast on 22 stitches. (Make sure you cast on an even number of stitches if you wish to make it a different width.)
Rows 1 - 6 = Purl
Row 7 = P1. *yo, P2 tog*, repeat from * to * across until there is one stitch on the left needle, P1.
Rows 8 - 12 = Purl.
Row 13 = Repeat row 7.
Rows 14 - 18 = Purl.
Repeat these rows (7 - 18) until almost desired length.
Purl 6 rows.
Bind off.
Here are a few pictures that might help you if you are a beginner:
Cast on 22 stitches:
Purl the first six rows:
Purl means the right needle goes in front of the left needle not behind as with knit.
Purl 1, *yarn over, purl 2 together* repeat from * to * across, purl 1
After purling the first stitch,
wrap the yarn around the right needle bringing it back in the position with purling.
to purl two stitches together, insert right needle in the next two stitches in front of the left needle and continue as if they were one stitch.
Continue across the row until one stitch is on the left needle. Purl this last stitch. (Purling the two stitches together creates the space you see in the pattern.)
Purl rows 8 - 12
When you are purling row 8, the yarn over from row 7 will look like this when you are purling...purl as normal.
This is what it will look after the first row in the series is purled.
Here is another picture of my finished scarf. It measures 5-1/2 x 71 - inches. I used Red Heart worsted (4) Black Fleck.
This is my current project I am working on. It will be a scarf for someone. It is soooooo soft.
I cast on 16 stitches. The really great thing working with this fancy yarn, is you can just knit every row until you have the desired length.
I don't really consider myself a knitter or crocheter, but I do like to attempt small easy projects. The scarves I knitted my CO grandchildren for Christmas this past year were a big hit.
I come from a family (mother, grandmother, and aunts) who enjoyed crocheting. They did some truly beautiful pieces. Every time I tried to learn, I gave up due to frustration with getting the chains the same length. (I just wasn't ready to learn.)
One summer when my parents came to visit us in CA, I told my mother I wanted her to teach me how to crochet. Everyone else could do it but me. I guess I was really ready this time, because I "picked it up" quickly. In fact she was surprised I learned so quickly.
I am still not very advanced...with either knitting or crocheting, but when I see something that looks like I could do, I try it. I saw this knitted washcloth and was attracted to the unique design....not your normal square washcloth. Simply Notable called it "the almost lost washcloth pattern". She told her interesting story here.
The pattern reminded me of some of my mother's recipes when she just said "cook til done". There were a lot of questions that people asked and I read almost all of them. Someone really interested asked if she could do a tutorial because she was having difficulty fully understanding the pattern. One comment tried to explain the pattern which helped me a lot. Anyway I decided I would give it a try.
I wanted to use cotton yarn and actually "undid" a washcloth I had started but didn't finish quite a while ago. I think it worked out okay. My finished "center circle" isn't a perfect circle, but maybe it will look better when I make another one. Once it is wet I probably won't be able to tell it doesn't have a "perfect center circle". (I really need to work on this problem I have with perfectionism.)
Anyway I have lots of pictures but it shows how to make what I am calling a "sunburst" 14-point washcloth. I should add that I finished it in an evening....I think I can do it in a couple of hours when I am not having to stop to take pictures.
Here is the pattern as Simply Notable presented it:
# 8 knitting needles (U.S.) ((I used #9 needles))
Cast on 14 stitches and knit across
1. Knit 4, yarn over, knit, leaving 2 stitches and knit back
2. Knit 4, yarn over, knit, leaving 4 stitches and knit back
3. Knit 4, yarn over, knit, leaving 6 stitches and knit back
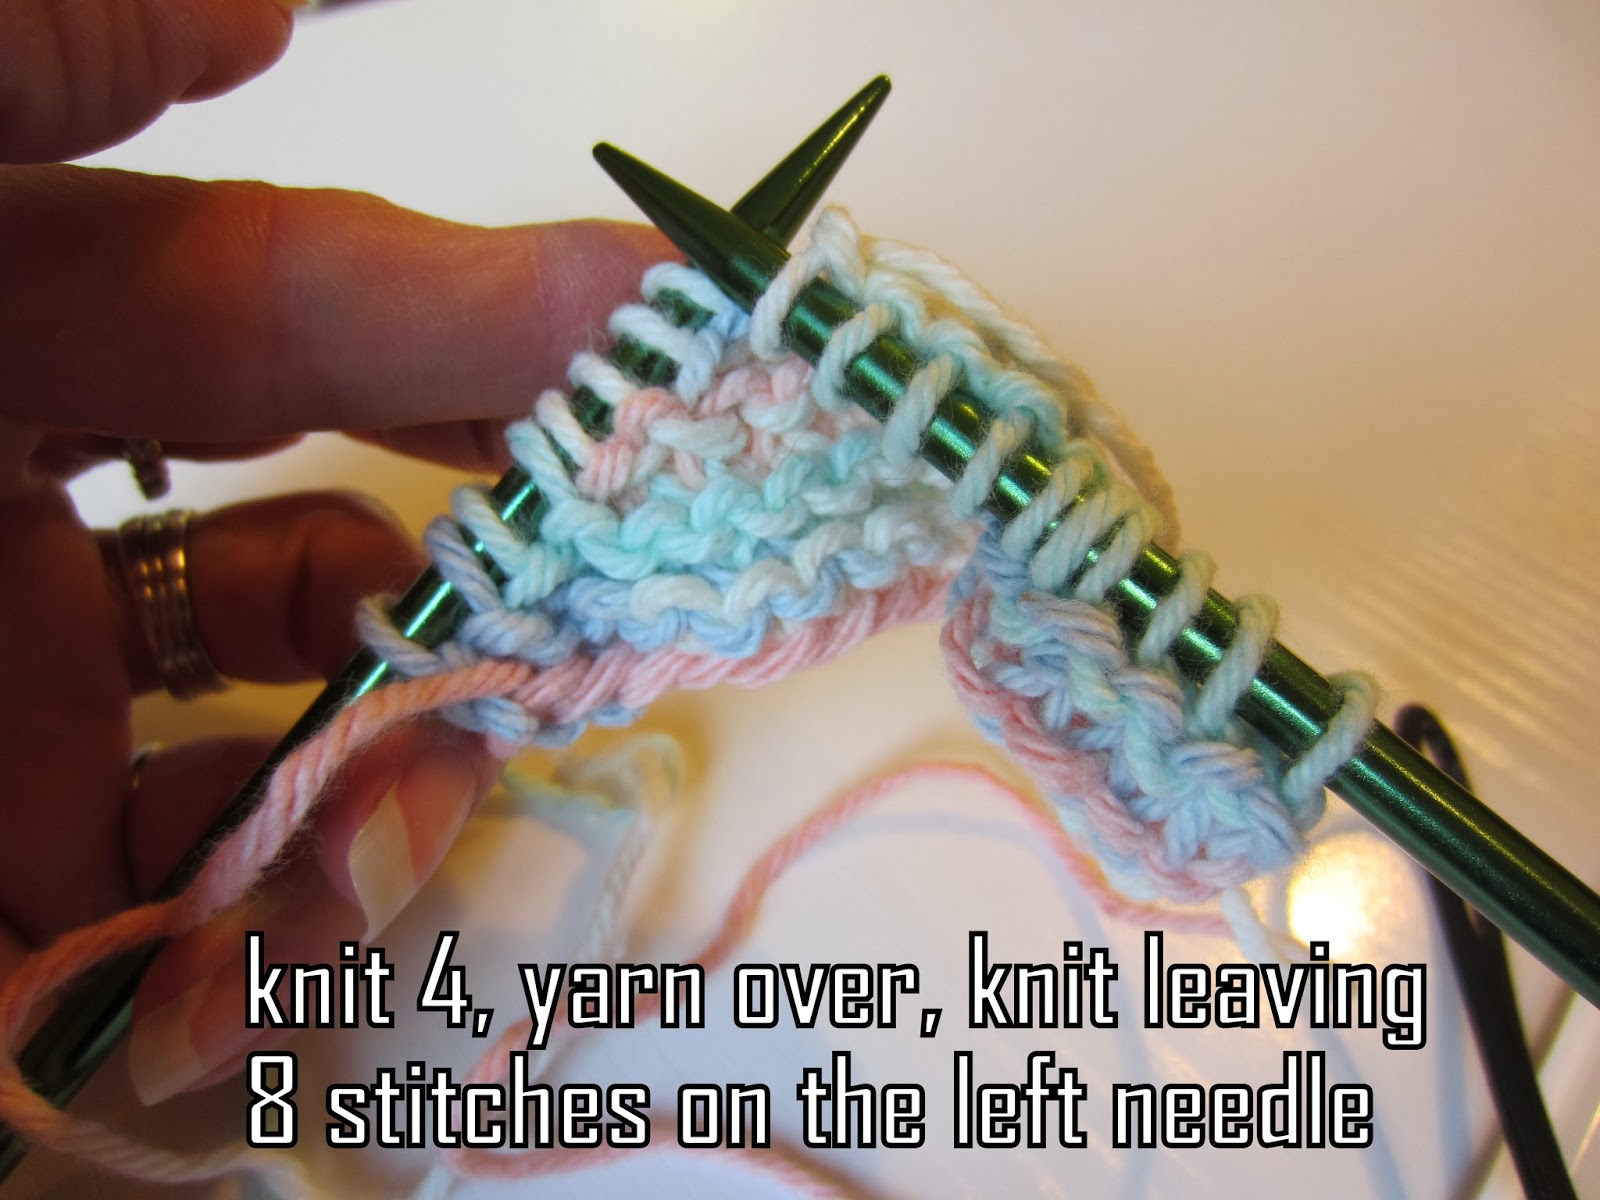
4 Knit 4, yarn over, knit, leaving 8 stitches and knit back
Cast off 4 and knit to end (should be 14 stitches on needle)
Repeat for 14 points
Leave enough yarn to sew sides together and go around circle and draw circle together. Tie ends in a double knot.
****You have to include the initial "knit across" after casting on the 14 stitches here in the repeat so that you will be back on the right side for the next point. Her numbers 1 - 4 was confusing for me as that implied the pattern to me. In my pattern I made it row 11 to better follow the pattern. See below with my pictures.
Here is my tutorial. Hopefully it will help if you are like me and need a little bit more directions. I have included my directions beside the pictures. If you have any questions, please ask. I will get back to you as soon as possible.
"SUNBURST" - 14 - POINT KNITTED WASHCLOTH PATTERN
Cast on 14 stitches
Row 1 - Knit across the 14 stitches
Row 2 - Knit 4, then yarn over (bring yarn from back over front of right needle and then insert the right needle into next stitch on left needle to knit)
Knit the next 8 stitches, leaving the last two stitches on the left needle (end of row 2)
Row 3 - Turn, bringing the yarn to the back for knitting
Knit across to finish Row 3 - now 15 stitches
Row 4 - Knit 4, yarn over, knit across leaving the last 4 stitches on the left needle.
Row 5 - Turn, move the yarn to the back and knit across the row - now 16 stitches.
Row 6 - Knit 4, yarn over, knit across leaving the last 6 stitches on the left needle.
Row 7 - Turn, moving the yarn to the back to knit
Knit across - Row 7 is finished with 17 stitches
Row 8 - Knit 4, yarn over, knit across leaving the last 8 stitches on the left needle
Row 9 - Turn, move yarn to the back to knit across the row - now 18 stitches on the needle
Row 10 - Bind off the first 4 stitches
(you now have 14 stitches on the two needles)
Knit across to end - Row 10 finished
***Row 11 - Knit across. First point finished. (She doesn't include this row but it puts you back on the right side.)
Row 12... - Repeat Rows 2 thru 11 thirteen more times to make 14 points.
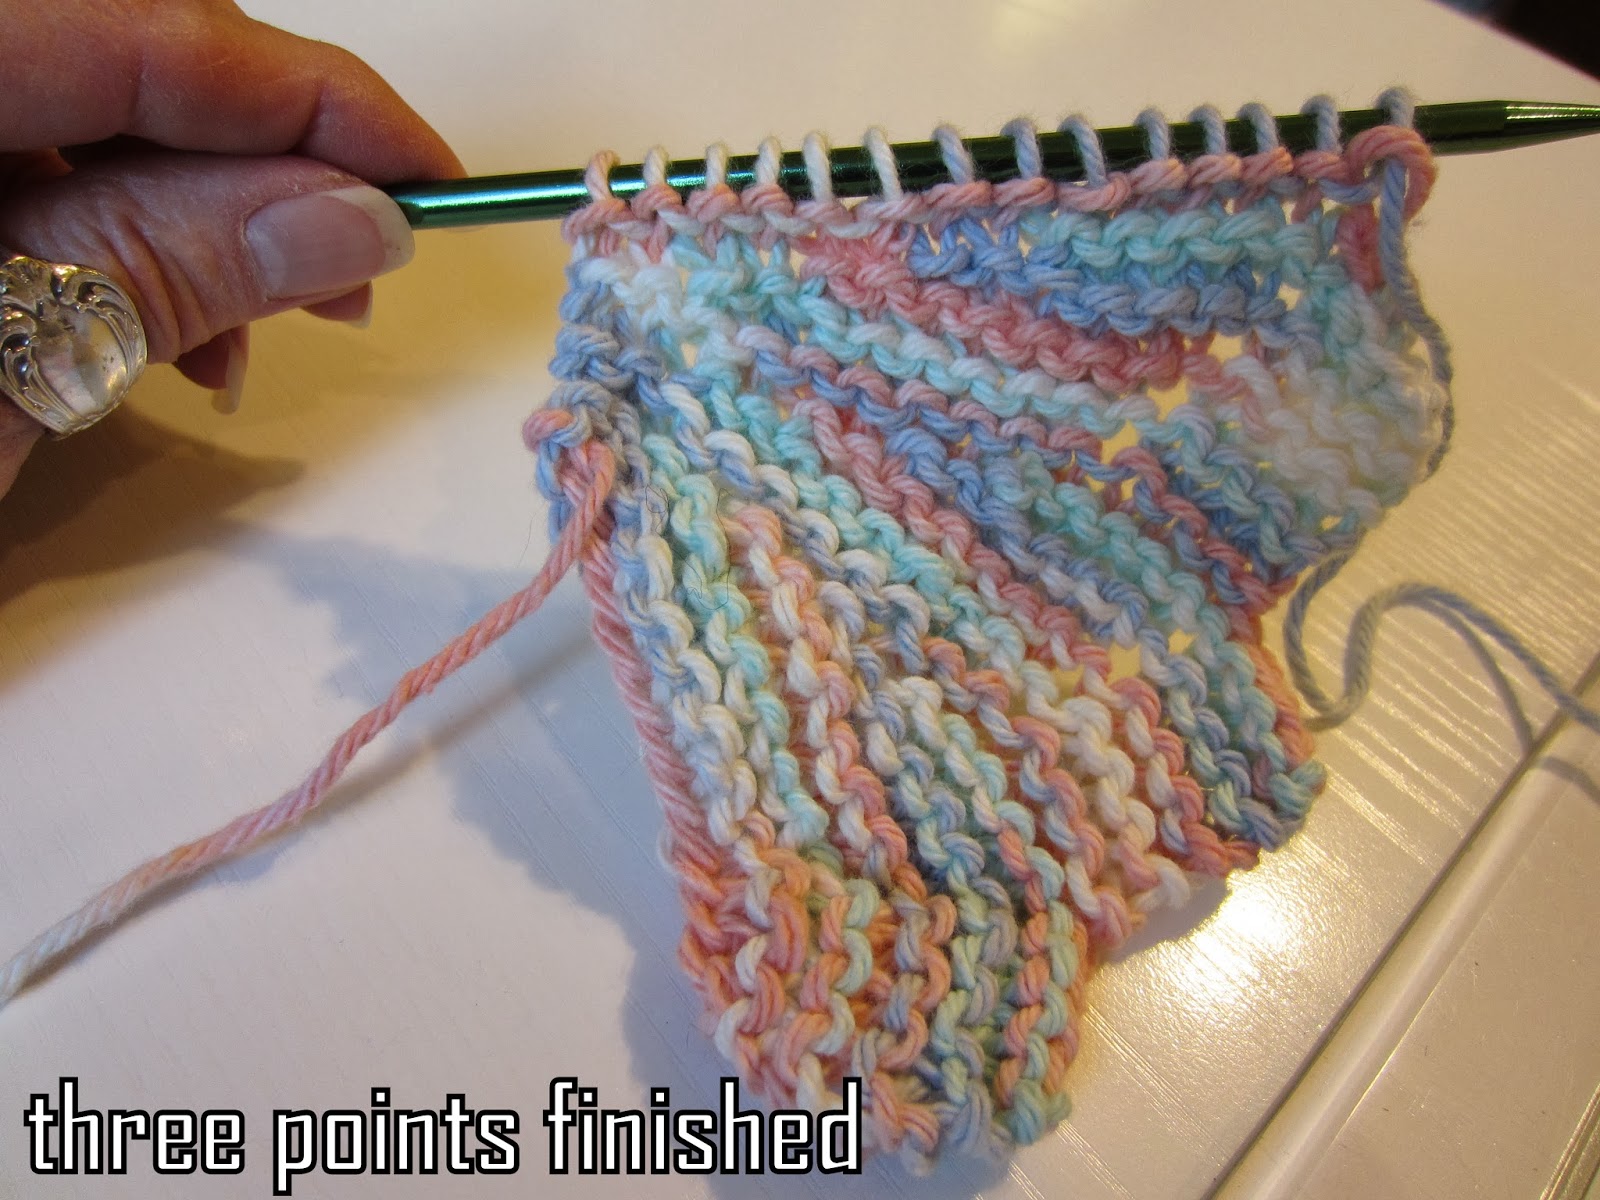
(Third point finished)
and fourth point finished (You get the idea)
Fourteen points finished.
To finish the washcloth....
-cut the end of the yarn...for the desired length, measure 4 times the length of the 14 (bound) stitches for weaving the ends
- tie the two ends together in a double knot to make a closed circle
- thread a tapestry needle with the cut yarn and insert the needle in the (cast on) stitch on the left
and then the top loop of the (bound) stitch on the right
all the way down - (the 14 cast-on stitches should match up with the 14 bound stitches)
The other end (from casting on the stitches) can be woven on the wrong side in the same manner.
Totally finished....

 Right side.
 Here is what your work will look like when you are finished with ROW 4 and ready to do ROW 1. You see the stitches in pairs on the needle with a single stitch at the beginning.
  To do this you bring the yarn to the front like you would if you were going to purl.
  Then bring the yarn back over the right needle to knit the next two stitches.
 The first purl stitch in the trio will be pulled back over the YO and last purl stitch you made and then taken off the needle.
  You have to hold the thread tight so that the two stitches you are passing over - the YO and purl - don't fall off the needle. This gets easier as you go along.)