Our grandson, Henry Matthew, was born on October 12 giving us 3 grandsons and 3 granddaugthers now. We planned to go see "him" and the rest of the family over Thanksgiving, but plans got changed. Later that weekend we went to Branson for a week with our friends, Janice and Leon.
One day when Janice and I went out on our own shopping, we found ourselves in a quilt store and that is where we saw a baby quilt on display that caught both of our attention. The first thing I noticed when we went in the store was a sign that said no photography or note-taking was allowed.
That meant that Janice and I really had to study the quilt to decide how it was made. We changed our minds several times as we noticed more things about it. A sales lady came up and asked us if we had any questions and I told her we were just trying to figure out how it was made. She told me there was a template they sold to cut the material.
When I saw it I realized it was just a square inscribed in a circle. I didn't need a template for that....I used to teach math.
All I would need to do was find some material and then decide how much to buy. The store had used chenille for the "back" and then a cotton for the top. My dil Sara had chosen the popular "owl" for the theme for the nursery. We couldn't find anything in an owl print appropriate though so I had decided on just a striped print, when Janice saw the owl/tree print that I fell in love with.

Doing some quick math* and adding a little extra to be safe since we were in a hurry and I was getting confused (since we weren't supposed to be taking any notes), the material was cut and we were on our way to another store to shop some more.
* Back when I was making a lot of rag quilts, I created a spreadsheet so I didn't have to do the math every time my friends and I went to buy material. I haven't made a rag quilt in over 5 years, so I haven't looked at it recently. Here is a brief (do I "know" brief....ha) explanation that might help you out.
Generally speaking cotton fabric is 42 - 45 inches wide. I just figure it is 40 inches wide for my calculations (this allows for the fabric to shrink when prewashed). Decide the size you are going to cut your squares (remember to cut the square 1/2 inch bigger than you want your finished square to be for the 1/4 inch seams)....for my purpose here we will say we will use a cut 5 - inch square. Divide 40 by 5 which is 8. You will be able to cut 8 squares from a 5-inch strip. If the quilt top will have a total of 64 squares using 2 prints, you will need to cut 32 squares of each print. Now divide 32 by 8 and you get 4. That means you will have to cut 4 strips that are 5 inches wide to get the 32 squares. Now you will multiply the number of strips (4) by the size of the square/strip (5) and you get 20. That is 20 inches of material you will need to have to get the 32 squares.
1 yard = 36 inches; 1/2 yard = 18 inches; 1/4 yard = 9 inches; and 1/8 yard = 4.5 inches.
For 20 inches you should buy 5/8 yard of material since 18 (1/2 yd) + 4.5 (1/8 yd) = 22.5 inches. This will give you extra to allow for shrinkage.
Back at the room, I started taking some more detailed notes and making sure I had gotten enough material. I decided the size I would make the quilt (6 x 9 squares), etc.
About a week later after we got back home and I decided to start working on it.....I only had about 3 weeks since we would be going right after Christmas.....I couldn't find the detailed notes I had taken that night. That meant I had to rethink everything and I changed my mind regarding the size. (Since the total number of squares only differed by 1, it was okay.)
The quilt would be 8 x 8 squares or 40 x 40-inches square. The top would consist of 64 cut 5-inch squares using two different prints. The back would be circles from 3 different chenille colors - 21 of two of the colors and 22 of the third one.
Once I had decided to make the square 5 inches, the next thing I had to do was see how big the circle would be.
 I drew the 5 inch square on a piece of paper
 Then I drew diagonal lines from the opposite corners to find the center of the circle.
 It would have been real easy to draw the circle if I had had a protractor, but I didn't. So instead I just took a piece of string, tied a loop in one end, inserted a pencil in the loop and held the other end with my finger in the center of the square and adjusted the length so that my finger was holding it in the center and the pencil lead matched up with one of the corners of the square with the string taut. Moving the pencil around I made a circle that touched each corner of the square. (I couldn't get a picture of this since I was using both hands with the string and pencil. The diameter of the circle ended up being 7-1/8 inches.)
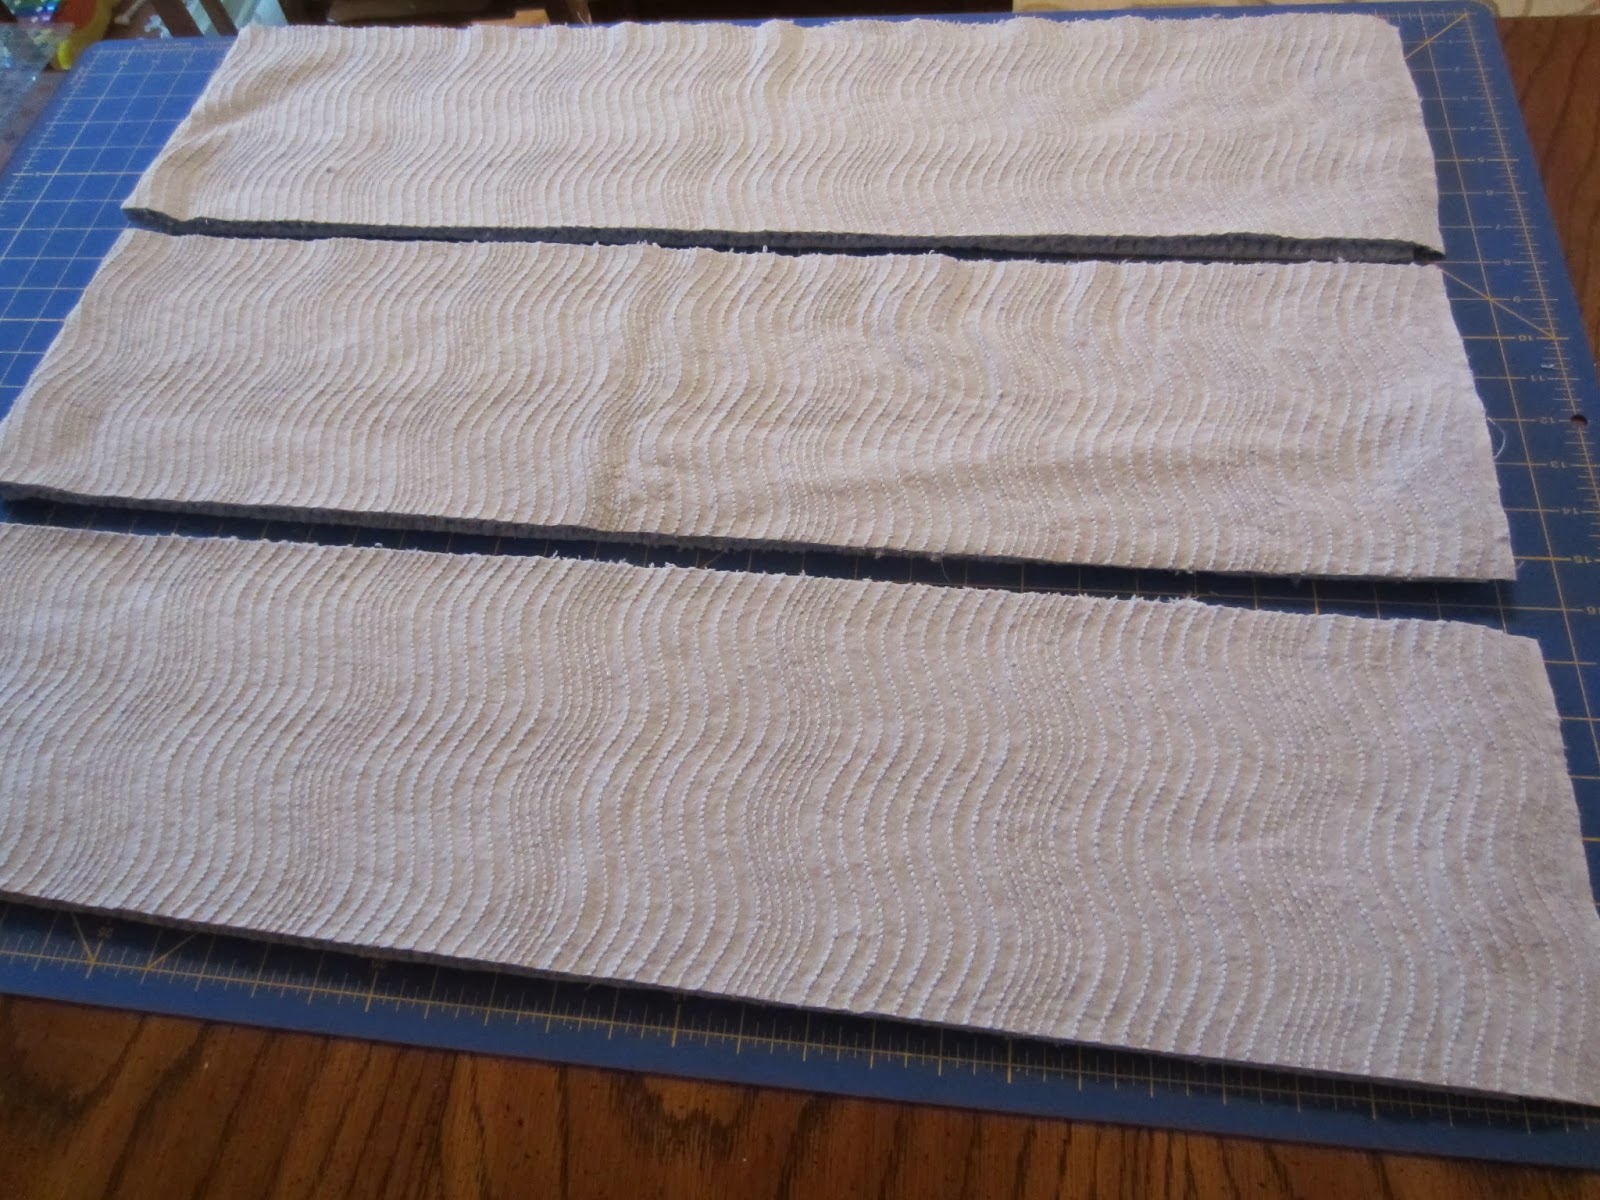 I decided the easiest way to cut the circles would be to cut 7-1/8 inch squares from the chenille. Then I could just round the corners and I would have a circle with a diameter of 7-1/8 inches. So I cut the chenille into 7-1/8 inch strips.
 Then I cut the strips into 7-1/8 inch squares. Here are the three colors all cut.
 Using a piece of cardboard, I cut a template for the circle. (Call me crazy, I redrew the square on the cardboard after I outlined the circle .. not sure why. My perfectionist ways I guess.)
 Then I had to round the corners on the squares I had cut from the chenille.
 One down, 62 more to do...
 All done...It was really exciting getting them done and it really didn't take that long.
 It helped because I have a turntable I got at an estate sale that everything fit on and I could just turn it around and not have awkward cuts to make. I decided to show you the under side of the turntable.
 I didn't have enough material to "fussy cut" the print fabric for the top, but that was okay. The owls and trees were strips on the fabric
 so I simply cut 5 inch squares so that I had 32 owl prints
 and 32 tree prints.
 Since I had not bought the template the quilt shop sold, I had to decide how to assemble the quilt. I could tell from looking at the sample, that the circle wrapped around to the top and had the look of the cathedral window quilt. So I decided to center a square on the circle - wrong sides facing - (pinned in center) and connect the circles on the "sides" of the square similar to how I make rag quilts...with right sides of the chenille facing, sewing the two circles together down one side of the square.
 I laid each row out to make sure I was spreading the "prints" out and then sewed each row.
 Once I had two rows done, I sewed the two rows together.
 This is what it looked like on the back side after sewing the first two rows together. (I pinned circle down along the edge of the quilt to get the full effect.)


I was so anxious to see how it was going to look with the overlaps sewed down that I started sewing down the overlaps from the first row. You just sew close to the edge making a complete circle before stopping.
You can only do the outer row at this time, but if you look closely you can see most of the circle stitched.
 As it turned out, I decided this was the best way to do it. Not sure if that is how the directions would have said to do it, but it was really easy "quilting" it as I went. As soon as I could sew around the complete circle with the overlaps, I did.
 I also stitched the blanket in two separate halves first and
 then sewed the halves together. This cut down on bulk when I was sewing the overlaps down.
 I only had the circles in the center to sew down and I was finished.
 I think Henry liked it.
One day when Janice and I went out on our own shopping, we found ourselves in a quilt store and that is where we saw a baby quilt on display that caught both of our attention. The first thing I noticed when we went in the store was a sign that said no photography or note-taking was allowed.
That meant that Janice and I really had to study the quilt to decide how it was made. We changed our minds several times as we noticed more things about it. A sales lady came up and asked us if we had any questions and I told her we were just trying to figure out how it was made. She told me there was a template they sold to cut the material.
When I saw it I realized it was just a square inscribed in a circle. I didn't need a template for that....I used to teach math.
All I would need to do was find some material and then decide how much to buy. The store had used chenille for the "back" and then a cotton for the top. My dil Sara had chosen the popular "owl" for the theme for the nursery. We couldn't find anything in an owl print appropriate though so I had decided on just a striped print, when Janice saw the owl/tree print that I fell in love with.
Doing some quick math* and adding a little extra to be safe since we were in a hurry and I was getting confused (since we weren't supposed to be taking any notes), the material was cut and we were on our way to another store to shop some more.
* Back when I was making a lot of rag quilts, I created a spreadsheet so I didn't have to do the math every time my friends and I went to buy material. I haven't made a rag quilt in over 5 years, so I haven't looked at it recently. Here is a brief (do I "know" brief....ha) explanation that might help you out.
Generally speaking cotton fabric is 42 - 45 inches wide. I just figure it is 40 inches wide for my calculations (this allows for the fabric to shrink when prewashed). Decide the size you are going to cut your squares (remember to cut the square 1/2 inch bigger than you want your finished square to be for the 1/4 inch seams)....for my purpose here we will say we will use a cut 5 - inch square. Divide 40 by 5 which is 8. You will be able to cut 8 squares from a 5-inch strip. If the quilt top will have a total of 64 squares using 2 prints, you will need to cut 32 squares of each print. Now divide 32 by 8 and you get 4. That means you will have to cut 4 strips that are 5 inches wide to get the 32 squares. Now you will multiply the number of strips (4) by the size of the square/strip (5) and you get 20. That is 20 inches of material you will need to have to get the 32 squares.
1 yard = 36 inches; 1/2 yard = 18 inches; 1/4 yard = 9 inches; and 1/8 yard = 4.5 inches.
For 20 inches you should buy 5/8 yard of material since 18 (1/2 yd) + 4.5 (1/8 yd) = 22.5 inches. This will give you extra to allow for shrinkage.
Back at the room, I started taking some more detailed notes and making sure I had gotten enough material. I decided the size I would make the quilt (6 x 9 squares), etc.
About a week later after we got back home and I decided to start working on it.....I only had about 3 weeks since we would be going right after Christmas.....I couldn't find the detailed notes I had taken that night. That meant I had to rethink everything and I changed my mind regarding the size. (Since the total number of squares only differed by 1, it was okay.)
The quilt would be 8 x 8 squares or 40 x 40-inches square. The top would consist of 64 cut 5-inch squares using two different prints. The back would be circles from 3 different chenille colors - 21 of two of the colors and 22 of the third one.
Once I had decided to make the square 5 inches, the next thing I had to do was see how big the circle would be.
I was so anxious to see how it was going to look with the overlaps sewed down that I started sewing down the overlaps from the first row. You just sew close to the edge making a complete circle before stopping.
You can only do the outer row at this time, but if you look closely you can see most of the circle stitched.
This is one of the most adorable quilts I've seen. Thank you for showing us these step-by-step directions.
ReplyDeleteThanks for your words Mimi. It did turn out so cute.
DeleteFon's and Porter call this quilt the Peek-a-Boo quilt and have the templates for sell. Like the chenille idea.
ReplyDeleteThat's good to know if you don't want to cut your own circle. I liked choosing the size I wanted to make my circle. (and I'm cheap.ha) The chenille is so sweet on the quilt. Thanks for your input.
DeleteGot here from Pinterest. Love the chenille idea, love how the different colors of chenille show off different colors in the great fabric you picked for the front. It turned out so super cute!
ReplyDeleteThanks, Kathy. So glad you found my site. Hope you will check out some of my other posts/tutorials.
Deletewhat a wonderful quilt for a baby! It looks so cozy!
ReplyDeleteThanks, Bea! It was so soft with the chenille.
DeleteThis is a great tutorial on how to make this quilt and figure the yardage. Thank you so much for sharing.. It is a cute quilt..
ReplyDeleteThanks so much Christine. I was really pleased with it. Did I inspire you to make one?
DeleteOH MY GOODNESS!!!! I LOVE THIS QUILT!! Thankfully I have a new grandbaby on the way and have chenille to do this with! Thanks for sharing such a thorough tutorial.
ReplyDeleteHow exciting for you! Enjoy your new grandbaby. Thanks for stopping by and your kind words. It does make a beautiful quilt.
DeleteWhat a sweet quilt! I just came over from Pinterest intrigued by the chenille - especially as I have quite a bit of chenille sitting around! Thanks for the instructions, can I just ask - when you sew the chenille overlap down on the front, do you just sew it raw edge? Presumably it's pretty good from a fraying perspective?
ReplyDeleteGlad you found me, Wonky Patchwork! Yes, I left the edges of the chenille raw. I sewed just inside the edge so that the edge was free. I loved the look it gave it and it would fray a tiny bit. I do recommend using a "walking foot" attachment for ease of sewing with the chenille. Hope you will give it a try. Thanks again for stopping by and leaving your kind words and asking your question.
DeleteIts wonderful!
ReplyDeleteThanks, Mara.
DeleteWhat a beautiful job. Love it!!!!
ReplyDeleteThanks so much for saying so.
DeleteI have been attempting to make this quilt and the chenille circles slip when I sew causing the line to be crooked on one side. Any pointers? Did you have this problem? I wanted to make one of these for a baby shower so bad because it is just gorgeous!
ReplyDeleteSorry to hear of your difficulty. I had several pins holding the "edge" down as I sewed around it. I also used a walking foot attachment on my sewing machine. I hope this helps. It does make a darling blanket. Let me know how it turns out.
DeleteSo, I bought a walking foot and switched my needle to a ball point. The walking foot helped tremendously! The blanket looks really good so far! I'm making this for a baby shower I have to attend in two weeks. Thank you sooo much for the instructions and the tip to fix my crooked line problem! I just love this blanket! I can send you a picture if you want!
DeleteWould love to see your quilt finished. Glad I was able to help you out. My email address is mypatchworkquilt@gmail.com
DeleteWould love to see your quilt finished. Glad I was able to help you out. My email address is mypatchworkquilt@gmail.com
DeleteI will send you one when it's done. Hopefully, this weekend. One more question. Were you able to machine wash this and dry it in a dryer?
DeleteYes I could have. I prewashed all the material before I cut it and dried it like I would after it was finished...Cold water, gentle cycle and dry on low. I don't use much soap when I prewash the material. Give instructions for care when you give it at the shower. I don't remember if I washed and dried it after I finished it or not (since I had done that before I cut it.) If you think you might have gotten it dirty, you might want to wash it again. I don't usually wash it again. Looking forward to seeing a picture of it.
DeleteThis is the cutest quilt I ever saw. You are very talented. Thank you for sharing with us that are not so talented. Great instructions. Can not wait to try this. Thanks again.
ReplyDeleteWow Nancy! Thanks so much for saying so. You have made my day! I do enjoy trying new things. Let me know how yours turns out. Thanks again.
DeleteWow Nancy! Thanks so much for saying so. You have made my day! I do enjoy trying new things. Let me know how yours turns out. Thanks again.
DeleteNot only is this one of the cutest baby quilts I've seen,it's also the most innovative. Thank you so much for sharing the clear instructions for making it. You are very talented.
ReplyDeleteThank you so much for your kind words. It makes my day when I hear my tutorial was helpful to someone. Patricia
DeleteLovely Quilt Patricia and great tutorial. I like the fact that it is Quilt as you go and will keep it in mind when I need a baby gift.
ReplyDeleteThanks Judi. I think it would be nice with denim also a little bigger for a throw for an older child. Patricia
DeleteThis is amazing and the directions can even be followed by me. Thanks for sharing,
ReplyDeleteWow! Thanks, Bev. That is so good to hear as I strive so hard to make clear tutorials for all levels of ability to understand. I hope you will give it a try. It really makes a beautiful quilt.
DeletePatricia
Found you via Pinterest....I bought the circle template for this awhile back & have been cutting up denim and scraps of cotton saved (stupidly) from our craft fair days back in the 90's. But with 2 littles joining our family in the spring, I may borrow your chenille idea for baby blankies! Love it!!
ReplyDeleteWow! You sound like one busy lady. Like the idea of using the denim. I would like to do that. How exciting to have two little ones joining your family! Glad you found "me" and left your message. Sorry I didn't see it sooner. Patricia
DeleteYour baby quilt is amazing.
ReplyDeleteThank you so much for leaving a comment to let me know. Patricia
DeleteLove it! I don't think you are cheap, I think you are very smart! You knew how to figure out how to do it yourself, and you went for it! You are definitely a math teacher, though, wow!!! Lol! As far as finding the center, most of the sewing world would just fold it and pin it to find the center, but doesn't matter, you got it done! Great job, grandma! Love the quilt! The 3 background colors, and 2 front ground colors would have really killed me in my perfectionist ways, but you did it, and it is almost as awesome as you! I sure hope to have grands one day before I die, too!
ReplyDeleteThank you for your awesome comments. Made my day. Henry is now 9 and we are visiting with him and the family this weekend. I now have 9 wonderful gkids. May you be blessed with many of your own. Patricia
Delete