I think I saw this block pattern was on Pinterest while I was just scrolling through looking for patterns I might want to try. Then one day on Facebook someone in a quilting group I belong to, someone shared the same picture asking if anyone knew the name of the pattern. I couldn't remember it, but I went back to where I had been and found it. Before I answered her question, I drew the pattern on my graph paper and knew I was going to be making it.
Yankee Puzzle is a beautiful block. The picture had it made in two shades of red. I decided to do mine in two shades of blue. I personally think it would be beautiful in any color. Since the whole block is nothing but HSTs, you definitely have to enjoy making them. But they make an awesome looking block.

When I make HSTs, I cut the squares a whole inch bigger than the finished size instead of the customary 7/8" bigger. Then after I get it made, I can square it up and trim off the excess and come closer to making perfect HSTs. If you would like to read more about making HSTs, check out my post HERE. This pattern is 4 x 4 and a 12" finished square. That means each HST will be a finished 3" so I cut each square 4".
If you look at my graph drawing a lot of ones around the edge but the other half sometimes is two and sometimes 3. So the first thing I did was count how many 1/2 combinations I had and how many 1/3 combos I had. Turns out the combo of 1/2 appears eight (8) times and 1/3 appears four (4) times. The center of the block is made with four HSTs of 2/3 combination. Since we will be making two HSTs out of each square, I will cut half as many squares of each print.
CUT four (4) squares from print #1 (white) and print #2 ( darker print)
CUT two (2) squares from print #1 (white) and print #3 ( medium print)
CUT two (2) squares from print #2 (darker print) and print #3 (medium print)
If you are still with me that means...
CUT six (6) squares from prints #1 and #2 and four (4) squares from print #3


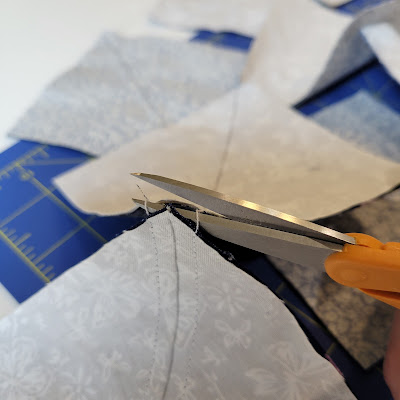
Because I am sewing nothing but HSTs, I used the chain method to save time and thread. To make two HST, you will sew 1/4" from each side of the line you drew, cut the threads between the squares, cut on the drawn line, press toward darker print (wrong side first and then the right side), and then trim down to 3.5". My eagerness to see the pattern, as I trimmed each HST, I started placing them on my design wall in the pattern.


Now that I have all the HSTs made, sized up, and pressed, I started sewing them in pairs starting in the lower left hand corner.

I won't do this with each pair, but make sure you "next" the two angled seams together. If there is an issue with the pressed seams both going in the same directions so that the seams will not "nest", just pin one of them in the other direction and you can repress it when you press the seam you are about to make.

Secure the edges with pins and sew across so you hope when you remove the pins and

open it up, the pair will look like this. Repeat this process until you have all eight pairs sewed and

are ready to sew the pairs together to make four rows.

Once you have the four rows,

you will press the seams so that you will be able to "nest" the seams. If the top row has the seams going to the left, then the next rows' seams should be pressed to the right. (I will show you a picture later of the four rows pressed so you can get the full picture.)

Sew the top two rows together and

then the bottom two rows. Once the block is completed and pressed,

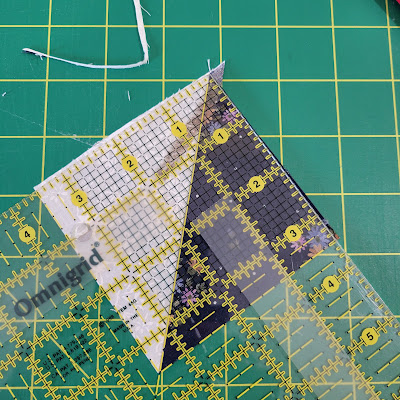
you want to square it up with a 12.5" square ruler. Use the diagonal line and other marked lines to line up the square.

Cut off excess...

The wrong side...

and the right side...
OTHER BLOCK PATTERNS YOU MIGHT BE INTERESTED IN:
Block #31 Log Cabin Quilt Block
Block #1 Disappearing Nine-Patch Quilt Block
Block # 10 HEATHER'S PENNSYLVANIA
Very well explained Thanks.
ReplyDeleteThank you so much. Patricia
Delete