This block called Oh Susannah is a pretty, old block can be made in three different ways. I will explain the three different ways, but can only show you pictures of two of the ways. The method you use will depend upon the prints that you choose to make the block. Sometimes you have a pretty print that you don't want to chop up. I know I do. Sometimes when you are looking at a finished block online, it looks like they didn't cut up the print and then when you zoom in the picture, you can see they did have a seam but did an outstanding job matching it. I don't think I have the talent or the need to show off my skill when most people won't notice, as they say. Anyway, there are two places that you can have the print run continuously - the square-in-a-square for the center section and also for the strips going to the center. I don't know how to really describe the latter accurately. In my tutorial I decided to keep the "square" in the center section one piece. Below the tutorial I will describe how the block could be made differently.
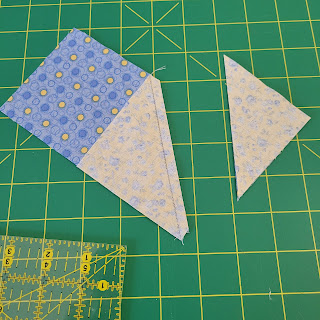
The QST center way is a good way to make the block if you have a print that you don't want to cut up into two squares. Except for the fact that I used a print with so-called lines and got a couple of the squares turned the wrong way and had to "unsew" (aka "rip out") several times. Because of this experience I would probably strongly suggest that you avoid prints with lines, plaids, or directional prints. It will save you many headaches!

HOW TO MAKE THE OH SUSANNAH BLOCK SQUARE WITH A SOLID CENTER BLOCK
You will need three different fabrics - a light/cream/white , one medium print, and one dark print
CUT from Print #1 (light) one (1) - 6.5" square and four(4) - 3.5" squares
CUT from Print #2 (medium) eight (8) - 3.5" squares
CUT from Print #3 (dark) four (4) - 3.5" squares
The first thing we will do is to make the center square - in - a - square using a technique called connector corners. I personally love this method for making a square-in-a-square and having a solid piece center square.

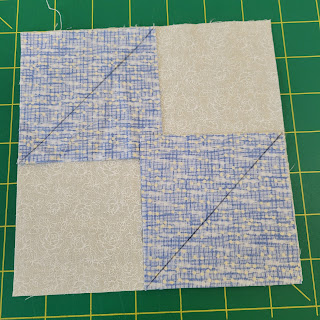
Sew on the drawn line.


Pressed.


Pressed away from the center section.

At this point I decided to check the squareness of this center section. This will assure the flatness of our block when we get finished.

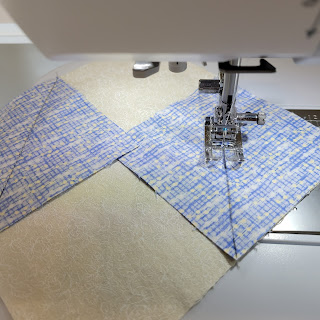
Now add the outer two strips nesting the seams when they meet.


When I squared it up, you can see I have all of my mistakes corrected...Yay.

The back side all pressed neatly.

And the front...Finally! Success!


It is a little harder to press with the bulk in the center. I did end up pressing the seams open which I don't really like to do. The other method uses connector corners similar to what I did with my square above but instead of using it on the center square, you will sew it on the rectangular strip you cut for the long strips to the center.

Remember you cut squares for everything. In the connector corners, you will cut four(4) rectangles 3.5" x 6.5" and sew one of the four (4) white 3.5" squares that you cut for the center square on one end of the rectangle.
Making four of these strips, the yellow pieces come together to make the center. Oh Susannah is a beautiful and really easy block. I hope I haven't turned you off of trying it and that my mistakes will help you when you chose your fabrics and make the block.
OTHER BLOCK PATTERNS YOU MIGHT BE INTERESTED IN:
Block #31 Log Cabin Quilt Block
No comments:
Post a Comment