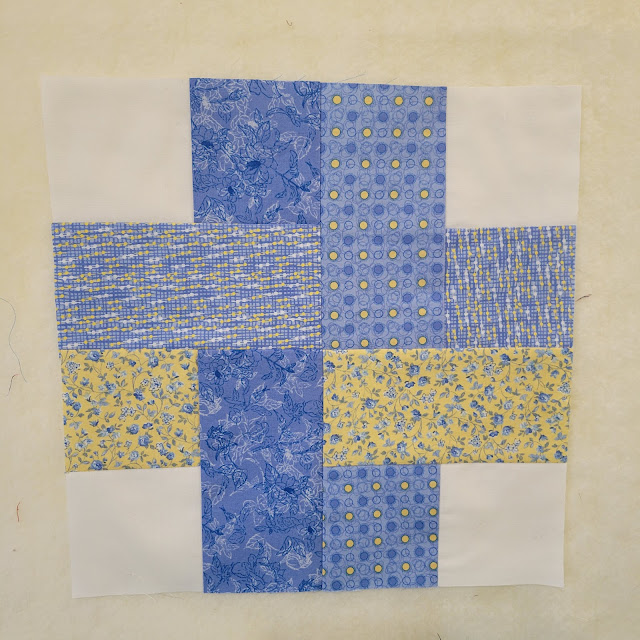
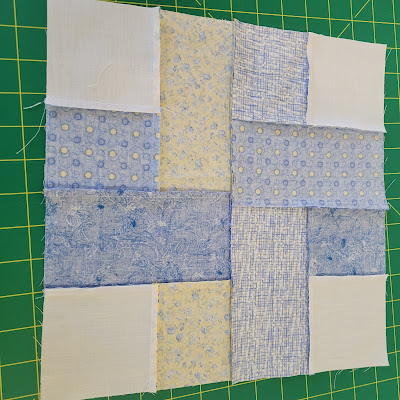
I had forgotten how fast and easy this quilt block went together. I don't remember how I found the block design. Who knows? I could have seen it in a quilt shop finished and on display. Or I could have seen a picture. I love the creation aspect of seeing and then going to graph paper, figuring out the math, and drawing it out. I did find out from one of the ladies in the 30-Block Exchange that the name is Woven Ribbon. I love the name and I love my finished block.
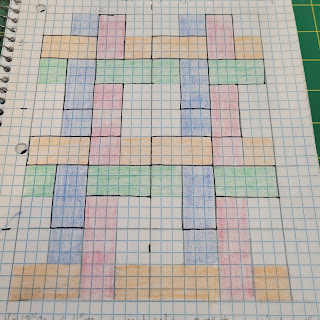
I first made the block in a Blanket of Hope, our quilt group from church. I have a drawing of part of it at the bottom so don't forget to check it out.
One of the reasons the block goes together so quickly and easy is because the block is actually four smaller blocks sewn together and you only have to match two seams one time - when you sew the center of the block.
HOW TO MAKE A WOVEN RIBBON BLOCK
(using a 1/4" seam all strips cut 3.5" wide)
CUTTING:
You will need 4 color prints and one white.
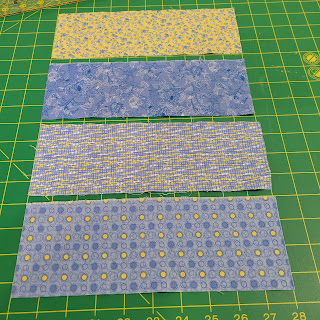
Cut a 10" strip from each of the four. Cut four 3.5" squares from the white. (I cut a 7" strip, double layers of white fabric and then cut them in half.)
From each 10" colored strip cut 3.5" from one end leaving a 6.5" strip and a 3.5" square.
DESIGNING:
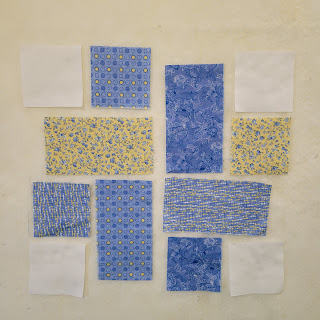
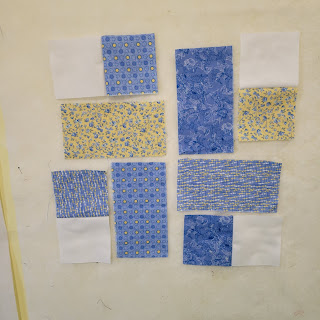
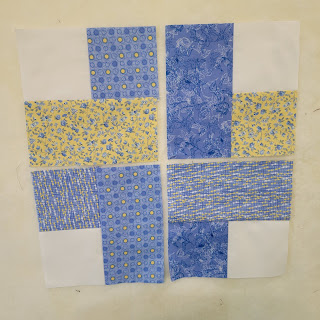
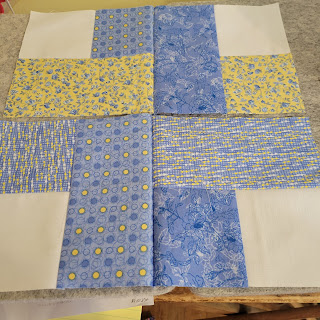
Arrange the pieces in following arrangement on your design wall (felt hanging on my wall) or table. From these you will be making four blocks and then sewing them together.
SEWING & PRESSING:
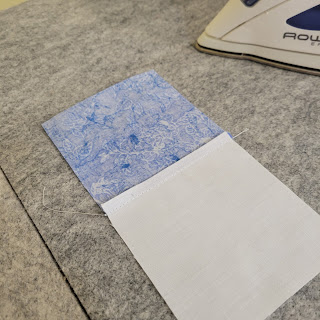
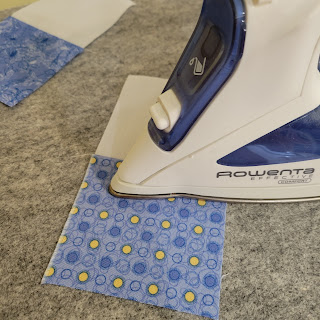
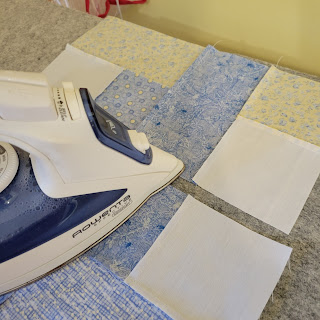
Step 1 - Sew the squares together first.
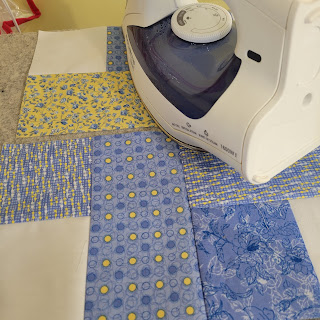
Press both the underside and
top side seam away from the white.
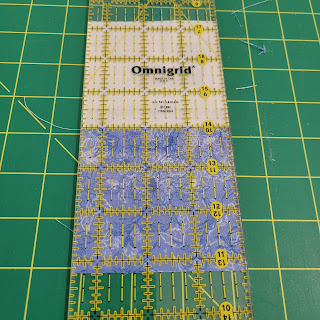
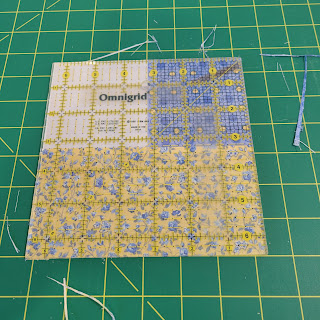
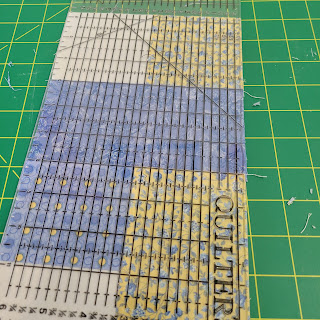
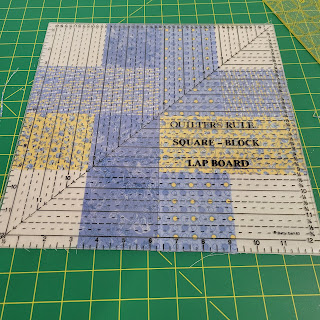
Check the twozie with a 3.5" ruler and trim any access off.
Place twozies back in place with strips.
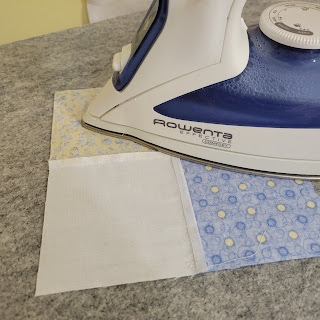
Step 2 - Sew the twozie strip to the 6.5" strips. No seam to match. Press the seam toward the long strip - away from the white square.
Check and trim if necessary to a 6.5" square.
Place back in place for block.
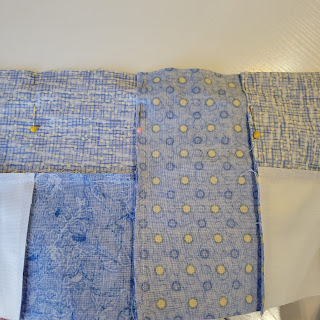
Step 3 - Sew the top two squares together and then the bottom two.
Press the seam in one set one direction and the other set the other so the seams will nest when you sew the two together.
Remember this is the only seam that you have to match in the block.
Don't forget to check and trim as needed using a 6.5" ruler. Every little bit makes a difference.
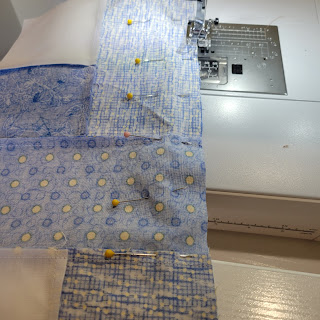
Step 4 - Sewing the two sections together. Nest the center seam and pin on one of the seam.
I also pinned in a few more places to just hold the pieces together. Sew and press the seam either direction.
Step 5 - Trim block down to 12.5" and you are finished.
And this is what it looks like on the underside.
Here is my drawing I made before when I made a Blanket of Hope using the pattern. It also shows you how the pattern continues if you wanted to make more than one block.
UPDATE: Someone asked in a comment for me to respond to how much fabric is needed for a full size quilt for a wedding gift. What a wonderful idea! I found a picture of the quilt I made for the church's quilting group and am sharing it also. It lets you see the design when the block is repeated. She asked for a full size which I have interpreted as a full/double size bed. I will also include other sizes also.
The finished block square is 12 inches so I worked with a whole 12" block. The pattern will lay out with rows (horizontal placement) and columns (vertical placement).
Quilts using a Twelve-Inch Block
columns/rows finished inches mattress type
3 x 4 36 x 48 Baby blanket
4 x 4 48 x 48 Lap throw*
5 x 6 60 x 72
6 x 7 65 x 88 Twin (39 x 75)
7 x 8 84 x 96 Full (54 x 75)
8 x 9 96 x 108 Queen (60 x 80)
9 x 9 108 x 108 King (76 x 80)
Looking at this chart you can see the finished size of a quilt using a 12" quilt block and the actual size of a mattress. I guess you would say that is what makes a homemade quilt so precious and unique. Generally speaking you want a 10 to 12 - inch drop on each side of the mattress. If you do not plan to drape the top over pillows, you just need a 10 - 12 inch drop at the foot. You can work with the pattern by adding borders to make the quilt closer to the size you want.
To find the number of blocks you need using the chart above, just multiply the number of columns by the number of rows and that will give you your answer. ( 3 x 4 = 12, 5 x 6 = 30, 7 x 8 = 56, etc)
Likewise you can discover how many columns/rows you will have by dividing the finished size by the size of the block. That will give you a starting place, at least. ( 93 / 12 = 7.75 or 8 blocks in the row or column)
Look next at the sizes of pieces needed for the quilt. (This Woven Ribbon Block is made from pieces 3.5 inch squares and rectangular pieces 3.5 " x 6.5". The block uses four different color/prints and then white or a background color. A 3.5 inch square and a rectangle 3.5 x 6.5 inches from each color/print is needed for each square. SO using the total number of blocks for the quilt, you can see how many of each size you need to cut for the total quilt. (Ex. quilt has 12 blocks ((3 x 4))...so you will need (12) twelve 3.5" squares from each color/print and (12) twelve rectangles 3.5 x 6.5 inches for the quilt. There are (4) four 3.5 inch squares cut from the white or background color in each block so you will need to cut 4 x 12 or 48 squares from that.)
Several years ago while I was still teaching I created a series of charts to make it easy for me to tell my friends how much fabric they needed to buy when we were out shopping for fabric to make rag quilts because I got tired of having to do the math each time they found fabric they liked. Right now I can't lay my hands on it so I had to do the math. If I don't find them, I see chart-making in my future.
I will try to make it easy for you to follow...we will say you are making a full size quilt using the Woven Ribbon Block Square above - - 7 columns x 8 rows using a finished 12 inch block - - that consists of 3.5 inch squares and rectangles 3.5 x 6.5 inches. There will be a total of 56 blocks (7 x 8).
You will cut (56) fifty-six 3.5" squares from each color/print and (56) fifty-six rectangles 3.5 x 6.5 inches and from the white or background color (224) two hundred twenty-four 3.5" squares (4 x 56 = 224)
We will use 40 inches as a standard width of our fabric. If you are using wider fabric, use the measurement of it. Divide 40 by the size of the piece. (3.5 for this example) 40/3.5 = 11.4. That means from a strip 3.5" wide cut across the width of the fabric, you can cut (11) eleven 3.5" squares. If you can cut 11 squares from one (1) strip and you need a total of (56) fifty-six squares then 56/11 is 5.09. That decimal means you will cut 55 squares from 5 strips which means you will be one square short. Put that aside for a minutes and we will look at the rectangles.
Now we will cut the rectangles that are 3.5" wide and 6.5" long. Using more 3.5" wide strips cut the width of the 40" fabric, you can cut (40/6.5 = 6.15) six (6) rectangles from each strip. How many strips do you need to cut? (56/6 = 9.33) Since my answer wasn't a whole number, that means you will come up short here also since you can only cut 54 rectangles from 9 strips. The nice thing about this pattern is the strip for every piece is 3.5" wide which means you can cut different width pieces from the same strip. You need one more 3.5" square and two more rectangles 3.5 x 6.5 inches that you can cut from one more strip with some leftover for your scrap bag.
If you are still with me you can do the final math (5 + 9 + 1 = 15) which means you will use fifteen (15) strips cut 3.5 x wof* from each of the four color/prints for the quilt top. *width of fabric
For the white or background color, you have four 3.5" squares in each block so 4 x 56 (the total number of blocks) =224 squares. Since you already know that you can get eleven (11) squares from each strip...224/11=20.36, which means you will need to cut 21 strips 3.5" wide across the width of the white or background fabric to cut 224 squares. Wow.
Okay, now take a breathe, get a drink of water or whatever, because we are almost through with this math lesson.
All we have left to do is figure out how much fabric you need to buy to make your full sized quilt. Once again since every piece has been cut from a 3.5" strip, we just need to multiply the number of strips by 3.5...
SO for each color/print fifteen (15) strips are needed and each strip is 3.5" wide ... 15 x 3.5" = 52.5" . There are 36" in a yard. 52.5/36 = 1.45 or we will say 1.5 yards. You could also take 52.5 - 36 = 16.5 inches. Since half a yard is 18 inches, that means 1.5 yards is needed of each color/print. (Depending on how error-free you will be, you might want to buy a little extra incase you make some cutting mistakes. If the fabric isn't too expensive, I might buy 2 yards of each of the four color/prints especially since I always prewash my fabric before I cut it.
For the white or background fabric, you needed to cut twenty-one (21) strips (21 x 3.5 = 73.5) which will require 73.5 inches of fabric. One yard is 36 inches and two yards are 72 inches. That leaves 1.5 inches needed. A fourth of a yard is 9 inches so I would buy 2-1/4 yards of the white or background fabric.
You still have the backing of the quilt to buy though. You can buy fabric 108 inches wide if you like for the backing and will just need to buy enough for the length of the quilt. From my earlier chart, the quilt will be 84" x 96" . (96/36=2.66) or 2-2/3 yards. I would probably go on and buy 3 yards and save the leftover fabric for my stash. If you use 40" wide fabric, you need to buy three times the length of the quilt because you will be sewing three lengths together vertically to have a backing wide enough for 84 inches. It will probably be more expensive in the long run because you would have to buy (2.66 x 3 = 8) eight (8) yards of the 40 inch wide fabric. I also like to stay away from having to piece the backing especially if the fabric has a pattern on it.
So are you ready for the grand totals?
Fabric needed to make a full size quilt using the Woven Ribbon Block 12" Block:
Quilt top:
1-3/4 to 2 yards of four different color/prints 40 inches wide.
2-1/4 yards of white or background fabric also 40 inches wide.
Backing:
2-3/4 to 3 yards of 96+ inch-wide fabric (probably 108" wide)
Batting to cover 84 x 96 inches.
I have tried to explain this as easily as I could. If you have any questions though, please don't hesitate asking in a comment.
Here is the picture I promised.
Other block tutorials:


Very lovely idea, love that it comes together so quickly! Thanks for sharing!
ReplyDeleteThank you. I love patterns that look intricate but are really easy. Patricia
DeleteThis I just finished this block. My very first pieced quilt block. Your pattern was very easy to follow. Thank you for sharing. Pam
ReplyDeleteHow exciting, Pam! The first of many I'm sure. Thanks for letting me know. Patricia
DeleteI love this for a wedding quilt! Do you have amounts of fabrics you used for a full size quilt?
ReplyDeleteThank you so much for such detailed instructions. It goes together so easy. I squared my blocks to 12 inches as my seams were a bit off and they did not measure 12 1/2 inches.
ReplyDeleteI have my Ex lover back just in 48 hours... This is unbelievable... I love this!
ReplyDeleteGet back with Ex... Fix broken relationship/marriage..........
His result is 100% guaranteed.
He cures herpes with herbal mixture
Thanks Robinsonbuckler11 ((@ gmail)) com...
Patricia Bowen
Florida, United States
Thank you so much for all the detail and time you've taken to explain how to calculate the amount of fabric. I very much appreciate it. I will now go and check my stocks of fabric and see if I have enough or need to go shopping again!!
ReplyDelete