After accidentally losing about four hours of work Friday morning, I took a break from my tutorials for the blocks I am making in a 30-Block Exchange Group. I have been writing up the tutorial as soon as I finish the block since my actions are fresh on my mind, but now I have three tutorials to write to catch up.
The other exciting thing that happened was receiving my first block in the mail on Saturday. Several of the members had messaged that they had mailed their thirty blocks, but I hadn’t received any. It is so pretty and I can’t wait to receive another one. Until then I will just plod along finding new blocks to make and writing the tutorials for them.
Today I am sharing the pattern I found online at Quilts to be Stitched called Patience Corner. The block went together especially quickly because one of the quilts I am working on for Blankets of Hope, our quilting group at church, right now is one using this pattern. I did need to change the dimensions because my square was bigger than 12.5” for the Blanket of Hope.
I find many quilt patterns aren’t as difficult as they sometimes look if you can break it down into parts. If you think of this block as four smaller blocks with two rectangles and a square in each AND simply rotate them around, you can see how quickly it will go together. The other great thing about this pattern is there is only one time that you have to match two seams and that’s right at the end. I actually enjoy “nesting” or butting up seams together. It feels so good when you can “feel” that the seams are meeting and then when you open the piece up and see that the seams met, it’s a great feeling. Puts a smile on your face.
When I made the blanket and this block, I only used two colors for each of the small blocks. You could use two different prints for the two rectangles in each block if you preferred. I used the same print for each rectangle.
HOW TO MAKE A PATIENCE CORNER QUILT BLOCK
(12.5” or 12” finished block and using a ¼” seam)
CUT four 4.5” squares from different prints (can use a charm pack and trim down)
Four rectangles 2.5” x 6.5” from Print #1
Four rectangles 2.5” x 4.5” from Print #1 or Print #2
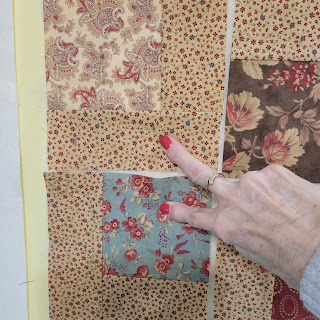
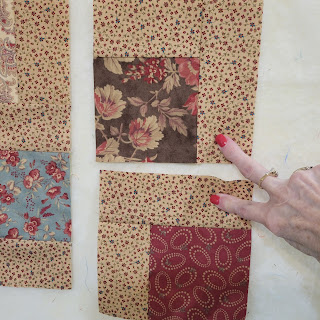
ARRANGE the squares and rectangles using the picture as your reference. I have some spaces so you can see the four smaller blocks.
The first thing to do is to stitch these two pieces together (the square and the short rectangle) using the ¼” stitch.
PRESS the seam away from the square or toward the strip each time on the wrong side and then on the right side making sure that you are pressing close to the seam on the latter.
Return the piece to the pattern on your design wall or table and join these two pieces together.
PRESS the seams away from the center or toward the strip and return to the pattern. You have made the first of the four smaller blocks and will repeat the process with the other three smaller blocks. Remember to repeat each step. Once you have the four smaller blocks sewed and back on your design wall or table
you will need to SQUARE each small block to 6.5” square. This is an important step so that you produce a nice, flat block.
PRESSING is also important. This is what the back of each of the four smaller squares looks like.
RETURNING the trimmed blocks to the design wall, you will SEW these two blocks together. Remember there are no seams to match. Always pin the ends of the strips together and secure the two strips together at the seams with a pin. After you have sewed two of the smaller blocks together, PRESS the seam in one direction, wrong side and then right side. RETURN to its place on the design wall and
repeat with the last two smaller blocks. The only thing different is this time PRESS the seam in the opposite direction. Return to place in pattern.
You are now ready to SEW the two blocks together now to make the 12.5” block.
This is the only time you have two seams to “nest”. This picture shows how pressing the last two sets in different directions is so important. (I do not have a picture of nesting and pinning these two halves but do that first and pin the seams. Then bring the ends together pinning them and finally secure in-between with pins making it smooth.)
This is what you want to see when you open out the block and PRESS on both sides.
One more thing to do and your block is finished. Square it up with a 12.5” square ruler. You shouldn't have much to trim but check it anyway.
Finished block.
Here is a picture of the pattern in a Blanket of Hope I am working on. I plan to add a border around the top to close in all of the squares, but you can see how it looks with many blocks.
Some other blocks you may be interested in checking out:


No comments:
Post a Comment