Thursday, January 30, 2014

ALMOST-FRIED CHICKEN

"If you are staying away from a lot of "fried"....here's an oven version that has fried taste without all the fat."  That's how Mr. Food describes his Almost-Fried Chicken.

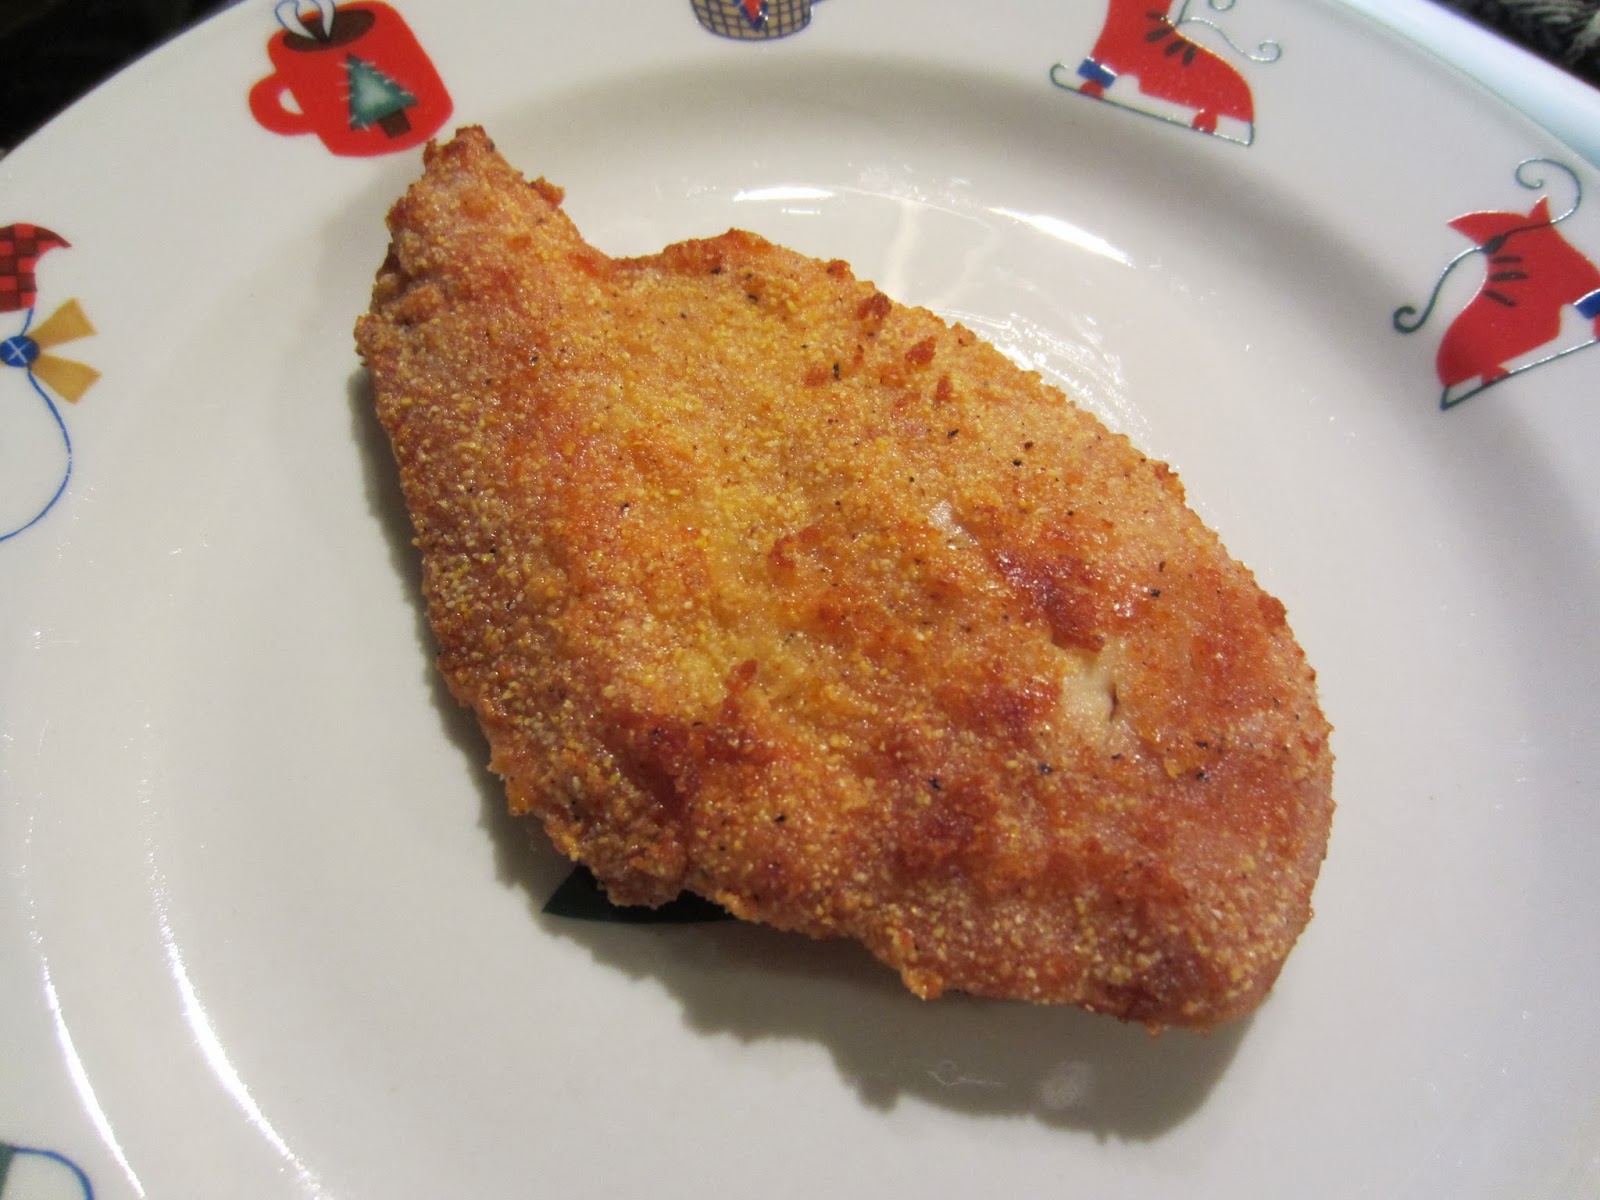
I decided to give it a try the other night.  You can't have too many ways to cook chicken....Right?  I was surprised that it looked just like fried chicken....without the "fried".  

I would suggest that you watch the cooking time as it will change according to the cut of chicken you are using.  I got out what I thought was 2 frozen boneless chicken breast to thaw to use.  After they thawed, I realized one was the "whole" breast but the other breast was actually 2 thinner sliced pieces that I had wrapped together or didn't realize it wasn't a whole breast when I wrapped them to freeze.  Anyway, the three breasts were done at different times.  I actually cooked the thinnest one a little too long.  But now I know and will not make the mistake the next time.  I will give the recipe for using 2 chicken breast with my personal note below for "tenders".


ALMOST-FRIED CHICKEN

1/2     cup flour
1/4     cup cornmeal
1/2     teaspoon pepper
1/2     teaspoon paprika
1/2     teaspoon garlic powder
1/2     teaspoon onion powder
2        chicken breast, split, skinned, and boned
1/4     cup olive oil

Preheat the oven to 350 degrees F.  (Spray a baking pan with cooking spray.)


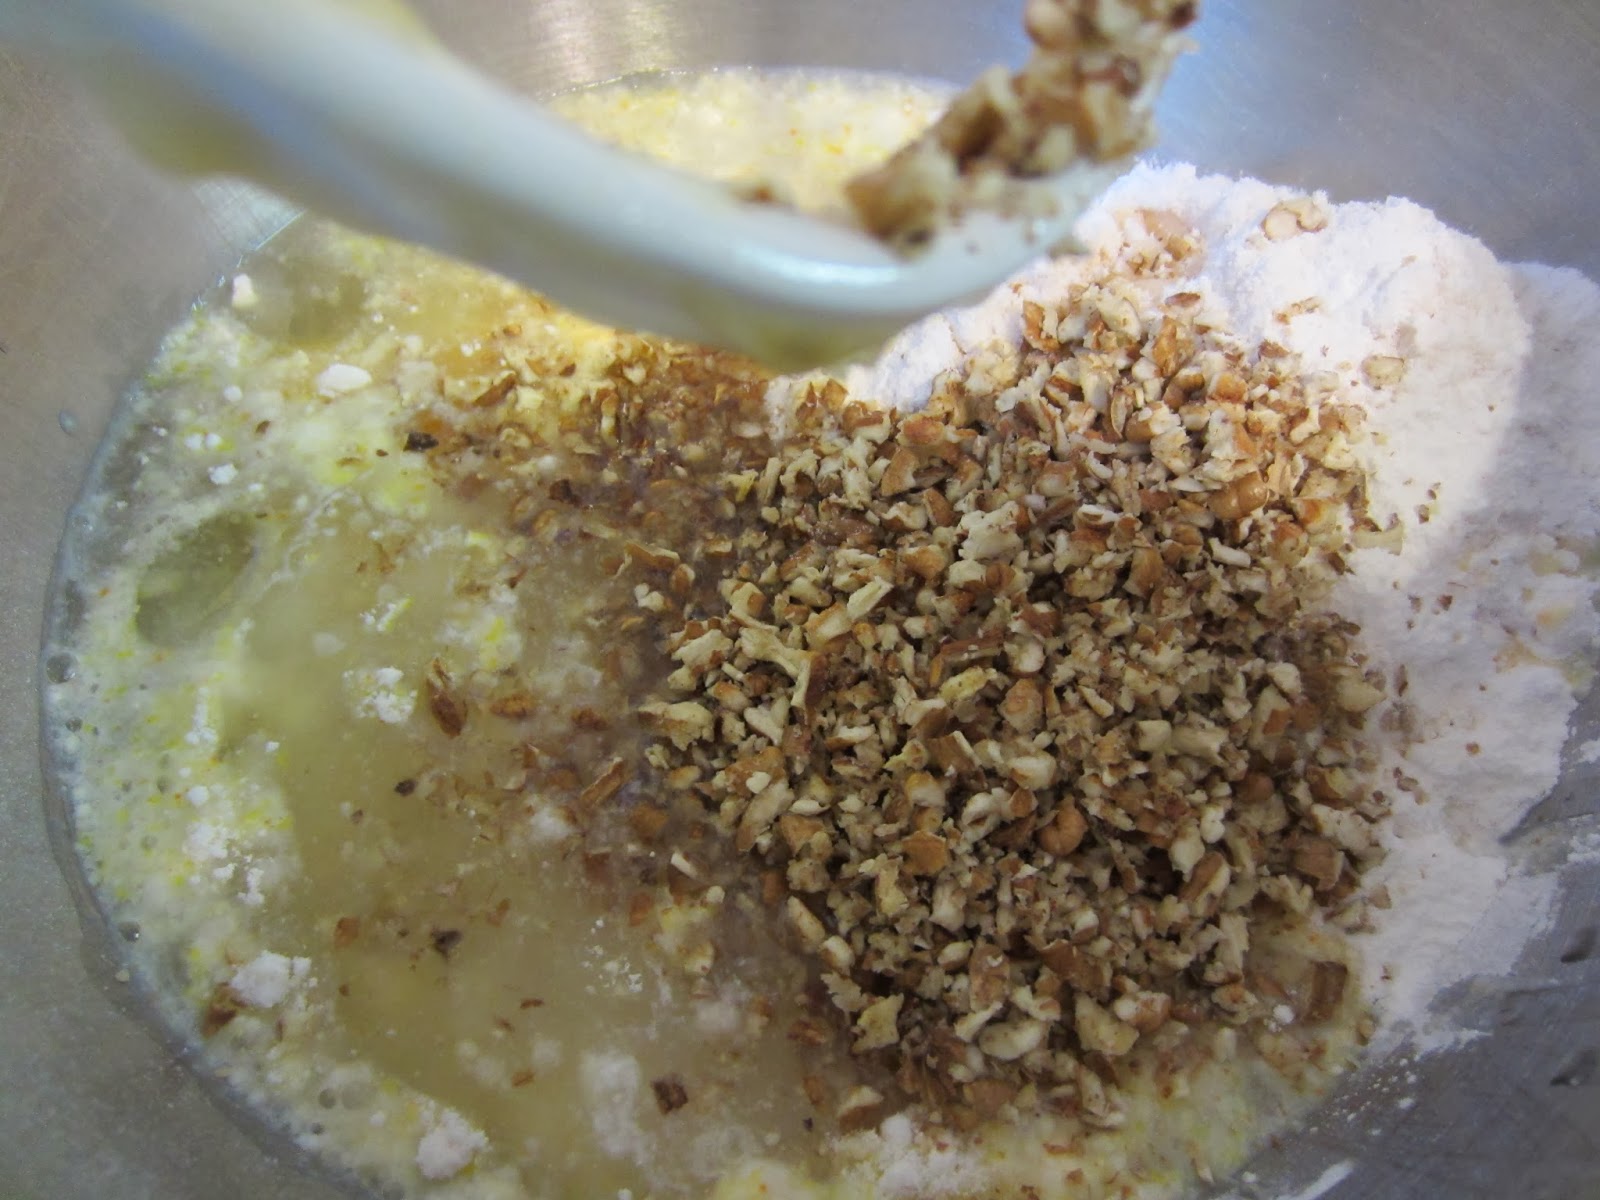
Pour the flour, cornmeal, pepper, paprika, garlic powder, and onion powder into a paper bag or shallow dish. (I did the latter.)


Set up an "assembly line" with the chicken pieces, flour mixture, and baking pan.


Place the chicken breast in the bag and shake until coated, or place in a shallow dish, turning to coat.


Since there was plenty of flour mixture, I made sure every bit of the breast was coated.


Place the coated chicken breasts in a baking pan and pour the olive oil over them. 


Bake for 15 minutes and then turn the breast over.


Bake for another 15 minutes and turn them back over. (I should have taken the smallest tender out at this point as it was done nicely.  The middle one was really close to being done.)


Bake for another 15 minutes if needed for no pink to remain.


Personal note for using tenders: Bake for 10 minutes and then turn them over.  Bake 10 more minutes...check for doneness.  Turn over again and bake 5 - 10 more minutes only if necessary for them to get done.


Wednesday, January 29, 2014

A BABY BLANKET FOR HENRY

Our grandson, Henry Matthew, was born on October 12 giving us 3 grandsons and 3 granddaugthers now.  We planned to go see "him" and the rest of the family over Thanksgiving, but plans got changed.  Later that weekend we went to Branson for a week with our friends, Janice and Leon.

One day when Janice and I went out on our own shopping, we found ourselves in a quilt store and that is where we saw a baby quilt on display that caught both of our attention. The first thing I noticed when we went in the store was a sign that said no photography or note-taking was allowed.  

That meant that Janice and I really had to study the quilt to decide how it was made.  We changed our minds several times as we noticed more things about it.  A sales lady came up and asked us if we had any questions and I told her we were just trying to figure out how it was made. She told me there was a template they sold to cut the material.  

When I saw it I realized it was just a square inscribed in a circle.  I didn't need a template for that....I used to teach math.  

All I would need to do was find some material and then decide how much to buy.  The store had used chenille for the "back" and then a cotton for the top.  My dil Sara had chosen the popular "owl" for the theme for the nursery.  We couldn't find anything in an owl print appropriate though so I had decided on just a striped print, when Janice saw the owl/tree print that I fell in love with.


Doing some quick math* and adding a little extra to be safe since we were in a hurry and I was getting confused (since we weren't supposed to be taking any notes), the material was cut and we were on our way to another store to shop some more.

*  Back when I was making a lot of rag quilts, I created a spreadsheet so I didn't have to do the math every time my friends and I went to buy material. I haven't made a rag quilt in over 5 years, so I haven't looked at it recently.  Here is a brief (do I "know" brief....ha) explanation that might help you out.  

Generally speaking cotton fabric is 42 - 45 inches wide.  I just figure it is 40 inches wide for my calculations (this allows for the fabric to shrink when prewashed).  Decide the size you are going to cut your squares (remember to cut the square 1/2 inch bigger than you want your finished square to be for the 1/4 inch seams)....for my purpose here we will say we will use a cut 5 - inch square.  Divide 40 by 5 which is 8. You will be able to cut 8 squares from a 5-inch strip.  If the quilt top will have a total of 64 squares using 2 prints, you will need to cut 32 squares of each print.  Now divide 32 by 8 and you get 4.  That means you will have to cut 4 strips that are 5 inches wide to get the 32 squares.  Now you will multiply the number of strips (4) by the size of the square/strip (5) and you get 20. That is 20 inches of material you will need to have to get the 32 squares.  

1 yard = 36 inches; 1/2 yard = 18 inches; 1/4 yard = 9 inches; and 1/8 yard = 4.5 inches. 

For 20 inches you should buy 5/8 yard of material since 18 (1/2 yd) + 4.5 (1/8 yd) = 22.5 inches.  This will give you extra to allow for shrinkage.

Back at the room, I started taking some more detailed notes and making sure I had gotten enough material.  I decided the size I would make the quilt (6 x 9 squares), etc. 

About a week later after we got back home and I decided to start working on it.....I only had about 3 weeks since we would be going right after Christmas.....I couldn't find the detailed notes I had taken that night. That meant I had to rethink everything and I changed my mind regarding the size. (Since the total number of squares only differed by 1, it was okay.) 

The quilt would be 8 x 8 squares or 40 x 40-inches square. The top would consist of 64 cut 5-inch squares using two different prints.  The back would be circles from 3 different chenille colors - 21 of two of the colors and 22 of the third one. 

Once I had decided to make the square 5 inches, the next thing I had to do was see how big the circle would be.  


I drew the 5 inch square on a piece of paper


Then I drew diagonal lines from the opposite corners to find the center of the circle.


It would have been real easy to draw the circle if I had had a protractor, but I didn't. So instead I just took a piece of string, tied a loop in one end, inserted a pencil in the loop and held the other end with my finger in the center of the square and adjusted the length so that my finger was holding it in the center and the pencil lead matched up with one of the corners of the square with the string taut.  Moving the pencil around I made a circle that touched each corner of the square.  (I couldn't get a picture of this since I was using both hands with the string and pencil.  The diameter of the circle ended up being 7-1/8 inches.)  


I decided the easiest way to cut the circles would be to cut 7-1/8 inch squares from the chenille.  Then I could just round the corners and I would have a circle with a diameter of 7-1/8 inches. So I cut the chenille into 7-1/8 inch strips.
Then I cut the strips into 7-1/8 inch squares. Here are the three colors all cut.


Using a piece of cardboard, I cut a template for the circle. (Call me crazy, I redrew the square on the cardboard after I outlined the circle .. not sure why. My perfectionist ways I guess.)


Then I had to round the corners on the squares I had cut from the chenille.


One down, 62 more to do...


All done...It was really exciting getting them done and it really didn't take that long.


It helped because I have a turntable I got at an estate sale that everything fit on and I could just turn it around and not have awkward cuts to make.  I decided to show you the under side of the turntable.


I didn't have enough material to "fussy cut" the print fabric for the top, but that was okay. The owls and trees were strips on the fabric 


so I simply cut 5 inch squares so that I had 32 owl prints 


and 32 tree prints.


Since I had not bought the template the quilt shop sold, I had to decide how to assemble the quilt.  I could tell from looking at the sample, that the circle wrapped around to the top and had the look of the cathedral window quilt.  So I decided to center a square on the circle - wrong sides facing - (pinned in center) and connect the circles on the "sides" of the square similar to how I make rag quilts...with right sides of the chenille facing, sewing the two circles together down one side of the square.


I laid each row out to make sure I was spreading the "prints" out and then sewed each row.


Once I had two rows done, I sewed the two rows together.


This is what it looked like on the back side after sewing the first two rows together. (I pinned circle down along the edge of the quilt to get the full effect.)


I was so anxious to see how it was going to look with the overlaps sewed down that I started sewing down the overlaps from the first row. You just sew close to the edge making a complete circle before stopping.

You can only do the outer row at this time, but if you look closely you can see most of the circle stitched.


As it turned out, I decided this was the best way to do it. Not sure if that is how the directions would have said to do it, but it was really easy "quilting" it as I went.  As soon as I could sew around the complete circle with the overlaps, I did.

I also stitched the blanket in two separate halves first and
then sewed the halves together. This cut down on bulk when I was sewing the overlaps down.


I only had the circles in the center to sew down and I was finished.

I think Henry liked it.

Monday, January 27, 2014

CHEESY CHICKEN CRUNCHERS

After a beautiful day yesterday around 60, waking up to 3 was pretty cold this morning.  It was supposed to get up to 14 today.  I guess it did.  I only went outside a couple of times and it did feel COLD.  

The best thing to do on such a cold day is have friends over for a fun afternoon of farkle and that is what I did.  It was even nice when the sun came out about middle of the afternoon and came through the living room window.  I also tried another new dessert that I will be sharing later this week.  It is another Amish recipe called Apple Roll-Ups that I got from a book of three Amish short stories that included a few recipes.  The MOIST BANANA BREAD, AN AMISH RECIPE that I made from a recipe in the book has taken over the top spot for most popular post from my blog.  I think you will like this one when I get a chance to write it up in a couple of days.  My friends all really liked it.  

For today though I am sharing a recipe I made last week that I cut out of the Kansas City Star newspaper not long after we moved here in 2008.  It doesn't advertise the fact but it is a healthy recipe using egg whites, 1% milk, and reduced-fat cheese.  My husband thought it could have used some spices (he does like a little spice in his life) and you could add those without adding to the calories. 


CHEESY CHICKEN CRUNCHERS

1/2     cup all-purpose flour
2        egg whites
1/3     cup 1 percent milk (I used skim milk)
1/2     cup crushed shredded wheat (I had to add a couple more crushed small biscuits to cover the last tender)
1/2     cup reduced-fat shredded cheddar cheese (I used shredded cheddar cheese from 2% milk)
1        lb chicken tenders (I used 4)


Heat oven to 375 degrees F.  Line a 9 x 13-in baking dish with foil.  Place a rack coated with cooking spray in baking dish and set aside. (I just used a cookie sheet.)


Place flour in a  pie plate.


In a second pie plate, mix together the egg whites and milk.


In a third pie plate, mix shredded wheat with cheese. (I cut through the mixture mainly to cut up the cheese more.)


Coat chicken strips in flour (shake to remove excess)


Then coat both sides in the egg/milk mixture


Roll chicken in cereal/cheese mixture


Place chicken on rack in dish.


Bake 15 minutes, then increase heat to 450 degrees. Turn chicken and bake 10 more minutes or until no longer pink.


If you wanted to add your favorite seasonings, just add them to the flour.

Hope you are having a good day today and enjoying whatever the temperature is where you are.  Until tomorrow....

Friday, January 24, 2014

SKINNY BANANA PUDDING CAKE

Some of my quilting friends are coming over to play canasta this afternoon....remember sometimes when we meet to quilt, we play cards instead or after we finish if we don't have much going on.

Well, we didn't get to meet this month as Kay was having fun playing with her grandsons.  So I decided we needed to get together to play cards, at least.

The first dessert I made "flopped" (we won't talk about that) and so I had to hunt through my recipes quickly last night to see what I could make.  I found this recipe for Banana Pudding Cake that I had copied from Woman's Day magazine back in 1982. (The first date on the back of the card was 10-82.)  The recipe called for bananas, a yellow cake mix, and a pudding mix, among other things.  Well, I had everything but the banana pudding, but I did have a vanilla pudding.  Even better the cake mix and pudding mix I had were sugar free.  (I knew we wouldn't eat the whole cake and so I needed to have something leftover that my husband wouldn't hesitate to eat.)

As always with my recipes, if you aren't concerned about calories or sugar intake, just use a regular yellow cake mix without the pudding added (This recipe dates back to before companies started adding the pudding mix in the cake mix.) and pudding mix.


SKINNY BANANA PUDDING CAKE

1 or 2     small ripe bananas
1            pkg yellow cake mix (sugar free)
1            pkg banana creme or vanilla instant pudding (sugar free)
4            eggs
1           cup water
1/4        cup canola oil
1/2        cup finely chopped nuts

Preheat oven to 350 degrees F.  Grease and flour a 10-inch tube or Bundt pan.  Can also bake it in a 9 x 13 - inch pan.

Slice or break bananas into large pieces in a mixer bowl. (My bananas were more normal size so I used 1-1/2. I rarely buy small bananas.)

Beat until well mashed.

Add remaining ingredients.

Blend til moistened. Scrape the sides of the bowl.

Then beat at medium speed for 2 minutes.

Pour into prepared pan

Bake for 60 - 70 minutes or until toothpick inserted near center comes out clean.  (I baked mine about 55 minutes.)

Remove from oven and cool in pan for 15 minutes.

Remove from pan and cool on rack.


Sprinkle with confectioners' sugar if you like....won't be "no sugar added" then, but a little bit will taste good.


Well, the girls are gone.  It was a really fun afternoon....Kay, Sharon, and I won.  It would have been fun even if I hadn't been on the winning team, but it didn't hurt.  The cake was very, very good and the girls all liked it.  We managed to eat half of it. My husband has already enjoyed a piece of it since he got home.
It probably won't be any left by Monday.