The way the 30 - Block Exchange Group works that I am a member of is there are thirty people in the group and each person makes 30 blocks. They can be the same block or different ones. I chose to make thirty different blocks. We were given three months to make the blocks and then a month to get them mailed out. One block is not mailed out as it is your 30th block.
This block was intended to be my kept block. I have always wanted to make a black and white quilt with a little splash of red. I have been gathering different prints for several years now. This block contains some of those prints. Don't ask me how I did it, but somehow I miscounted my blocks. One thing that caused some confusion with me was when someone dropped out and then a week or so ago, we realized another person had dropped out, I think. I'm still confused.
Anyway, I thought I was finishing with my Scrappy Log Cabin Heart block, but last night I rechecked my records and realized I had not sent one of one of the ladies. Her block was so beautiful that she sent me, I decided I had to send her my saved one. It looks different, but really isn't. Besides I have more of the prints, so I can make myself another one. I hope she likes it as much as I do.
HOW TO MAKE GRANDMOTHER'S CHOICE BLOCK
(using a 1/4" seam with four prints)
CHOOSE a focal print, a light background print with a darker design, and two different prints with the darker color in the light print - one slightly darker than the other one
From the background print
CUT four (4) - 2" x 3.5" rectangles
two (2) - 2" x 6.5" rectangles
two (2) - 2" x 9" rectangles
four (4) - 2" x 9.5" squares
From the focal print
CUT one (1) - 3.5" square (fussy cut)
four (4) - 2" squares (fussy cut)
From the medium print
CUT four (4) - 2" squares
From the other medium print
CUT four (4) - 3.5" squares
CUT four (4) - 2" squares (I fussy cut them from the focal print)
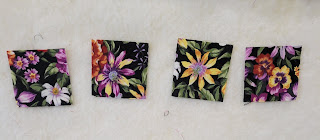
The four fussy cut 2" squares for the outer corners.
First arrange the center 9 - patch on the design wall.
SEW the center together as you would a 9-Patch. (If you have questions, ask below in the comment section.)
PRESS the seams as pictured here basically toward the darker print for the rows. Then I pressed the rows toward the center row.
SQUARE the center section to 6.5". TRIM off any excess.
Back on the design wall with the first row of borders. Start with the side borders.
Then sew the top and bottom ones on. You might be able to see in the picture that after sewing the side borders on, the right side looks a little short
so I decided to check the width of the center section before sewing the top and bottom borders on.
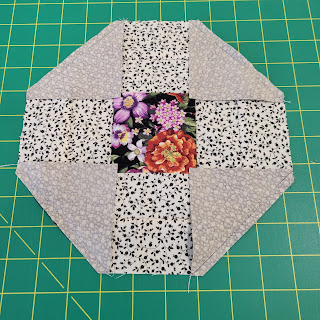
Don't let the picture confuse you, this is the center section; I just turned it on my cutting board so I could cut it better.
The wrong side to show the pressing. I usually PRESS toward the added strip. That seems to be the way the seam wants to lay.
Back on the design wall with the next added pieces.
DRAW diagonal lines on the wrong side of each 3.5" square from the second medium print, a little darker overall than the other medium print.
I realized the finished portion needed to be SQUARED UP and TRIMmed to 9.5" so I did that first and
then placed the squares over the corners on the portion as pictured. SEW with only one on at a time to make sure you have the square exactly over the corner.
Then TRIM the outer portion of the corners 1/4" from the sewed line
and
PRESS toward the darker print.
Now for the last border and start with the side borders first (9.5" rectangles). PRESS toward the added strip.
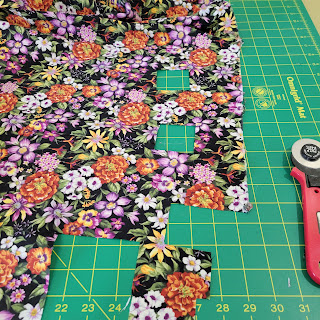
Earlier I said I fussy cut the squares from the focal print. If you are not familiar with fussy cutting, this is what your fabric make look like after you have cut the squares. It wasn't easy to find a complete flower since the square was only 2".
On the design wall to see the best arrangement for the corner squares.
You will SEW the corner stones on the ends of the top and bottom rectangles. This time though PRESS the seam toward the rectangle so you can "nest" the seams when you SEW them to the block.
PRESS seams toward the outer border.
The last thing to do is to SQUARE the block to 12.5" and TRIM off any excess.
The finished block.
OTHER BLOCK PATTERNS YOU MIGHT BE INTERESTED IN:
Block #31 Log Cabin Quilt Block
Block #1 Disappearing Nine-Patch Quilt Block
Block # 10 HEATHER'S PENNSYLVANIA
BLOCK #12 SUZETTE'S INDIANA PUZZLE
BLOCK #16 A STROLL THROUGH THE FLOWER GARDEN
BLOCK #20 RIGHT HAND OF FRIENDSHIP


Hello
ReplyDeleteMy name is Mary and I would like to ask if there is any Guest or Sponsored post option available on your website
I would like to post a unique and high quality article with a dofollow link inside
Please let me know all the guidelines for a perfect article
Best Regards
Mary Smith
crowdwork71@gmail.com