Because this is my grandson, Tyler's first Halloween, I decided to make him a jack-o-lantern bib. The idea just came to me....one of those creative moments I sometimes have.
I was in Wal-mart picking up a few things before going on our vacation and decided to look at the fall and Halloween items. That's when I saw the orange handtowels. I had seen some bibs when Janice and I were shopping for "Baby's First Halloween" and considered buying one for him, but didn't.
When I saw the orange towel, I didn't see an orange towel....I saw a jack-o-lantern bib.
 I used a piece of black material for the face, some flannel to layer in the middle to give the bib a little more "body" or thickness and a black Halloween print for the back. You can trace around a bib you might have for a pattern. I used a pattern template I found on the purl bee for their liberty bibs. I added two inches to their pattern to make mine longer. My finished bib is about 8" wide, 14" long, and with a 3-1/2" round opening for neck after snapped.
Directions:
Materials:
1 orange handtowel
1 scrap of black cotton fabric (about 5" x 7") for the face
1 piece of fabric for the back (about 10" x 15")
1 piece of flannel (about 10" x 15")
1 bib pattern
1 piece (about 5" x 7") of paperbacked adhesive transfer web
- From the handtowel, the fabric for the back, and the piece of flannel cut one each of the bib pattern.
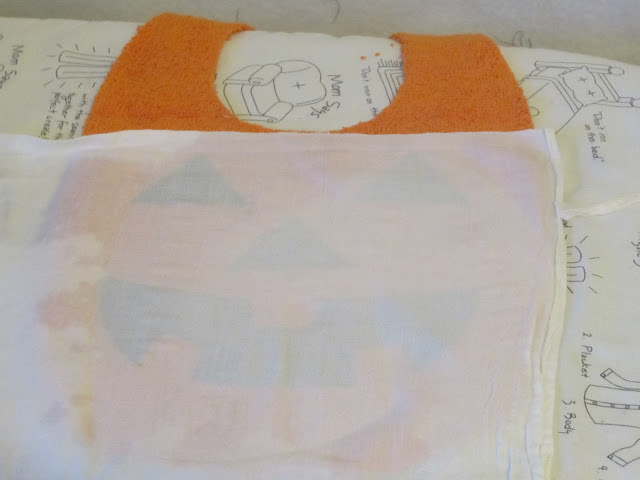
- On a piece of paper, draw the shapes for the eyes, nose, and mouth for the jack-o-lantern to fit the front of the bib. Make sure they will fit on the scrap of black fabric.

- Cut the piece of Pelon Wonder Web the same size as the black scrap.
- Place the rough side of Wonder-Under to the wrong side of the fabric.
- With the iron on dry and cotton, press for 5 - 8 seconds .
- Let cool.
- Draw the desired shapes onto the paper backing side

- Cut the shapes out.
- Gently pull back the paper backing

- Position fusible fabric web side down on the bib.
- Cover with a DAMP press cloth.
- With iron at wool setting, press firmly 10 - 15 seconds. (ALWAYS use a damp cloth.)

- Layer the three bib pieces as if it were a sandwich with the backing wrong side up, then flannel, and finally the towel with jack-o-lantern face up.

- Applique the face on the bib using a close zigzag stitch on your machine.

- Stitch 1/2 inch from the outer edge of the bib to hold the three layers together.

- Trim away any excess to even up the edges of the three layers.

- Clip around the edge close to the stitch about 1/4" apart for the edges to "rag" if you like.
- Attach a heavy duty snap or velcro for a fastener.
Now I can't wait to see Mr. Tyler wearing it.
I was in Wal-mart picking up a few things before going on our vacation and decided to look at the fall and Halloween items. That's when I saw the orange handtowels. I had seen some bibs when Janice and I were shopping for "Baby's First Halloween" and considered buying one for him, but didn't.
When I saw the orange towel, I didn't see an orange towel....I saw a jack-o-lantern bib.

Directions:
Materials:
1 orange handtowel
1 scrap of black cotton fabric (about 5" x 7") for the face
1 piece of fabric for the back (about 10" x 15")
1 piece of flannel (about 10" x 15")
1 bib pattern
1 piece (about 5" x 7") of paperbacked adhesive transfer web
**************
- On a piece of paper, draw the shapes for the eyes, nose, and mouth for the jack-o-lantern to fit the front of the bib. Make sure they will fit on the scrap of black fabric.

- Cut the piece of Pelon Wonder Web the same size as the black scrap.
- Place the rough side of Wonder-Under to the wrong side of the fabric.
- With the iron on dry and cotton, press for 5 - 8 seconds .
- Let cool.
- Draw the desired shapes onto the paper backing side

- Cut the shapes out.
- Gently pull back the paper backing

- Position fusible fabric web side down on the bib.
- Cover with a DAMP press cloth.

- With iron at wool setting, press firmly 10 - 15 seconds. (ALWAYS use a damp cloth.)

- Layer the three bib pieces as if it were a sandwich with the backing wrong side up, then flannel, and finally the towel with jack-o-lantern face up.

- Applique the face on the bib using a close zigzag stitch on your machine.

- Stitch 1/2 inch from the outer edge of the bib to hold the three layers together.

- Trim away any excess to even up the edges of the three layers.

- Clip around the edge close to the stitch about 1/4" apart for the edges to "rag" if you like.
- Attach a heavy duty snap or velcro for a fastener.
No comments:
Post a Comment