Wednesday, April 6, 2022

BLOCK 18: ASSORTED TAFFY

 I saw this pattern by Crystal Hendrix at Salt Water Taffy and was inspired to create my own pattern with a few changes. I like patterns with a print center square that I call a focal print and then use other colors in the block that are in the focal print or compliment the print. In fact this pattern would be perfect for an "I Spy" baby quilt. I'm also trying to use some of my smaller pieces for this 30 - Block Exchange Group that I am in. I wanted to make 30 different patterns and I am getting close. 

This tutorial is for Block 18, but I have four or five blocks that are finished but I haven't written the tutorials for. I will be lost when I make my lost block. This project has just about monopolized my days and nights as I even dream about blocks to make also. And most of my stash is not just scraps, but yardage. But I have several small pieces that are good focal prints. The one I used in this block is a good example. All three pieces were actually small pieces. It would have been interesting to see the blue and green fabrics switched, but since they were different sizes, I couldn't see.

Once you lay the pieces out on a design wall (you do have a design wall, don't you?), the block almost makes itself. In fact it might have gone together faster than any of the 20+ blocks I have made so far since I am discounting the time it took me to unsew (aka rip out) the last strip and turn it 180 degrees. I will point it out to you in the tutorial. And then as I was writing this I realized I had made another big booboo.

This pattern would actually make a pretty baby/toddler blanket. Like an I Spy quilt. The center print is a picture of some animal, thing, or letter for example that they can look for and learn.


HOW TO MAKE A

(using a 1/4 inch seam)

CHOOSE three (3) fabrics solid colors or prints that compliment each other. One piece can be a focal print - a design that draws your attention to it.


CUT  -  one(1) - 4.5" square for the center focal point

       - one (1) - strip 2.5" x 4.5" and one (1) strip - 2.5" x 10.5" and two (2) - 2.5" squares from one of the complimentary fabrics

         - three (3) - 2.5" squares, and one (1) strip - 2.5" x 4.5"  and one (1) strip 2.5" x 6.5" , and two (2) - strips 2.5" x 8.5" from the other complimentary fabric 


          Arrange the pieces on a design wall according to this drawing:


     I used the letters "W" and "P" for the two complimentary colors and it says "dark P" for the focal print.
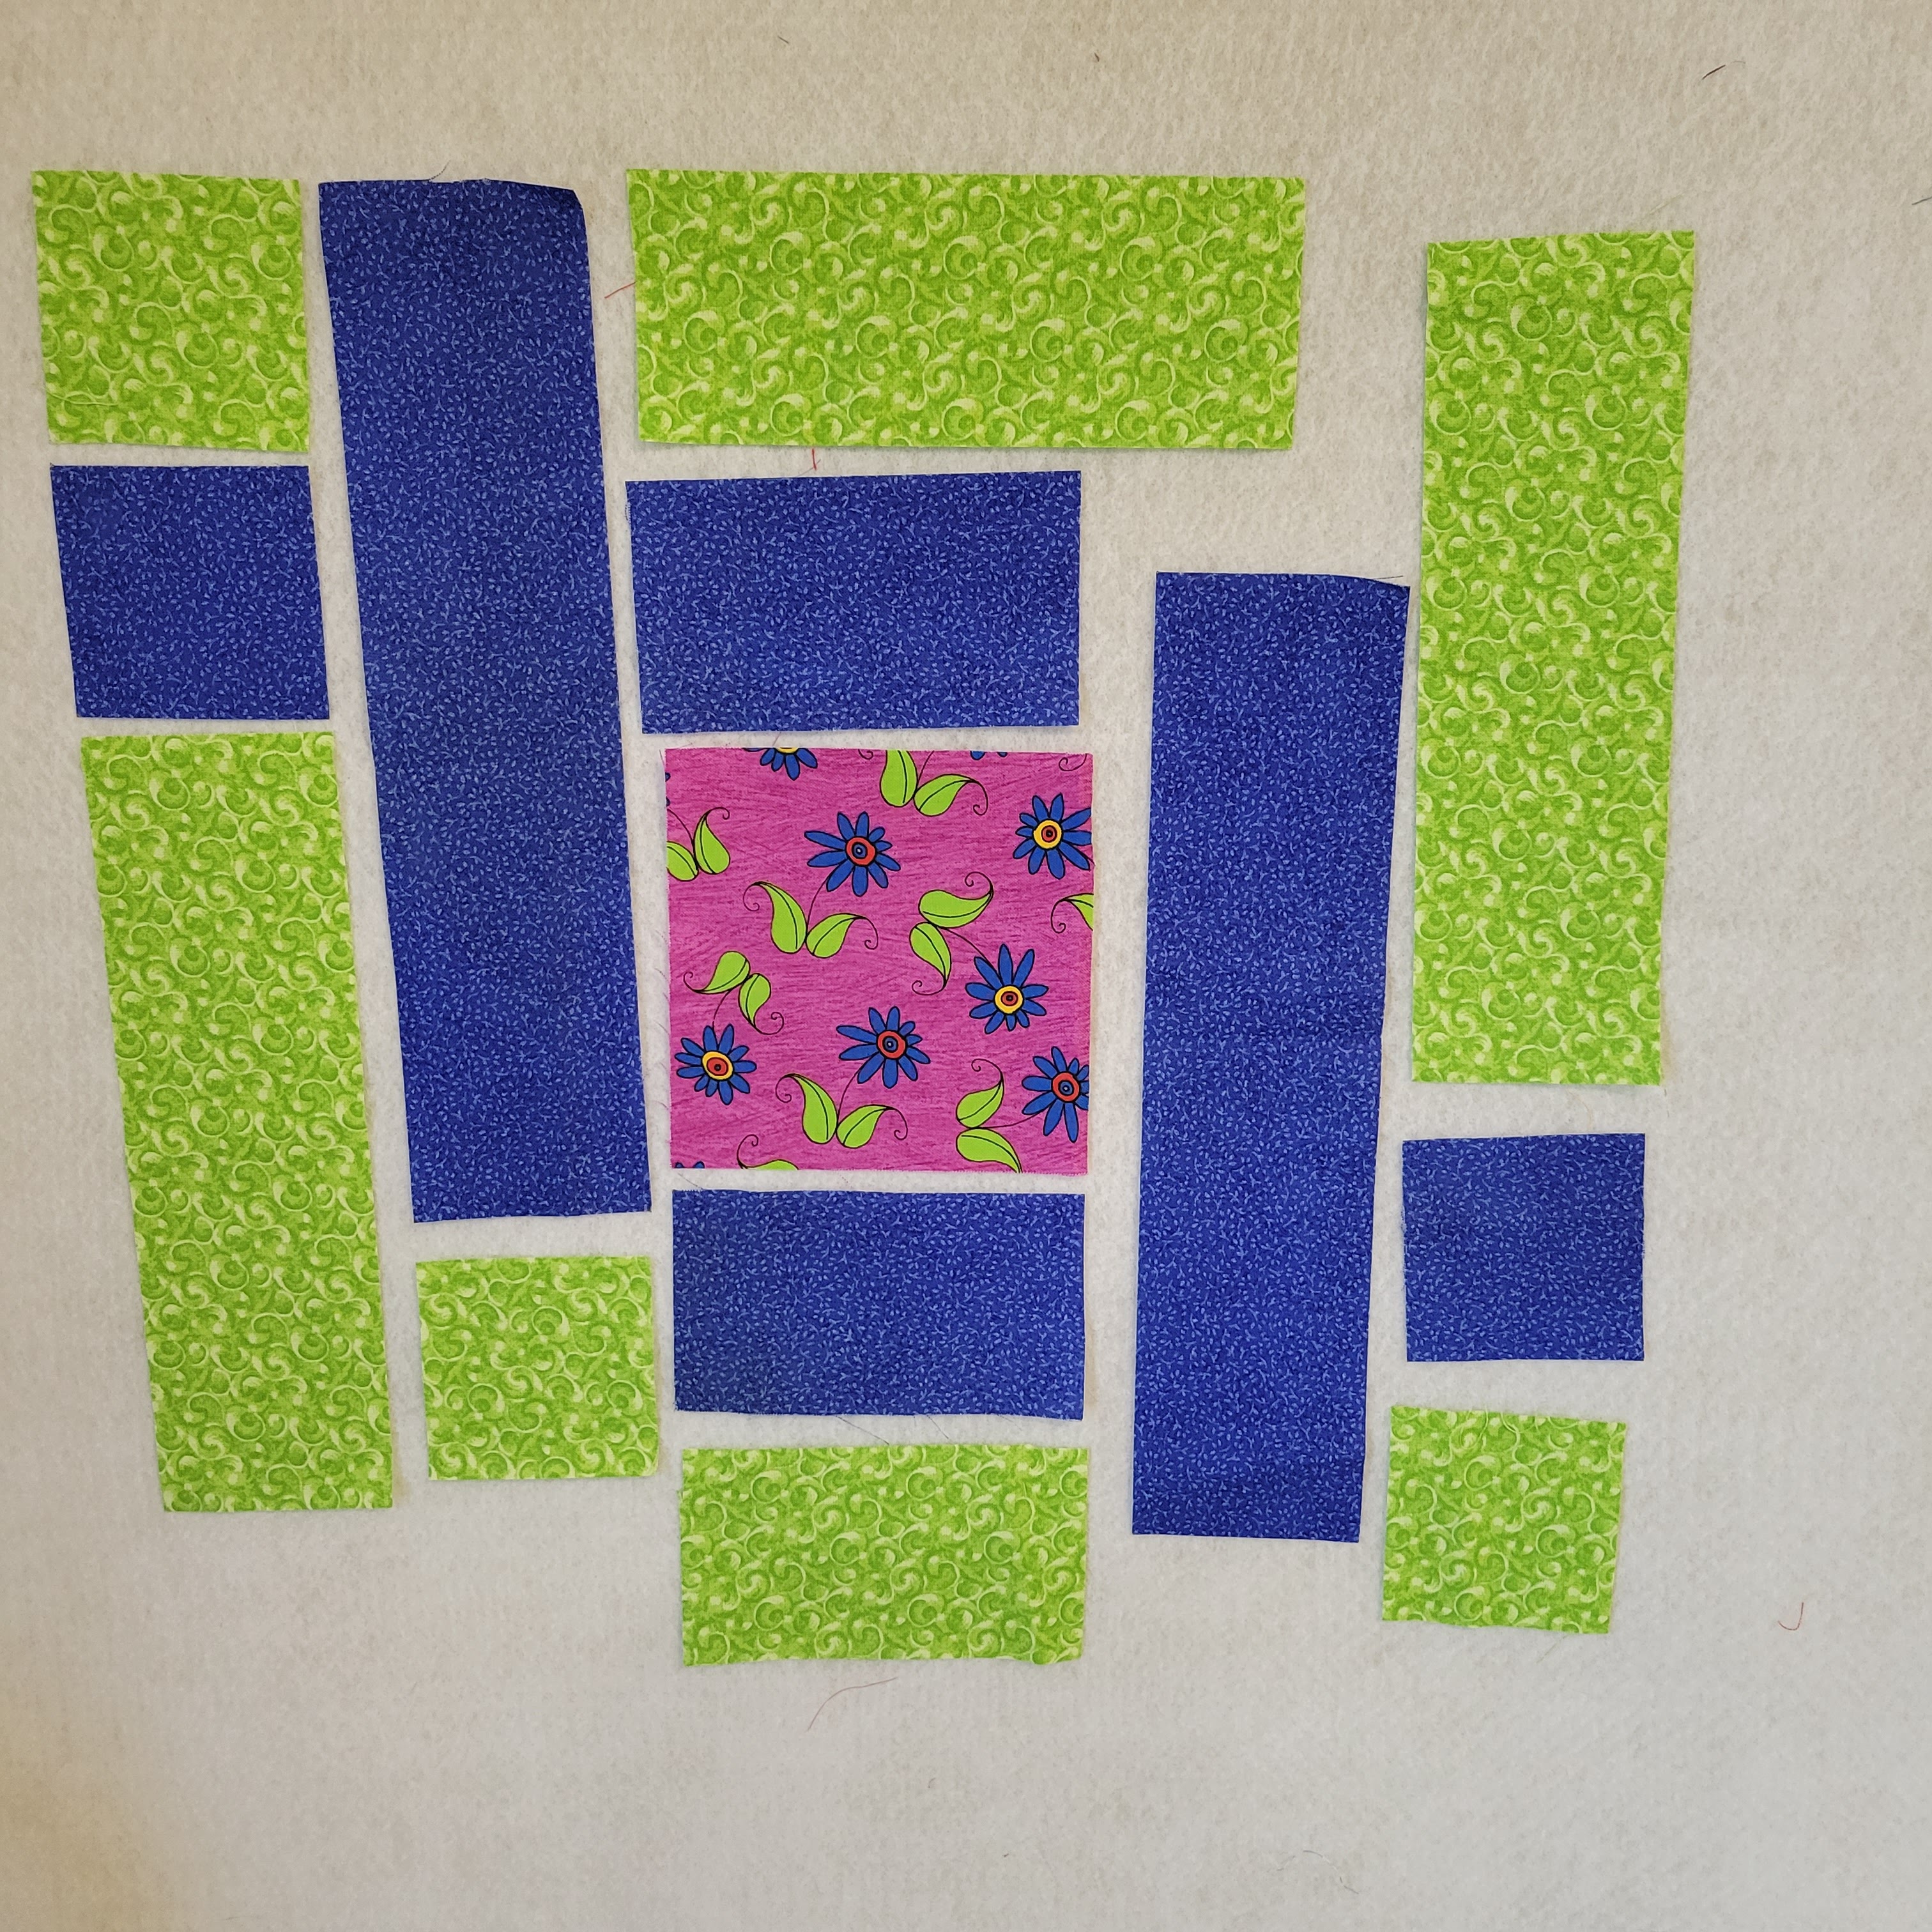


I started from the left and worked my way across to the right.     Sew the first column first - 3 pieces. I PRESSED toward away from the dark square because that was the way they seemed to want to be pressed.   Then make the next column with the two pieces. I sewed the second column correctly but when I placed it back on the design wall, I placed it incorrectly.

The first picture is the wrong way and

the second picture is the correct way. I failed to checked back with my drawing. Unfortunately I didn't catch my mistake until I was writing this tutorial. So that meant I had unsew two seams. Not fun but necessary. So the rest of my pictures will not look right but pay attention to the section I'm doing not the first two columns.

The next column is a wide one and I only sewed the bottom four (4) pieces. I added the top green rectangle later.


Next add the fourth column which is the blue long strip in my picture. 
Don't forget to press on the wrong side and the right side.

Now you can add that green rectangle we skipped to the top of this section. View from the wrong side.

At this point you can sew this center section to the first two columns or go on and add the last column. I did the latter. 
Sew the long strip with the blue square and then the green square.

Return it to the design wall.

Now I sewed the first two columns together not catching my mistake.

And finally the last column.
The wrong side.

I squared it up with my 12.5" square ruler and trimmed off the little bit of excess.


TO CORRECT MY MISTAKE I had to unsew the first two columns and then the second column from the center section.

Then holding the two strips together at the top, I carried it to my sewing machine and resewed the first two columns and repressed them. Then before I sewed anything else, I took them back to the design wall to make sure I hadn't done them wrong again.

Then satisfied I picked up the top edge of the first two and the rest of the block and sewed the block back together and pressed again.

So instead of this...

the block looks like this!


Tuesday, April 5, 2022

CHOCOLATE BAYOU CITY CAKE

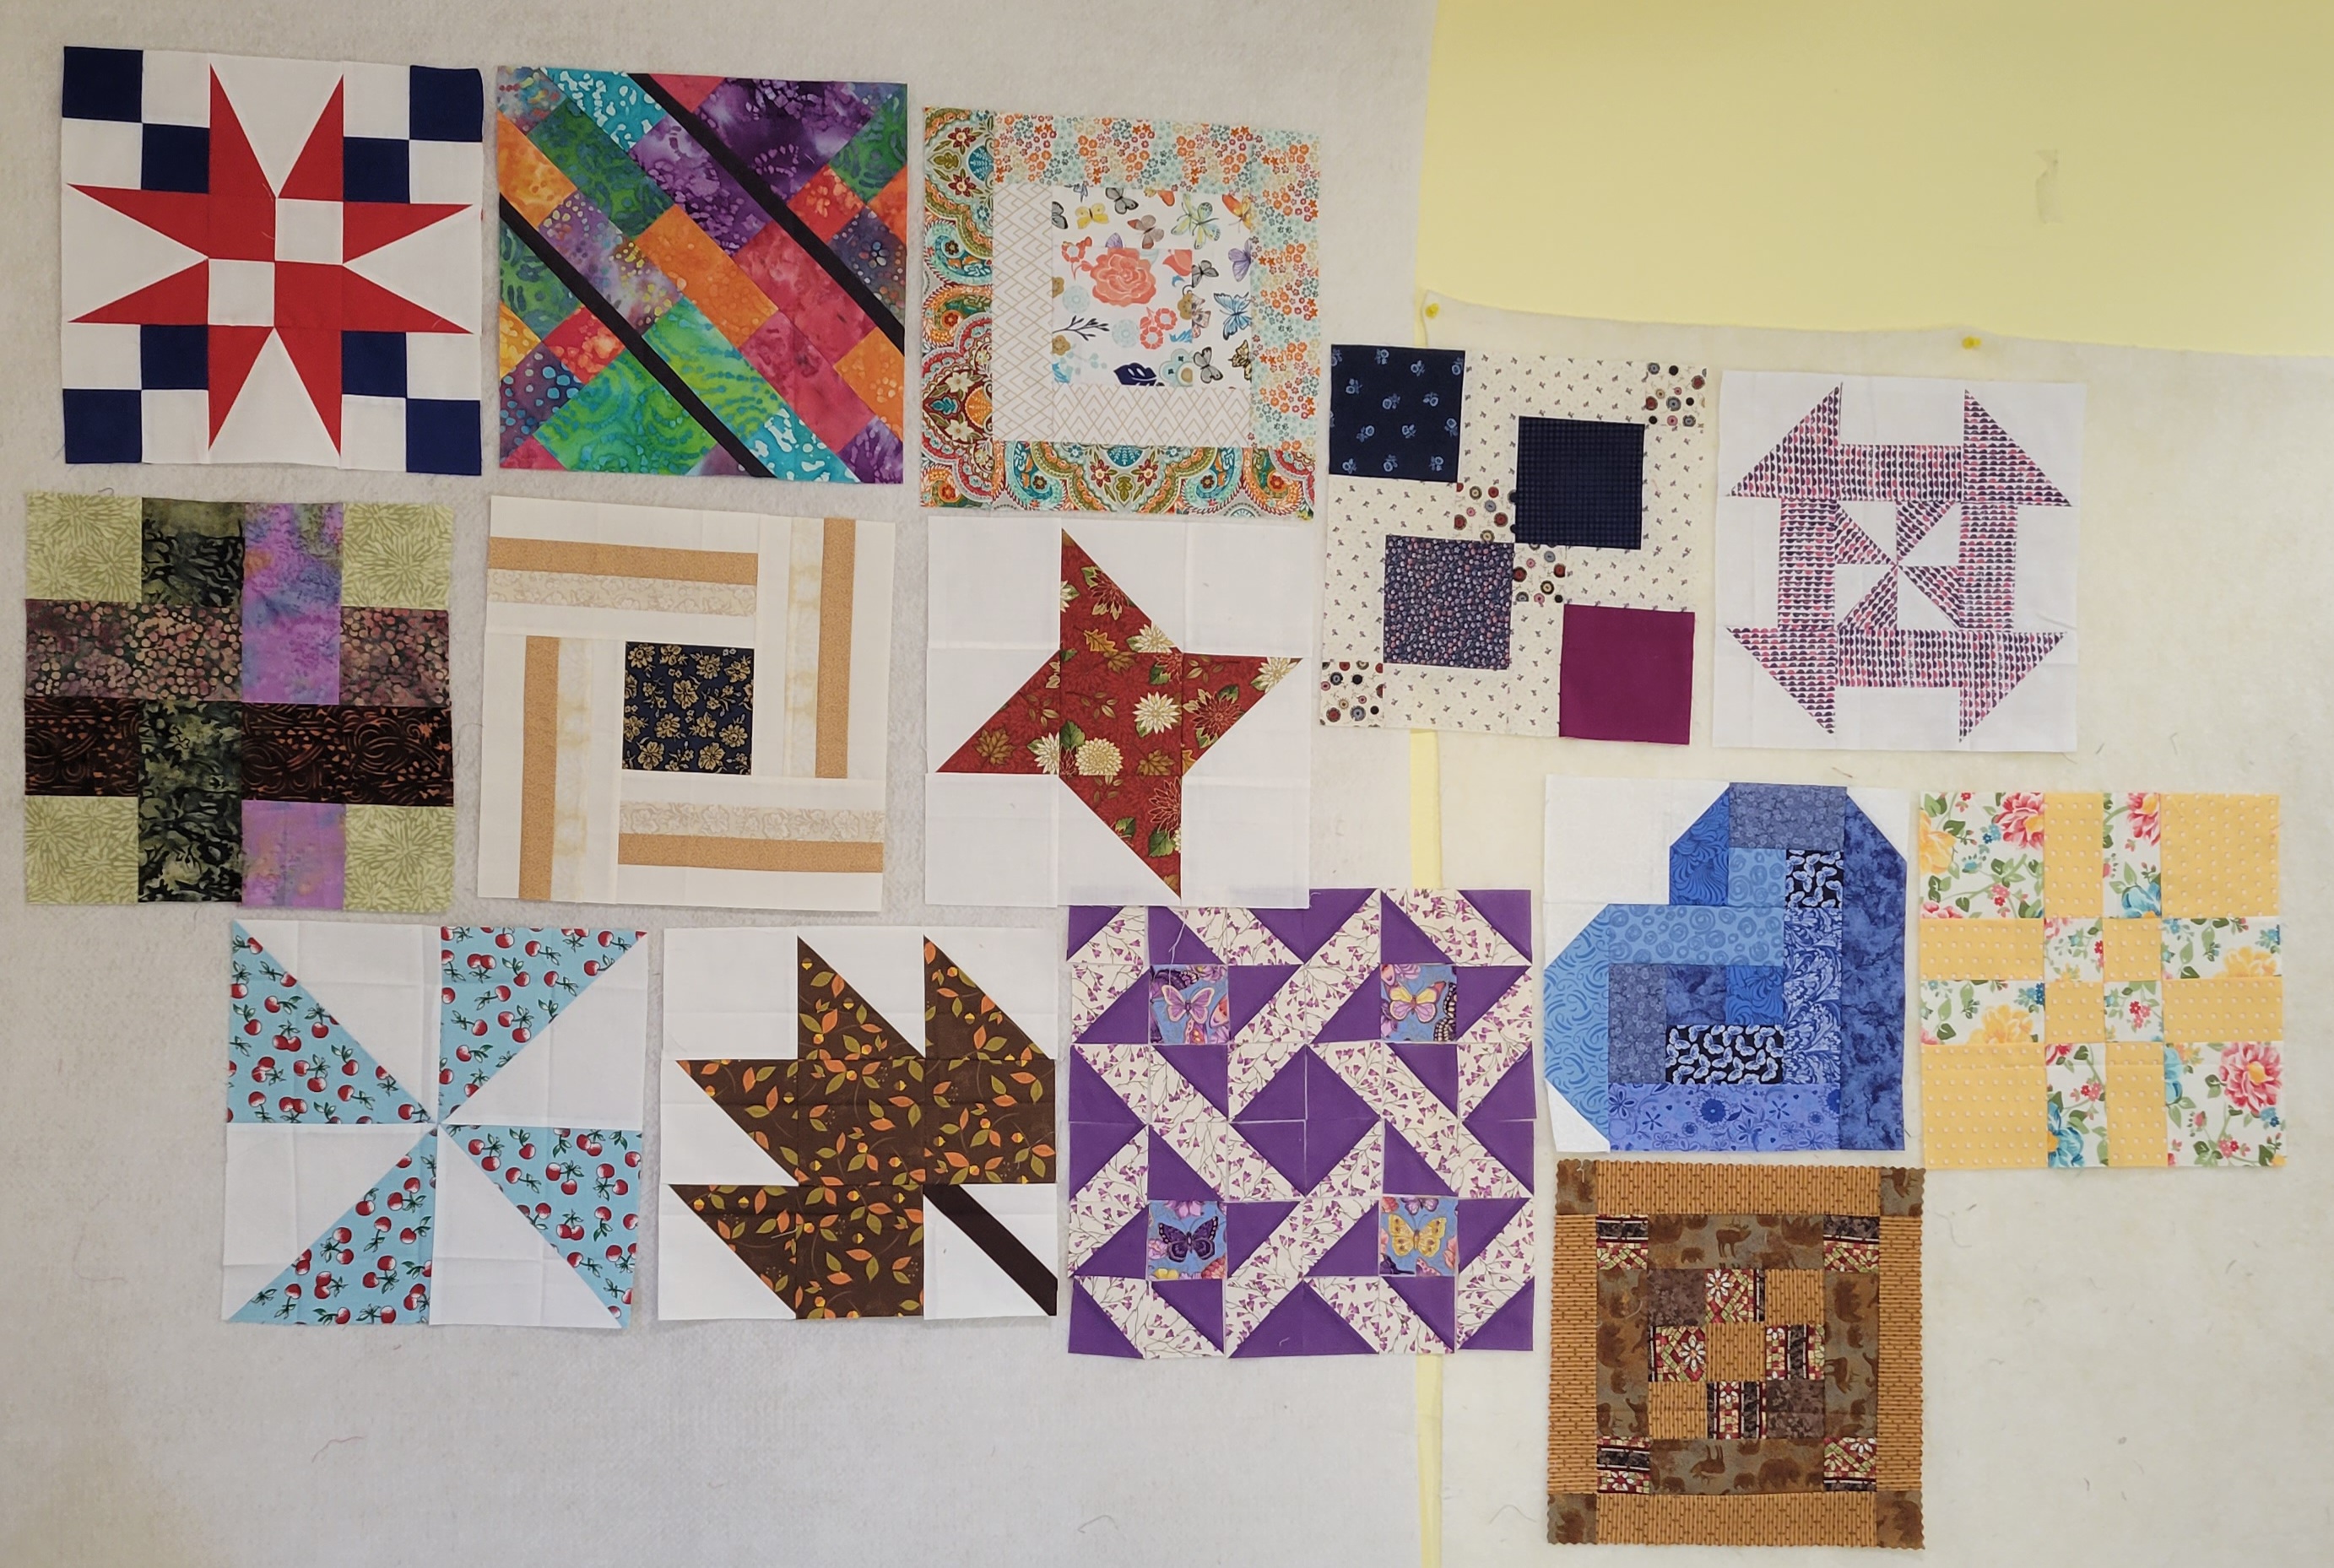
 If you have been missing seeing yummy looking desserts here at My Patchwork Quilt, the reason is I have been totally absorbed with making thirty different quilt blocks for a 30 Block Exchange Group I was invited to join. When it is over, I will have received 29 blocks from ladies across the United States and Canada to make a Friendship Quilt. I have received thirteen so far. (See picture below.) I have learned so much about different patterns and ways to make them but haven't made a dent in my stash. Oh well, that's okay. I'm not sure what I will do to occupy my time, when I am finished. Maybe rediscover my kitchen? 

I haven't completely forgotten where the kitchen is. In fact this weekend I had to give in to my sweet tooth and do I have a winner to share with you. I admit the name of the cake is what caught my eye first. 

Because of my background living in a rural town in the Mississippi Delta in Southeast Arkansas that was built along a bayou called Bayou Bartholomew  the idea of a bayou and a city seemed a little strange. In the early days I've been told riverboats went up and down the bayou. The bayou had to be a lot bigger or maybe the riverboats weren't the big beautiful white ones I seen. Anyway eventually I guess when the railroad came through, the businesses moved to the other side of the town by the railroad. I would love to see pictures of it. My maternal granddaddy was the village blacksmith. His shop was on the other side of the railroad from the business. Besides his responsibilities as the blacksmith, he and my grandma would hang the mailbag on a hook for the train to pick up and receive the one the train was dropping off. I just love the old stories I know. I just wish I knew more.

But I guess you are patiently waiting for the recipe. As I do so often, I tried to make it as sugar-free as I could. I did manage to reduce the added sugar to 1/4 cup of brown sugar. The recipe called for 1/2 cup but I just used 1/4 cup and then added a 1/4 cup of  erythritol, a sugar substitute for the other half. I used a sugar-free cake mix and instant pudding mix and even bought a can of fruit cocktail that had no-sugar-added. The really fantastic thing? You would never guess it when you take a bite. The recipe had a glaze, but I didn't use it or include it in the recipe. As it was baking, I got to thinking and decided it didn't need it. And it doesn't. The cake is beautiful and will satisfy anyone's sweet tooth. 

A printable copy of just the recipe


CHOCOLATE BAYOU CITY CAKE

1     package (Sugar-Free) devil's food cake mix

1     package (Sugar-Free) 4-serving size chocolate instant pudding mix

1     can (15-oz) No-Sugar-Added fruit cocktail

4     large eggs

1/4  cup oil

1/2  cup packed light brown sugar OR 1/4 cup packed light brown sugar + 1/4 cup sugar substitute (like erythritol or stevia or Splenda)

1/2   cup coarsely chopped pecans


Preheat oven to 325 degrees F. Spray a 9 x 13 " baking pan and then dust with flour. Shake off excess. Set aside.


Place the cake mix and pudding mix in a large mixing bowl. Combine the two with a whisk.

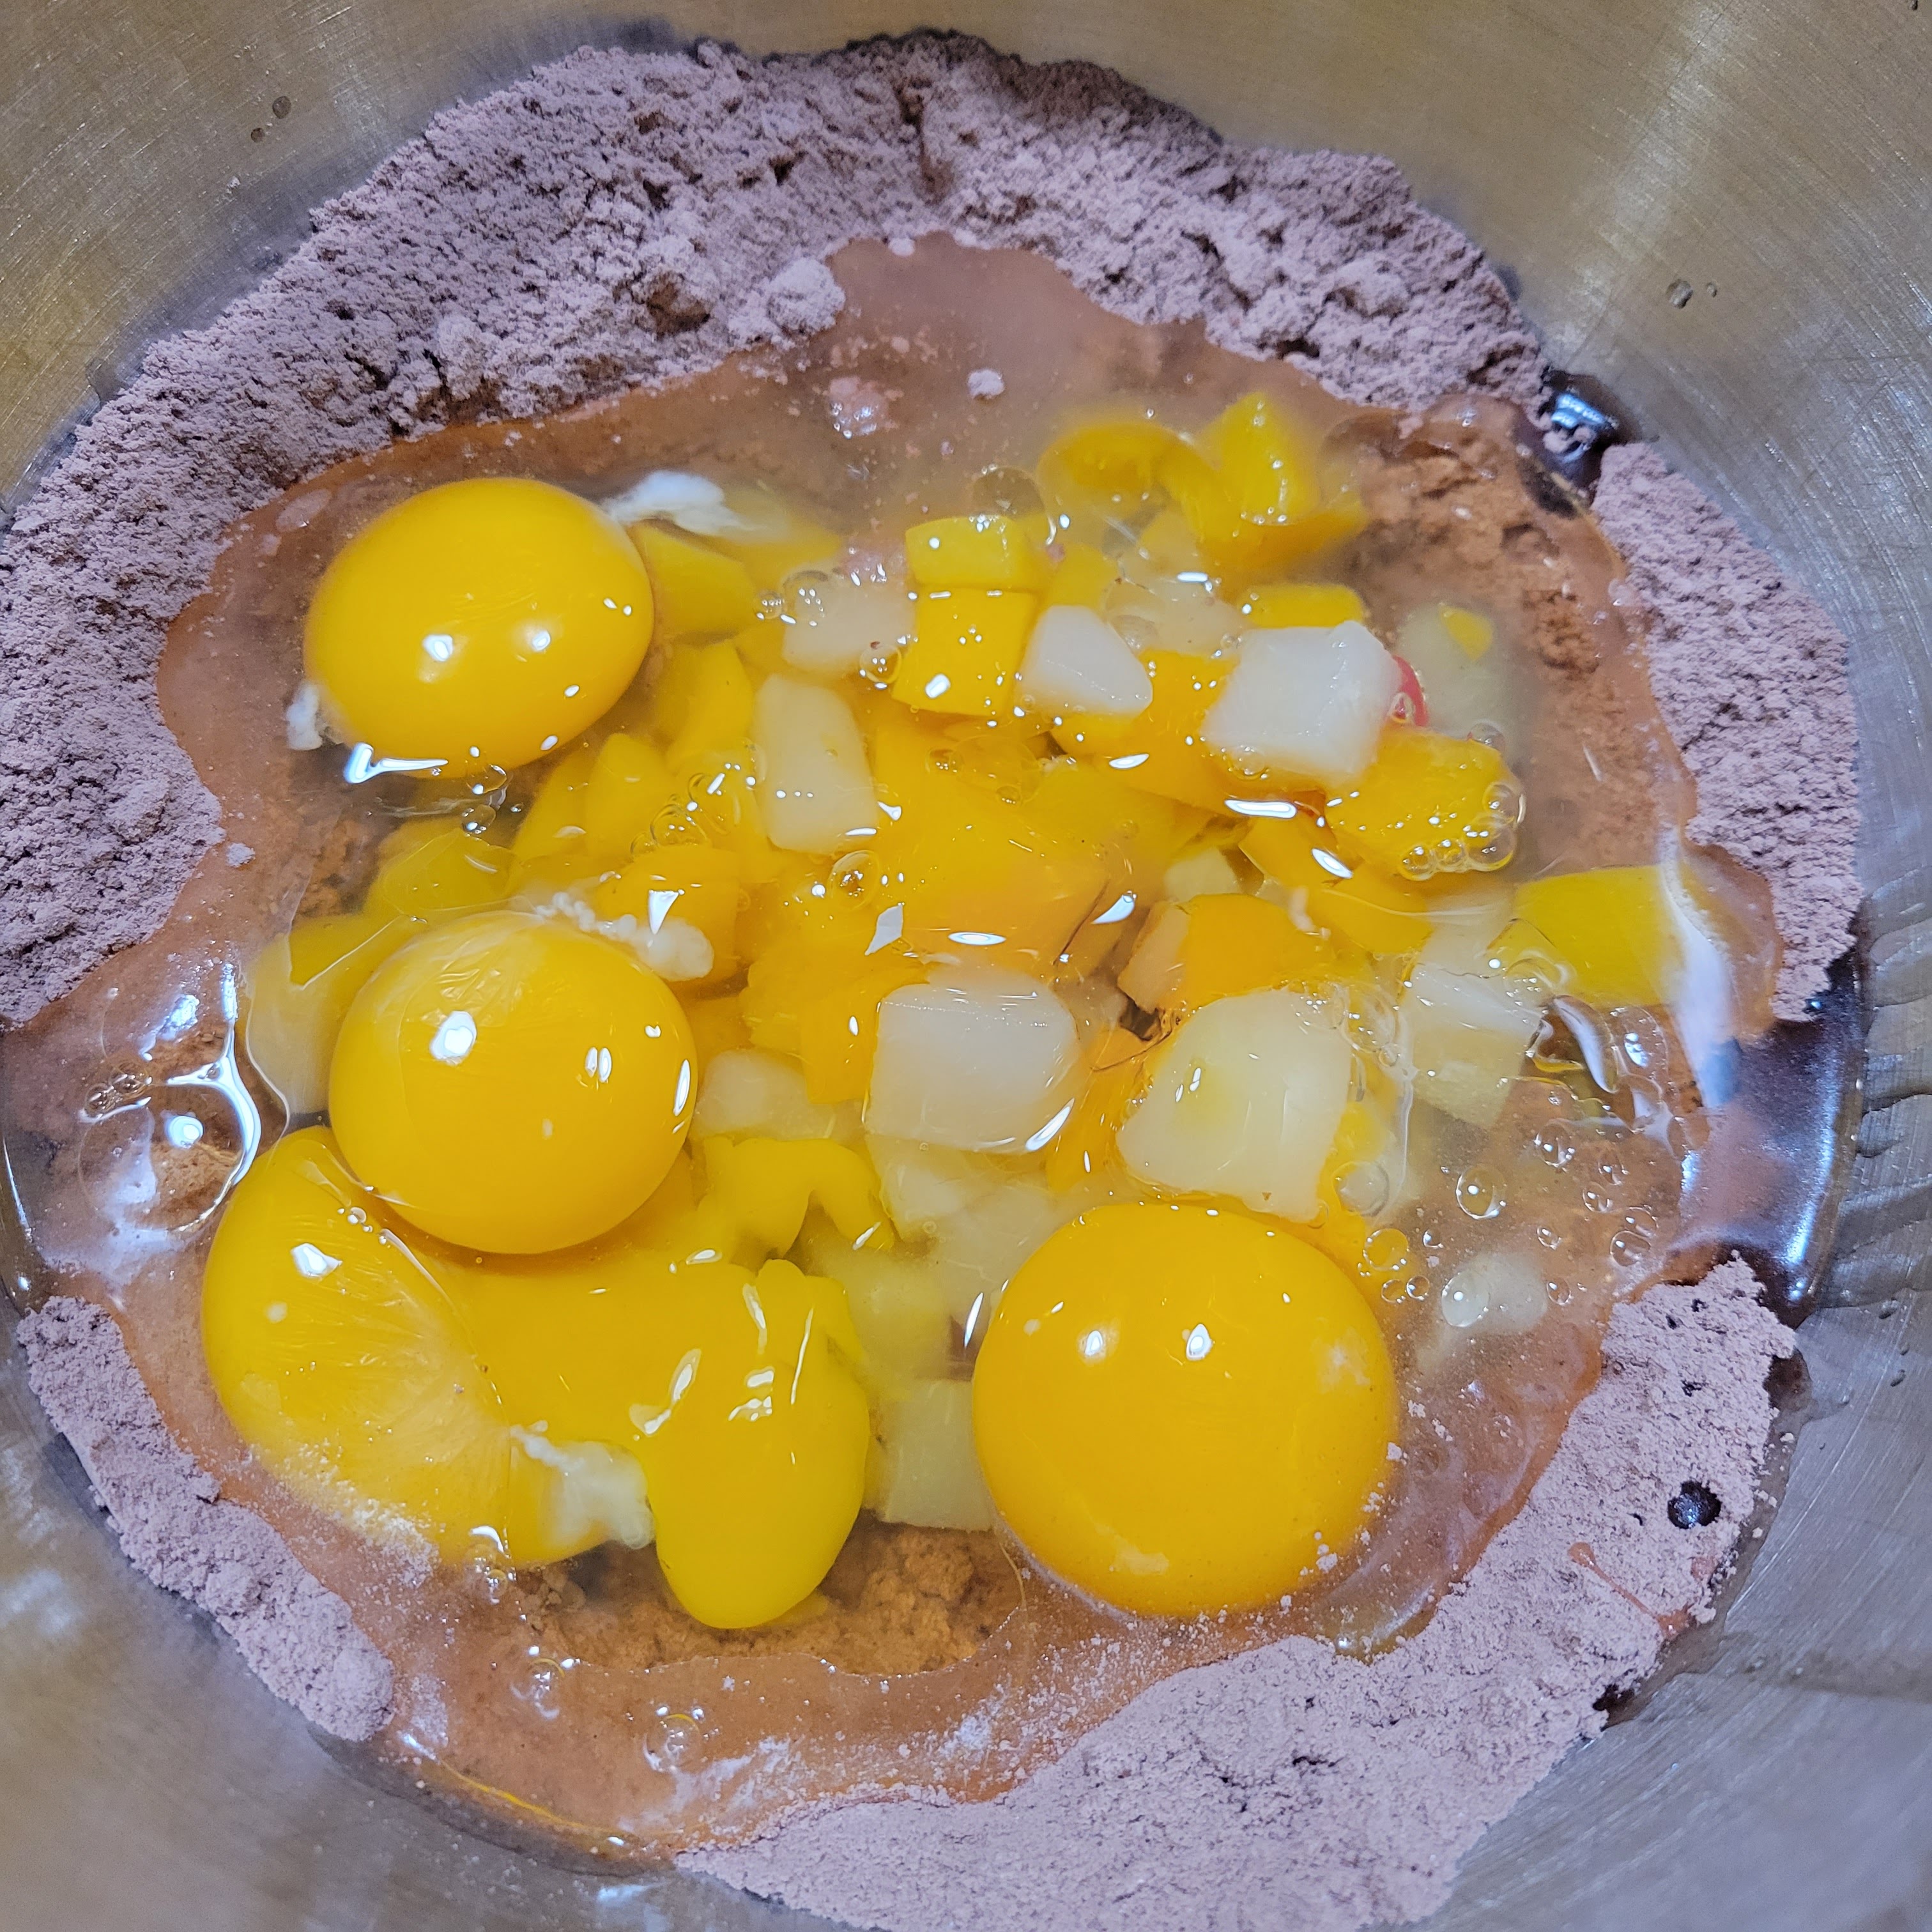
Then add the fruit cocktail and its liquid, eggs, and oil.

Combine the ingredients on low with an electric mixer just until the dry ingredients are wet.

Then scrape down the sides with a rubber spatula.

Then beat on medium speed for about 1-1/2 minutes.

Scrape down the sides of the bowl again.

Then pour the batter in the pan and spread out evenly with the spatula.


Combine the brown sugar/sugar substitute with the pecans and

then sprinkle the mixture evenly over the top of the cake batter.


Bake until the top springs back when lightly touched in the center, about 40 to 45 minutes.

Cool the cake in the pan on a wire rack.

The cake covered with foil or a cake cover will last at room temperature for a couple of days or up to a week in the refrigerator. (if it lasts that long).


So far I have received 13 blocks. The purple one is one I am making. I have the 36 HST (half-square-triangles) made I just need to sew them together. 

Monday, April 4, 2022

BLOCK 17: SEE-SAW BLOCK PATTERN

 I am currently over half way through with my 30 - Block Exchange. As I have said in other post tutorials, I have really enjoyed exploring new block patterns and I can't believe how much I have learned. I've made mistakes and think I have learned from them. You can easily catch my mistakes in my pictures, but I hope you read what I write and not just look at the pictures.

I really liked the outcome of this block and used my coordinating prints again that I have made several block with. I also used a new technique I learned called cornered strips. It is also called Flying Geese which I had heard of but never had looked how to make them. See I said, "I'm learning stuff every day. It is an easy method of having the HST (half-square triangle) look without having to make a HST which means less seams which I always think is good. The block doesn't look as chopped up then. I used this method with other patterns, too and just rewrote the patterns.


HOW TO MAKE THE SEE-SAW PATTERN BLOCK

(use 1/4" seam and press seams to darker print)

With four different fabrics: #1 dark print or solid

                                          #2 medium to dark

                                          #3 medium to light

                                          #4 light

CUT: #1  eight (8) - 3.5" squares

         #2  four (4) - 3.5" x 6.5" strips

         #3  four (4) - 3.5" x 6.5" strips

         #4  four (4) - 3.5" squares


Draw a diagonal line on the wrong side of all of the 3.5" squares.


Place the #1 squares so that the diagonals point to top center on both ends of each #2 strip. You will notice they overlap at the top center. 


Place the #4 squares on one end of the #3 strips like pictured.

Sew on the diagonal line on each #3 strip. (I am using the chain stitching method is why you can see one in front and one behind the presser foot. This just saves time and thread.) 


Cut the threads connecting the strips if you are using the chain stitching method. Trim off 1/4" from the seam. You can save what you cut off for another project.


The marked squares on #2 strips are next to sew. Since the squares overlap, remove one of the squares and just sew on the diagonal line on one of the squares on each strip. Make sure the diagonal line is going from the top center to the diagonal corner.

Just like with the other strips you just finished, trim off 1/4" from the diagonal line. on each strip.

Press the seam open and then place the other square on the other end of the strip.

Complete as with the other ones.

Look like something else you might have made? Flying Geese?


I made HST from the pieces trimmed off for another project.


Using this drawn layout for the pattern,

place the pieces on your design wall.

Spread the pieces out to have four sections. You will sew these four subsections the same way by sewing the two strips together. The only seams that meet when sewing will happen at the end after you have the four subsections finished and have to sew them together two at a time to finish the block.
Each subsection sewed together and pressed on the underside and on top.


When you sew two subsections together, securely pin especially over seams so they don't move as you stitch.

Save pressing this seam until you have just two subsections. I tried something new with this block.

I clipped the seam on just one side/layer at each seam of the yellow print

so I could press the seam open to reduce bulk at the center. 

The I squared up the block with my 12.5" square ruler and trimmed off any excess and repressed on both sides of the fabric.