
Hard to believe? Not when you are sewing and quilting it together at the same time. It took me almost as long to gather the material and prepare the pieces as it did to sew it together.
I started this method with placemats a couple of years ago. (It is one of my top tutorials.) Several people asked me questions that got me to thinking. (dangerous as that is)
Anyway, when my quilting friends and I decided to make baby quilts for Project Linus and after making a few, I decided I wanted to use the method I used for my placemats and make a baby quilt. Actually it is pretty simple....just make everything bigger.
The baby quilts we have been making are 36 inch - square. If I increased the width of the strips to a finished 3 inches, I would only need 12 strips to make the quilt. Using 4 different prints, that would be 3 of each. Wow! That will go so fast....I thought.
I gathered my material (material Friend Janice and I bought at an estate sale earlier this summer - a BIG tub for $50 dollars....so it didn't cost me much.), washed and pressed it and then preceded to cut it.
I cut a 37 - inch square from the material that I was going to use for the backing and also from the thin batting.


Because this all of this was larger than the placemats I am used to making, I decided to randomly pin it together to hold the backing and batting together. I just removed the safety pins as I worked across the quilt.


I bet you know what I did next. Right. I repeated the process with the fourth strip


Another TIP that I don't have a picture of but highly recommend especially when working with a bigger project like this is stitch down close to the edge of the first and last strips to make sure the three thicknesses stay together. When sewing on the binding, the backing can easily slip and might not get caught in the seam with the binding.

Preparing and sewing the binding:
You can read different opinions on the width to cut the strips to make binding. I admit, I always cut my strips 2 - 1/2 inches -- before meeting Friend Kay. Kay always cuts her strips 2 inches. It makes a narrower binding, but oh so pretty. I never actually liked the results of my cut 2 - 1/2 inch binding, because there was always more binding on the back than on the front OR the binding got thin on the outer edge. It takes a little getting used to, but if you have never tried it, I would suggest you do...at least once. Update: The 2-inch wide strips are great if you are making a small item such as hot pads, placemats, or even table runners. Most of my quilting now is for a quilting ministry at my church. We make quilts generally 42-" X 48" which is a good size for someone in a wheel chair. They are called Blankets of Hope. I cut five strips the wof and 2-1/4" wide.
Anyway, I cut four 2 - inch - strips from the print I was going to use for the binding (a striped print always looks so nice for a binding).


If you want to see how to make perfect corners, check out my tutorial HERE. I didn't bother taking pictures on this project. You will have perfect corners every time with this method.
Joining the binding together in a diagonal seam:
Back around to the side I started on, I always leave a generous amount with the ends. (I probably started sewing 12 inches down on this project at the beginning due to the size and I left more than that at the end - since it was the end of the strip I had made.)
Open up the strips and lay them on top of each other making sure there is no excess material.
 Choosing a place about half way down, mark it with a line (it might be hard to see the mark)

and cut a diagonal in the end of the strip on top
 Replacing this piece on top of the bottom strip once again making sure the pieces are laying flat and there is no excess,

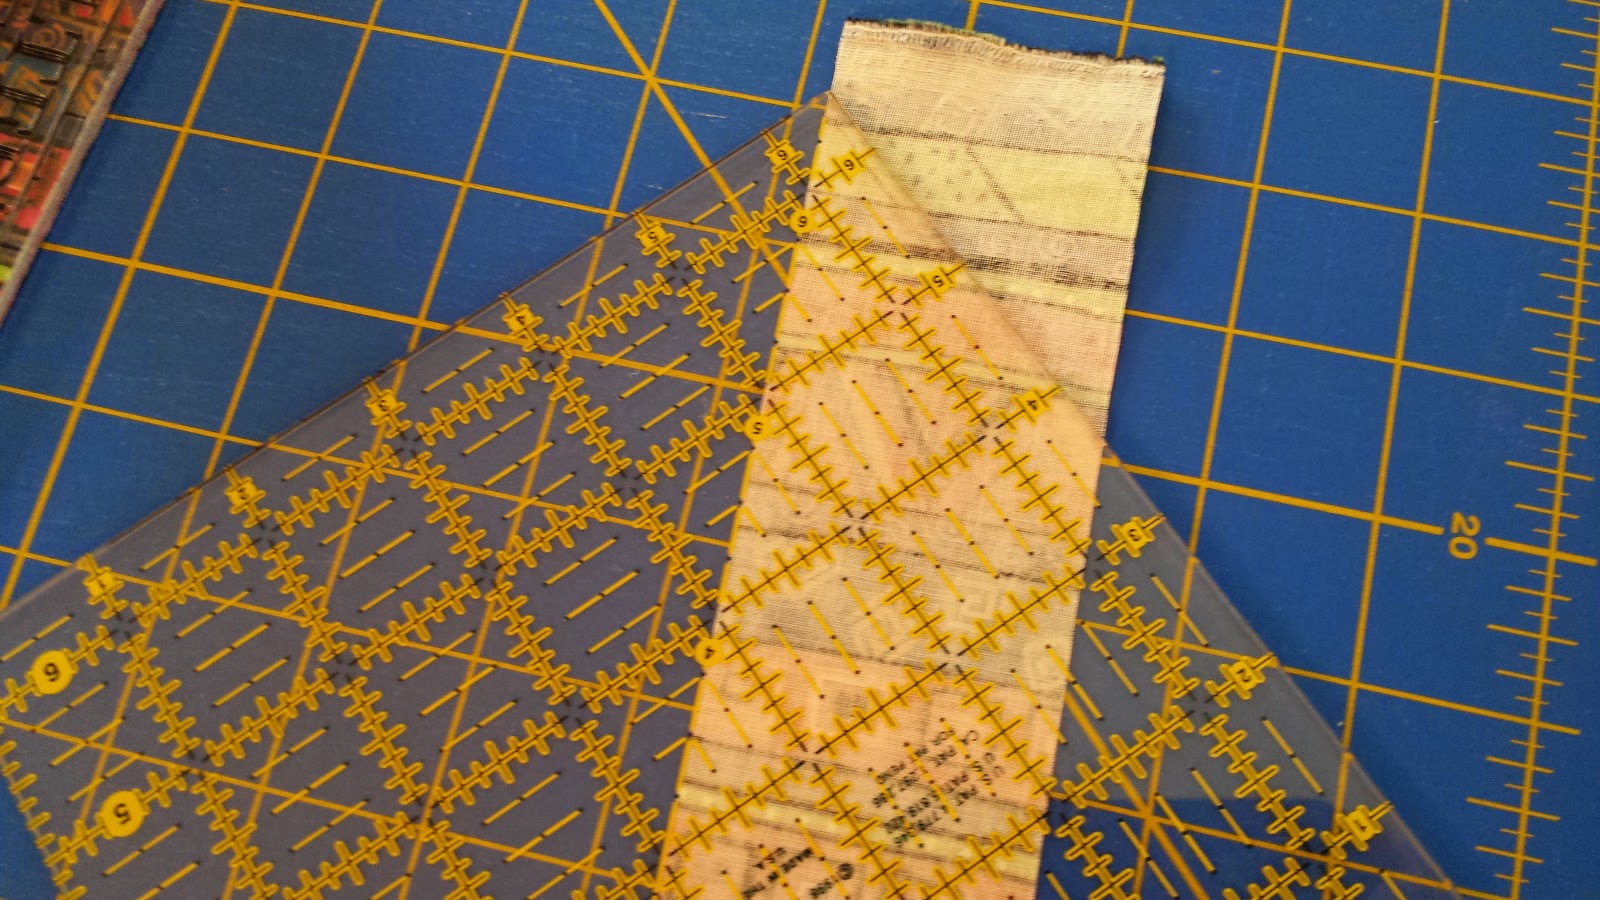
I marked exactly where the two met with dashes (look closely and you can see them especially in the lower right. I moved the upper piece up so you could see the mark.)
 Then I drew a line on the lower strip 1/2 inch above these marks (this is for the two 1/4 inch seams). The dashing are under the line on the template marked 6.

 Then I brought the ends together with right sides facing (not twisting the pieces) and centered them with about 1/4 inch "dog ear" on each end.
 Pinned them in place and then stitched across.
 I pressed the seam open with my fingers, laid the binding down on the quilt (just checking to make sure it is flat with no excess), cut off those "dog ears", and then pinned it down the entire way before I stitched from where I stopped to where I had begun - stitching in place at the end and beginning.

Slip stitching the binding down on the back:
 I start about in the center - doesn't have to be exact - and wrap the binding around from the front. As I said earlier it will make a narrow tight binding. I usually work with about 3 or 4 pins and pin down an area at a time and with a single thread, slip stitch the binding down. I wanted to get the quilt finished before I went to bed, so I didn't take pictures during this process. BUT I show you how when I made my Sudoku Lap Quilt HERE.
Joining the binding together in a diagonal seam:
Back around to the side I started on, I always leave a generous amount with the ends. (I probably started sewing 12 inches down on this project at the beginning due to the size and I left more than that at the end - since it was the end of the strip I had made.)
and cut a diagonal in the end of the strip on top
I marked exactly where the two met with dashes (look closely and you can see them especially in the lower right. I moved the upper piece up so you could see the mark.)
Slip stitching the binding down on the back:
Materials you will need for this blanket using 42 - 45 inch wide fabric:
1 - 1/8 yards each for backing and batting
3/8 yard of four fabrics
1/4 yard for binding
1 - 1/8 yards each for backing and batting
3/8 yard of four fabrics
1/4 yard for binding
fantastico saludos
ReplyDeleteThanks!
DeleteThank you for creating and sharing this wonderful tutorial! The detail and photos you included really made this a great learning experience. Thanks again! Linda ☺
ReplyDeleteThank you for your kind words, Linda. I am so pleased they were helpful. I started this blog just for this reason. With my years of teaching, I felt I could produce easy to follow instructions. Being a visual learner, I have to have lots of pictures. Patricia
DeleteThank you for the easy to follow directions! I'm going to be making one like this for sure!!
ReplyDeleteSo glad my tutorial was helpful for you Hallbevans. Would love to see a picture of your finished quilt. Patricia
DeleteGoing to try one of these for Project Linus! Thanks
ReplyDeleteWonderful idea, Maartje Maartje. I am sure some little one will love it.
DeletePatricia
thanks, I'm going to do this...it's quilted when it's finished...love it!
DeleteYes it is. I love the method also.
DeletePatricia
Thanks for the excellent instructions!
ReplyDeleteSo glad they were helpful, JaneseC, and thanks for letting me know.
DeletePatricia
This looks great and easy. I could also use this to make the Veterans lap and wheelchair quilts for DAR.
ReplyDeleteDiana
Diana, that would be a great idea. Sorry I didn't see your comment sooner.
DeletePatricia
wow.... fantastic! Congrats...
ReplyDeleteThank you, Tania
DeletePatricia