Friday, March 4, 2022

BLOCK 7 : JANICE'S TULIP QUILT BLOCK

 I’ve made eleven blocks now for the 30-Block Exchange Group; I’m just behind on writing the tutorials. I also have plenty of block patterns I want to make, I have just found myself in that situation where I can’t decide which fabrics in my stash would look good with each pattern. Fortunately I have a good friend who is. Friend Janice.


Yesterday we spent our Thursday as we have for quite a few years now going to estate sales and enjoying lunch together. This time though I told her I needed her to come over to my house when we got through to help me match fabric with patterns. Right after she left, I couldn’t help but start on one of the blocks. In fact it was the last one we designed. In her honor, I am naming the block pattern, Janice’s Tulip since it is basically a simple tulip design.


HOW TO MAKE JANICE’S TULIP BLOCK SQUARE

   (12.5” block square with all seams ¼” and using three color prints)


CUT the following pieces:

                 1  @ 4.5”  square (red) (flower center)

                 1  @ 5”      square (red) (to make two HST with white)

                 3  @ 4.5”  squares (white) (background)

                 2  @ 5”      squares (white) (to make four HST with green and red)

                 1   @ 2.5”  squares  (white) (background to match up with pistil - polka dot square)

                1    @ 2.5” x 4.5” rectangle (white) (background)

                1    @ 2.5”   square (polka dot) (pistil of the flower)

                1     @ 5”     square (green) (to make 2 HST with white)


Once you have all the pieces you need for the block, you are ready to make the HSTs and the smaller block with the pistil. We will start with the latter first.


This small block consists of the 2.5” x 4.5” strip from the white and the 2.5” white square block and the 2.5” polka dot square. SEW the two squares together first and press on the wrong side first and then on the right side, pressing toward the backing.


Then SEW the white strip to this strip you just made. Press the seam toward the whole strip.

If you like, you can CHECK this block to make sure it is 4.5”. Since the three pieces were cut to described size, if anything it will be small. At least you will know when you sew the “square” to the other squares where it is “short”.

Since I didn't show you a picture of sewing the two squares together, I will show you how the smaller block looked from the wrong side. (I didn't show you the picture because I goofed and sewed the polka dot square to the rectangle instead of the white square.)


Next make the HSTs by MATCHing up the 5” squares; one white with each red and green 5” squares right sides together. DRAW a diagonal line on each set.

Now SEW ¼” on each side of the drawn line.

CUT the square in half down the drawn line.

PRESS each HST toward the darker print.

SQUARE/TRIM each HST to 4.5”. You won't be trimming off a lot but some. Use the diagonal line on your square ruler to match up with your diagonal seam. (
This is why I cut the square for a HST a whole inch bigger instead of the ⅞” that directions will tell you to do.)


You can now PLACE the pieces on the design wall so you can see what your block will look like. This is like putting a puzzle together. Use my picture for your guide.


It really doesn’t matter whether you start at the top or the bottom or middle, but it is now time to SEW the three squares together in each row. I waited until I had all three rows sewed before pressing.


I PRESSed the seams on the bottom and the top rows toward the center and then the center row away from the middle. It is important that you PRESS the seams in different directions so you can “nest” or “butt” the seams together. 


When you sew the three rows together, the block basically is finished. You will match the seams together in each row by "nesting" or "butting" the seams together or flat feeling.


SECURE the two rows together with pins so they stay together to SEW.

PRESS seams any directions it doesn't really matter. I did press my away from the center though. I personally like the back or wrong side of my blocks to look as neat as the front or right sides. Part of my OCD.


Your block is finished. WAIT !

We aren't finished until we SQUARE/TRIM the square to 12.5".


Now it is finished.


OTHER BLOCK PATTERNS YOU MIGHT BE INTERESTED IN:


Wednesday, March 2, 2022

ROXANNE'S TUXEDO CAKE

Several weeks ago after church we went to one of our favorite eating places on Sunday, Roxanne’s Cafe. One of the reasons I wanted to go there is they have fantastic desserts and I was supposed to eat chocolate cake that day because the Chiefs were playing football. (It didn’t seem to help though because we lost, but the good news is I discovered an awesome chocolate cake.


As we walked in the door, I glanced over at the dessert frig to see if they had anything chocolate in it. They usually just have pies and cobblers in there, but I looked anyway. The cakes are usually in the back or occasionally on the counter. Not seeing anything out, I followed our waitress to our table and then searched out Chase, Roxanne’s son. I also read the specials menu board and they did have some kind of chocolate cake on it. I saw Chase and went to ask him about it. He didn’t seem to know anything about the cake listed but showed me a piece of chocolate cake wrapped on a plate. He said it was the last piece they had of his mother’s Tuxedo Cake that she had made the day before. It went fast, Chase said. I told him to save it for me to go.


I was full after eating, but did eat one bite so I could say I had eaten  chocolate cake before the game. Let me tell you it was really hard not to eat a second bite, but I didn’t. I saved it for after the game to console me because the Chiefs lost the game.


On our way out, I told Chase I wanted his mother’s and he said he would ask her later that day and have it for me the next time we came in. 


The next time we went in was the following Sunday. Fortunately for Chase Roxanne was there because he had forgotten to ask her for the recipe. Roxanne was more than welcomed to share it with me - She could have told me no, but she didn’t. 


I had planned to make it for Canasta the next week when Friend Fran hosted, but Fran had to cancel because her granddaughter tested positive for Covid. (I always make and take the dessert to her house when she hosts since she doesn’t cook much.) I finally got to make it yesterday morning as we met at Fran’s house yesterday afternoon to play canasta. 


Friend Susan asked me what the cake was called and I told her “Tuxedo Cake” from Roxanne’s Cafe. No one in the group had ever had Roxanne’s cake, but decided it couldn’t taste any better than mine. It really does taste as good, but it should since I used her recipe. I doubt you will see this, Roxanne, but I do appreciate your generosity and willingness to share your recipe. The only changes I made were 1 - using a sugar-free fudge chocolate  instant pudding, 2 - using ⅓ - less fat Neufchatel cream cheese, and 3 - I only used 3 cups of powdered sugar for the cream cheese frosting. I almost forgot one more change in that I used 8 - inch round cake pans instead of 9 - inch.


For a printable copy of just the recipe, click HERE.


ROXANNE’S TUXEDO CAKE


1     box chocolate fudge cake mix (without added pudding) + the ingredients called for on the box to make the cake (I found a dark chocolate fudge cake mix)

1     3.4 oz chocolate instant pudding (I used the sugar-free chocolate fudge instant pudding mix)

¼   cup milk (I used skim milk)


**********

1     pkg (8 oz) cream cheese at room temperature (I used ⅓ less fat Neufchatel, at room temperature)

½  cup (1 stick) butter, at room temperature

4    cups powdered sugar (I used 3 cups)


**********

9     oz chopped bittersweet chocolate

1     cup heavy whipping cream


Preheat the oven to 350 degrees F or whatever is recommended on the cake mix. Spray the bottom and sides of two 9 - inch round cake pans with non-stick cooking spray.
(I used 8 - inch round pans so the layers would be thicker and look nicer.) Set aside.


Mix up the cake following the directions on the box.


Then add the pudding mix and milk and

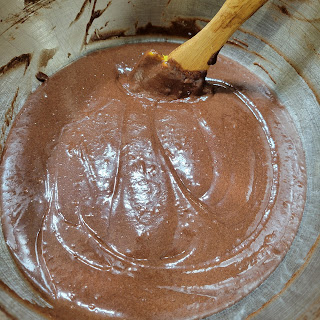
beat until smooth, about a minute. (I did use the electric beater. Here I was scraping the sides of the bowl to make sure the batter was completely blended.)

Divide the cake batter evenly between the two pans and cook following the directions on the box.
(
I cooked mine for 24 minutes.) Press lightly in the center to test for doneness.

Place cake pans on a wire rack for 10 minutes to cool.

Remove the cake layer and continue to cool on a wire rack. 


Meanwhile prepare the cream cheese frosting by creaming the cream cheese and stick of butter

until light and smooth.

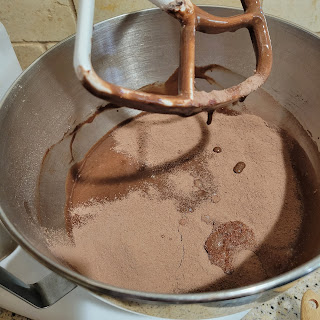
Slowly add the powdered sugar and

beat until smooth.
 

I did sift the powdered sugar before I added it.

By the time I did this, the cake was cool so I placed one of the layers flat side UP on the bottom of the cake carrier.
(If I were serving the cake at home, I would have placed it on a cake plate.)

Frost the bottom layer just on top.
 

Place the second layer flat side DOWN on top of the frosted layer and

frost the top and down the sides of the cake. (If you are want to frost the cake later, cover the bowl of frosting and place in refrigerator until you are ready to do so.)


Place the cake in the refrigerator until the Grenache is made and ready to pour over the frosted cake. 


To prepare the Grenache,  chop up the chocolate, place in a medium size bowl, and set aside. (Sorry I apparently failed to take a picture of my nicely chopped chocolate.)


Heat the heavy cream over low heat until

it just comes to a boil.

Then pour the hot cream into the bowl with the chocolate and

whisk until

smooth. Let it rest 5 minutes to thicken up before slowly pouring it over the top of the cake to cover the top and run down the sides of the cake. Mine was too thin after 5 minutes so I placed the bowl in the refrigerator for about 10 minutes. It still wasn’t as thick as I really wanted but I did

pour it from the center of the cake using a ladle spoon.

I didn’t use most of what I made but the ladies said they thought it was just the right amount. I also never saw Roxanne’s cake, just one slice, so I don’t know how her cake looked. I covered the cake carrier with the lid and stored in the refrigerator at Fran's until we were ready to serve it.


Tuesday, March 1, 2022

CHERRY - NUT BREAD

 The first time I saw the cookbook by Charla Lawhon called Heartland Baking, from the Jerre Anne Cafeteria *And Other Home-Cooked Favorites Friend Janice and I were at an estate sale in St. Joseph. They wanted more for it than I wanted to pay, so I didn’t buy it.  I think it was the next week when we were at another estate sale that I saw the cookbook again. I reminded Janice that I didn’t get it because they had priced it so high. I don’t like to pay over $2.00. If I did, you can be assured I would not have the collection that I have. Anyway, this time they were selling it for $2 so I bought it.


At the previous sale, the ladies said the cookbook  was from a local restaurant in St. Joe that had closed. The food, they said, was excellent. We were really disappointed to hear that they were no longer in business. Inside the cookbook you can read all about it and its start in 1930. The cookbook was published in 1991. I was surprised at its popularity when I Googled it.

I haven’t really taken the time to study the recipes, but I did make this marvelous Cherry-Nut Bread before Christmas. I made two loaves to give away - actually I planned to eat one and give the other one away. I liked it so much, I talked myself out of giving it away. It’s that good. 


If you want to print just the recipe, click HERE.


CHERRY-NUT BREAD


¾    cup sugar

¼    cup butter, softened (½ stick)

¼    cup margarine, softened (I just used a whole stick of butter)

2      eggs

1      teaspoon vanilla extract

2     cups sifted flour (sift first, then measure)

½   teaspoon salt

1      teaspoon baking soda

⅔   cup buttermilk

1      cup drained, rinsed, and chopped maraschino cherries

¾   cup chopped pecans


Preheat the oven to 350 degrees F. Grease two 4” x 7” loaf pans and flour them lightly. Set aside. (I know I prepared a lot of pans. I wasn't sure how many I needed.)


Prepare the cherries and set them aside until you need to add them to the recipe.


In a large mixing bowl, cream the sugar, butter, and margarine together.


Add the eggs, one at a time,

beating well after each addition.

Add the vanilla and beat well.


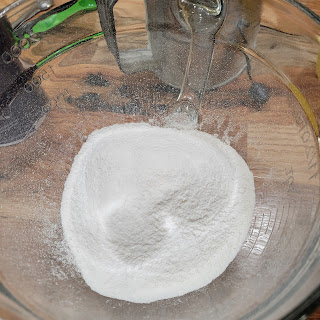
Sift together the flour, salt, and baking soda. (Remember when a recipe calls for a certain amount of sifted flour, that means that you sift some flour and

then measure what you need.
)


Add the dry ingredients to the creamed mixture,

alternating with the buttermilk. Be sure to start and end with the dry ingredients. (
I do 3 times dry and twice with the liquid.)


Fold in the chopped cherries (make sure there’s no excess juice) and nuts.

Divide the batter evenly between the pans, filling them about three-quarters full, and bake for 45 minutes or until a toothpick inserted in the middle comes out clean.

Let the loaves cool in the pans for 10 minutes then

turn them out onto the racks to finish cooling.

So pretty when you slice it and tastes even better.