When Blankets of Hope met Tuesday afternoon I left with two colors to inspire a new blanket. Not surprising the colors were blue and yellow - two of my favorites. Later that evening I did a search for "quilt patterns with two colors. I saw several images that interested me and drew off the blocks on my graph paper. I will eventually probably make all three but settled on one for the color prints I had.
After I draw what the block looks like then the math comes in to play for me to see the possibilities for the quilt. We traditionally make our blankets 7 columns x 8 rows using 6-1/2 inch squares which makes the blanket 42 " x 48 " and perfect for a wheel chair if that is needed for a recipient. Sometimes our "designers" want to design the squares with a center which messes up the 7 x 8 rows. So all of our blankets aren't our traditional. Also because there are a number of quilters in the group, they will take fabric home and cut the pieces for a traditional quilt pattern of their own trying to stay close to the 42" x 48" blanket.
I am really pleased with the way this block turned out and it wasn't difficult to make and was easy - which is what I like.
What might look difficult for some, I can look at a pattern, break it down into sections, and then figure out an easy way to make it. You might see big squares, little squares, and rectangles. I see the bigger squares and smaller squares and rectangles and how they were made. Once I decide the sizes that I am going to make each section, it's just a matter of cutting strips the width of the fabric and, in this case, 2-1/2 inches wide or 4-1/2 inches wide. Then after sewing two narrow strips together lengthwise (one of each color/print), pressing them, cutting them either in 4-1/2 inch sections or 2-1/2 inch sections. The wider strip is cut into 4-1/2 inch squares for the larger squares. Two of the 2-1/2 sections are sewed together to make the center and then it is just a matter of sewing everything together.
Hope you are still with me. If you are experienced, you had no difficulty with what I just said. In fact you probably already had that figured out. If you are not though, don't worry, I will take you through a pictorial tutorial that hopefully will help you a lot.
I started here with my three drawings:
If I make each grid square equal 2 inches, the finished block will be 12 inches. I can work with that.
Pressing the two color/prints, I cut the strips across the width of the fabric folded in half 4-1/2 inches wide to cut the 4-1/2" cut squares.
The yellow print was a little bit wider so I was fortunate enough to get an extra square (so 9) by opening up the folded piece. (Consider me crazy, but I love when I can get an extra square from the fold.)
My Blanket of Hope will have a total of twelve (12) blocks. Each block has two 4-1/2" squares of each color or (do a little math) a total of twenty-four (24) 4-1/2 squares of each color/prints. (With a little bit more math) that means three (3) strips needed that are cut 4-1/2" x wof (aka width of fabric) .
The rest of the block is made by sewing two (2) strips - one from each color/print 2-1/2" x wof. I say 2-1/2" because most people do that. I cut the strips one notch bigger (1/8") and then trim after the two strips are sewed together. It takes a little extra time, but I have made so much from strip-sewing and after I pressed the piece, it was slightly smaller than it was supposed to be. soooo...
Strip sewing is simply sewing strips together lengthwise and then cutting sections the size you need them. I did two strips, but you can keep adding more strips depending on the design you are making. Have you seen quilts with a series of say 1" squares and thought, "Wow! Can you imagine sewing all of those little squares together?" Guess what. Chances are they didn't. They did strip sewing. I'm not saying sometimes they didn't, but that's when they were using scraps of fabric they had. Here are some collages I made sewing you quickly the process of strip sewing.
If you don't have a 1/4" seam attachment for your machine, I would certainly suggest it.
You still set your machine for 1/4" seam on the right, but the "foot" helps you keep the fabrics inline for the 1/4" seam.
After sewing two strips together with a 1/4" seam, "set the seam" 1) press the seam just as it was sewn, 2) press the seam to one side...traditionally toward the darker print. Hint. Place the iron perpendicular to the seam toward the direction you are pressing the seam.
3) Then press on the wrong side of the fabric and 4) the strip is ready to be cut into sections.
If you line up the ruler with the seam and match 2-1/4" line with the seam, you can cut the 4-1/2" rectangular section and trim the excess on the top (remember that 1/8" extra that was cut originally).
Then just rotate it around and trim off the excess on the other half - remembering to match the seam with the 2-1/4" line. For my blanket, forty-eight (48) of these are needed cut from four (4) strip sets
Just as with cutting the 4-1/2" strip sets, 5) if the ruler line for 2-1/4 when the 2-1/2" sections are cut, the excess can be trimmed off the top at this time. Rotate the piece to also trim the excess off the other part. Cut a total of twenty-four (24) of these from three strip sets depending on the width. Hint: Divide 1/2 the width of the fabric (remember the strip is cut the wof but with a fold so two pieces are cut at a time from the open ends) by in this case 2.5 to see how many can be cut from the strip set. Ex. 42" wide fabric folded will be 21". 21/2.5 = 8. Then 8 x 3 = 24. I was able to cut one 2-1/2" section from the leftover on the 4-1/2" strip set so I had a little left over from the strip set for my scrap bag. 6) Trimmed and ready to chain stitch to make the center four-square.

7) When pairing two sets, alternate the prints and "nest" the seams so it feels flat and will they will "meet" on the right side. 8) Secure the placement with a pin on the side (of the seam) that will be stitched first.
This "chain stitching" will be a little slower because it will be necessary to nest the seams and pin one side of the seam down, but 9) it can still be done. 10) Connected chain of pieces, 11) Clip the threads, and 12) set the seams.
13) Press the seam to one direction on top and then 14) on bottom.
Made...
At this point, I usually work from my design wall (a large piece of felt hanging on a wall in my sewing room). If this pattern is new to you, I would suggest you make each block completely. If after you have made several and have a comfortable "feel" for the pattern, you could do some chain sewing if you like.
I space the "pieces slightly apart in the pattern of the block. I can see the rows (across/vertically) and the columns (down/vertically) of the block. I tend to work across or with rows, but it doesn't really matter. With this particular pattern I sewed the middle row first and then the top row and finished up with the bottom row. I don't do any pressing until I have all of the rows back on the wall when making the first block. After that I can press each row after sewing it as I know the way I need to press the seams.
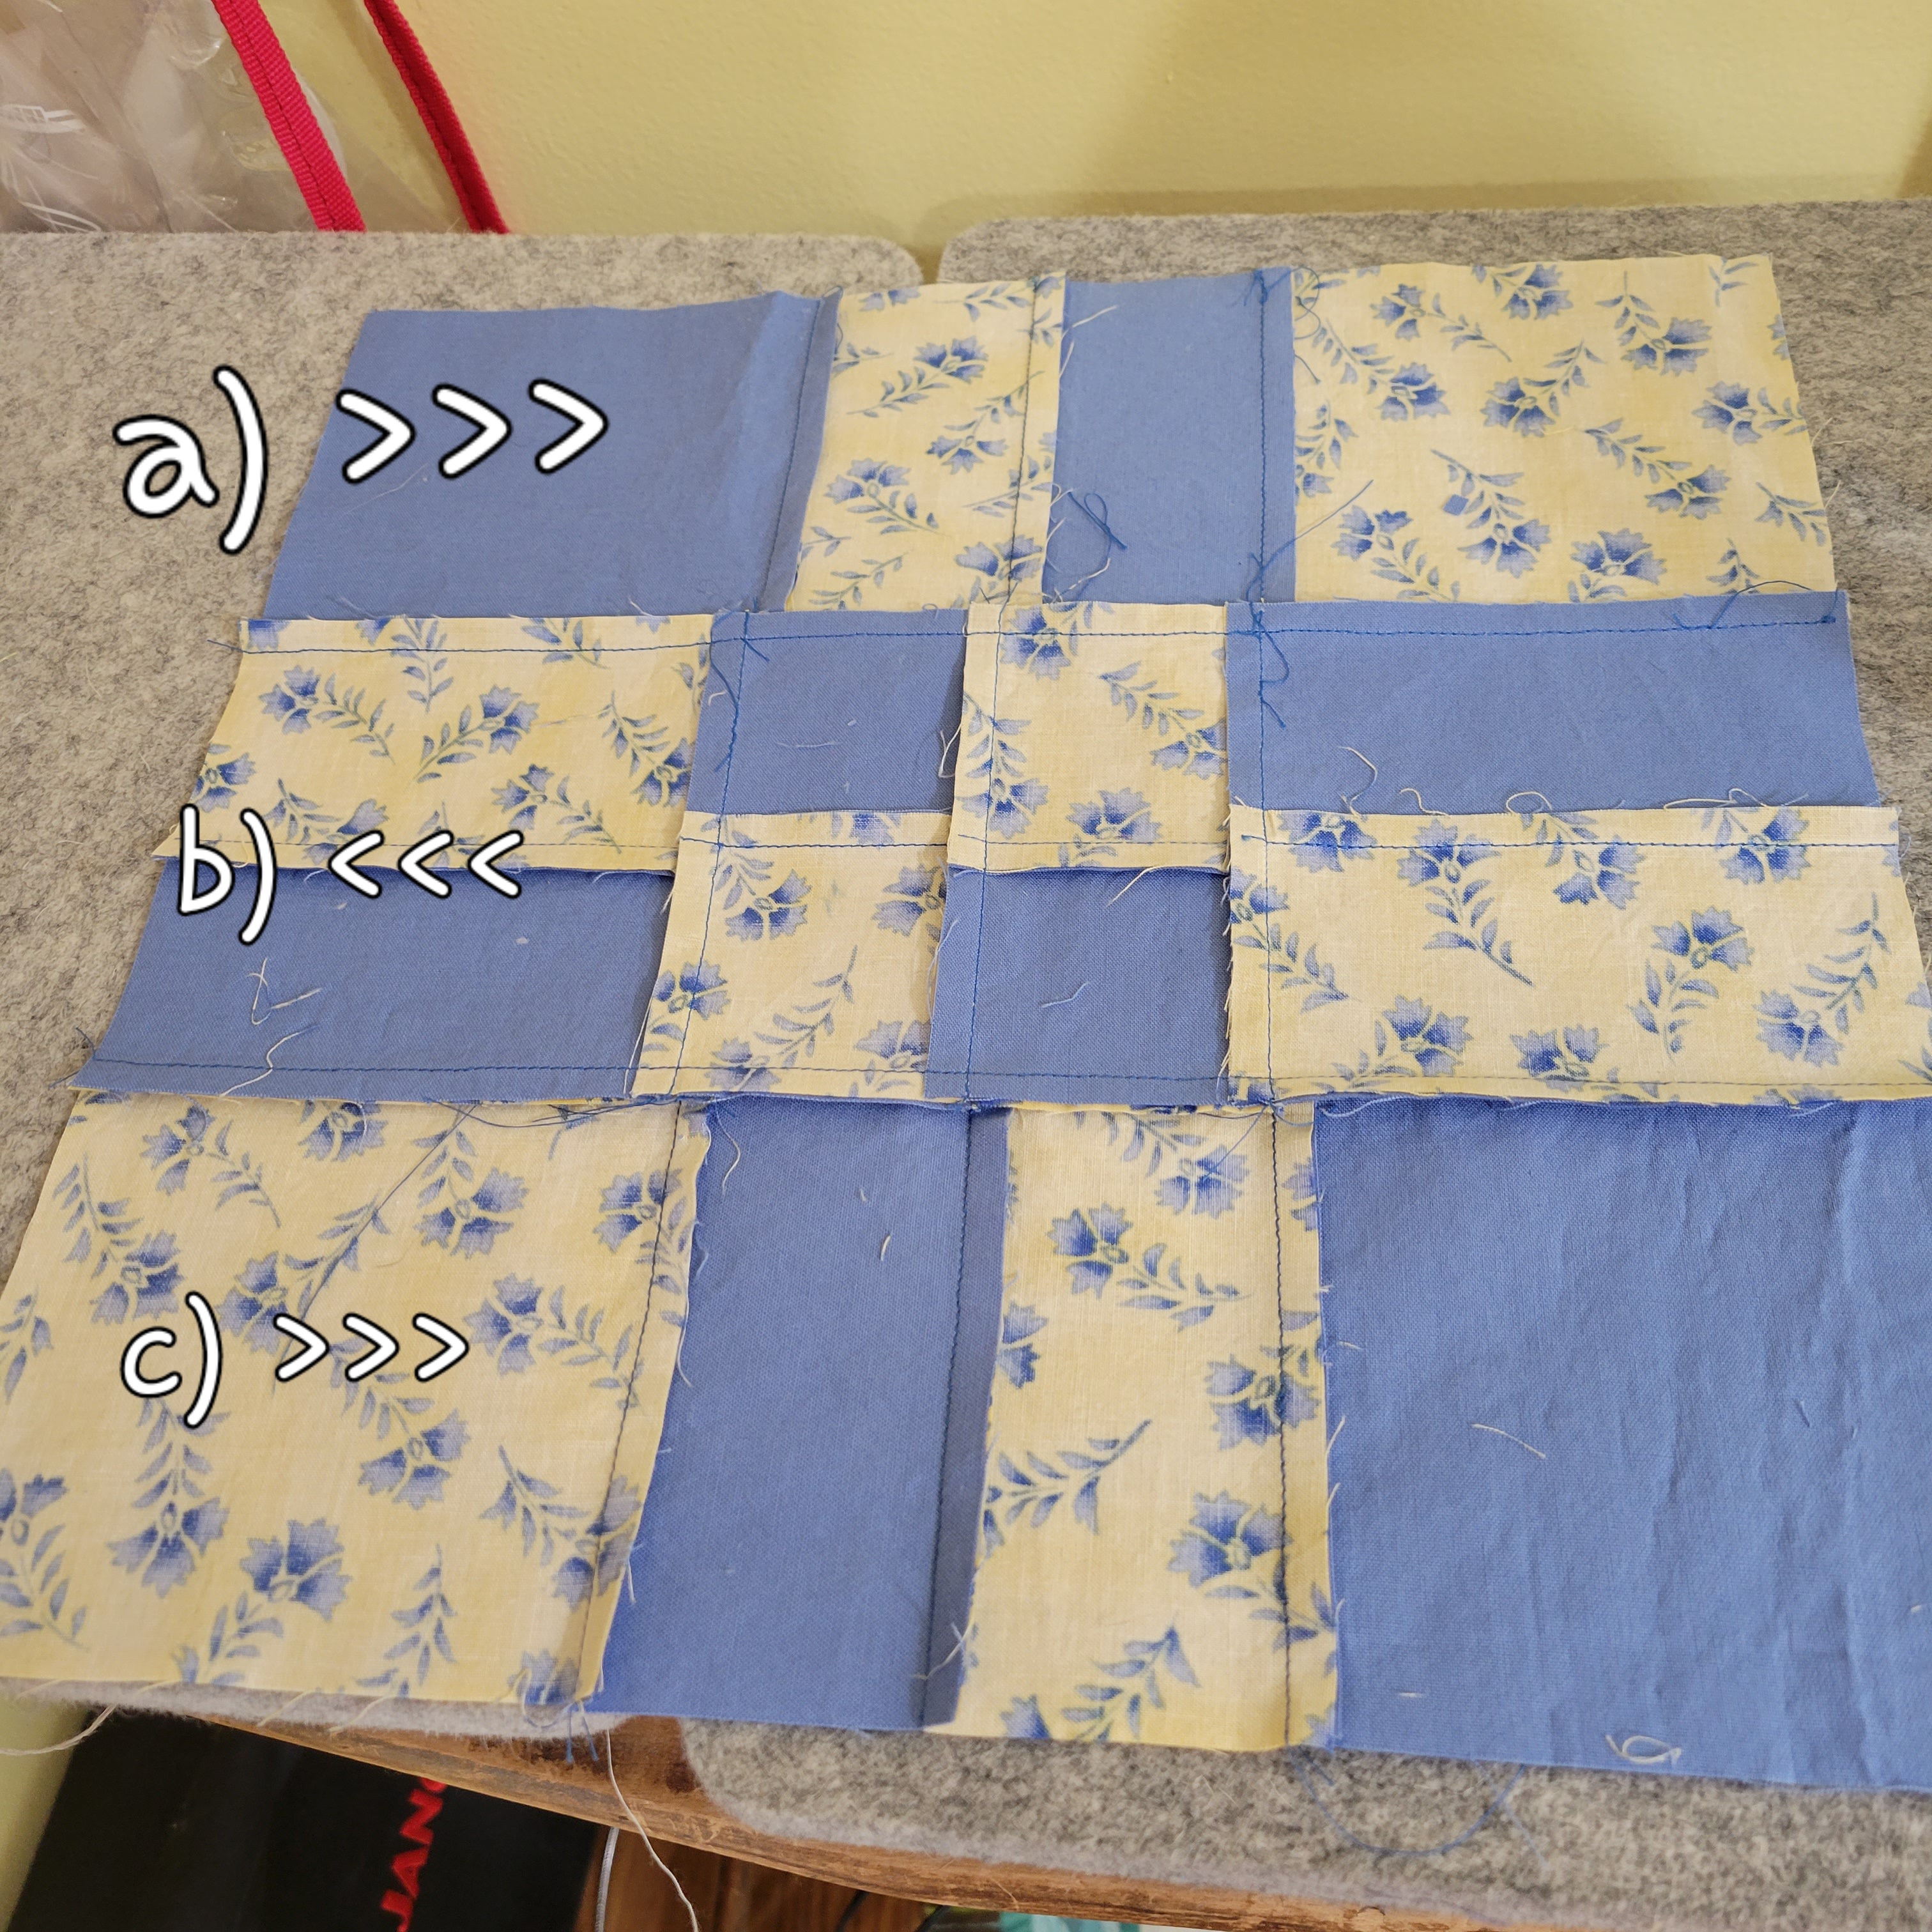
Generally speaking I press the seams toward the darker print. When you are sewing strips or rows together, you want to press so that any seams meeting can "nest". This happens when the seams are pressed in different directions. I realized I needed to be consistent to make it easier for me so I try to press the odd numbered rows toward the first square and the even numbered rows away from the first square.
In this picture I flipped over the strips/rows and used arrows to indicate the direction to press the seams. Don't get confused with the rows -- remember I flipped the block.
When I have all 12 blocks made, I will sew four blocks of each column together and then put a narrow border between the three columns to add some inches to the width of the quilt. But I'm resting today, so I will continue this when I get back to sewing it. I currently have four more blocks to make and I will be ready to do that. I hope you are enjoying this tutorial and are anxious to give it a try.


Beautiful! Thanks for posting!
ReplyDeleteThank you. I'm anxious to get back in to my sewing room to finish the top, but my sinus headache is winning out over it.
DeletePatricia