I am going to try to show you with lots of pictures and briefer written explanation how to make perfect mitered corners when you are sewing binding on your work. Also how to join the end binding together with the beginning with the diagonal seam also called an invisible seam. I should apologize for using a binding that the right and wrong sides of the fabric aren't obvious. It just happened to be what I was sewing when I decided to make the tutorial. It is also hard to show the steps with photos instead of a video. That's why I have so many pictures. I hope these tutorials will help you. If you have any questions, please leave them in the comments and I will try to answer them.
 1) Measure and mark a quarter of an inch from corner with a pin.
 2) Sew to the pin and stitch in place a couple of stitches or backstitch a few stitches.
Cut the threads.

My machine will stitch-in-place.

3) Fold the end of the binding up so that it forms a 45 degree angle to corner.

4) Holding the sewed binding in place with your finger, bring the binding down along the side making a fold even with the sewed side.

5) Holding the binding in place with your fingers, lift up the "foot" and carefully move the piece so that you will start sewing from the end. Sew a couple of stitches, then backstitch a couple and then sew down side.

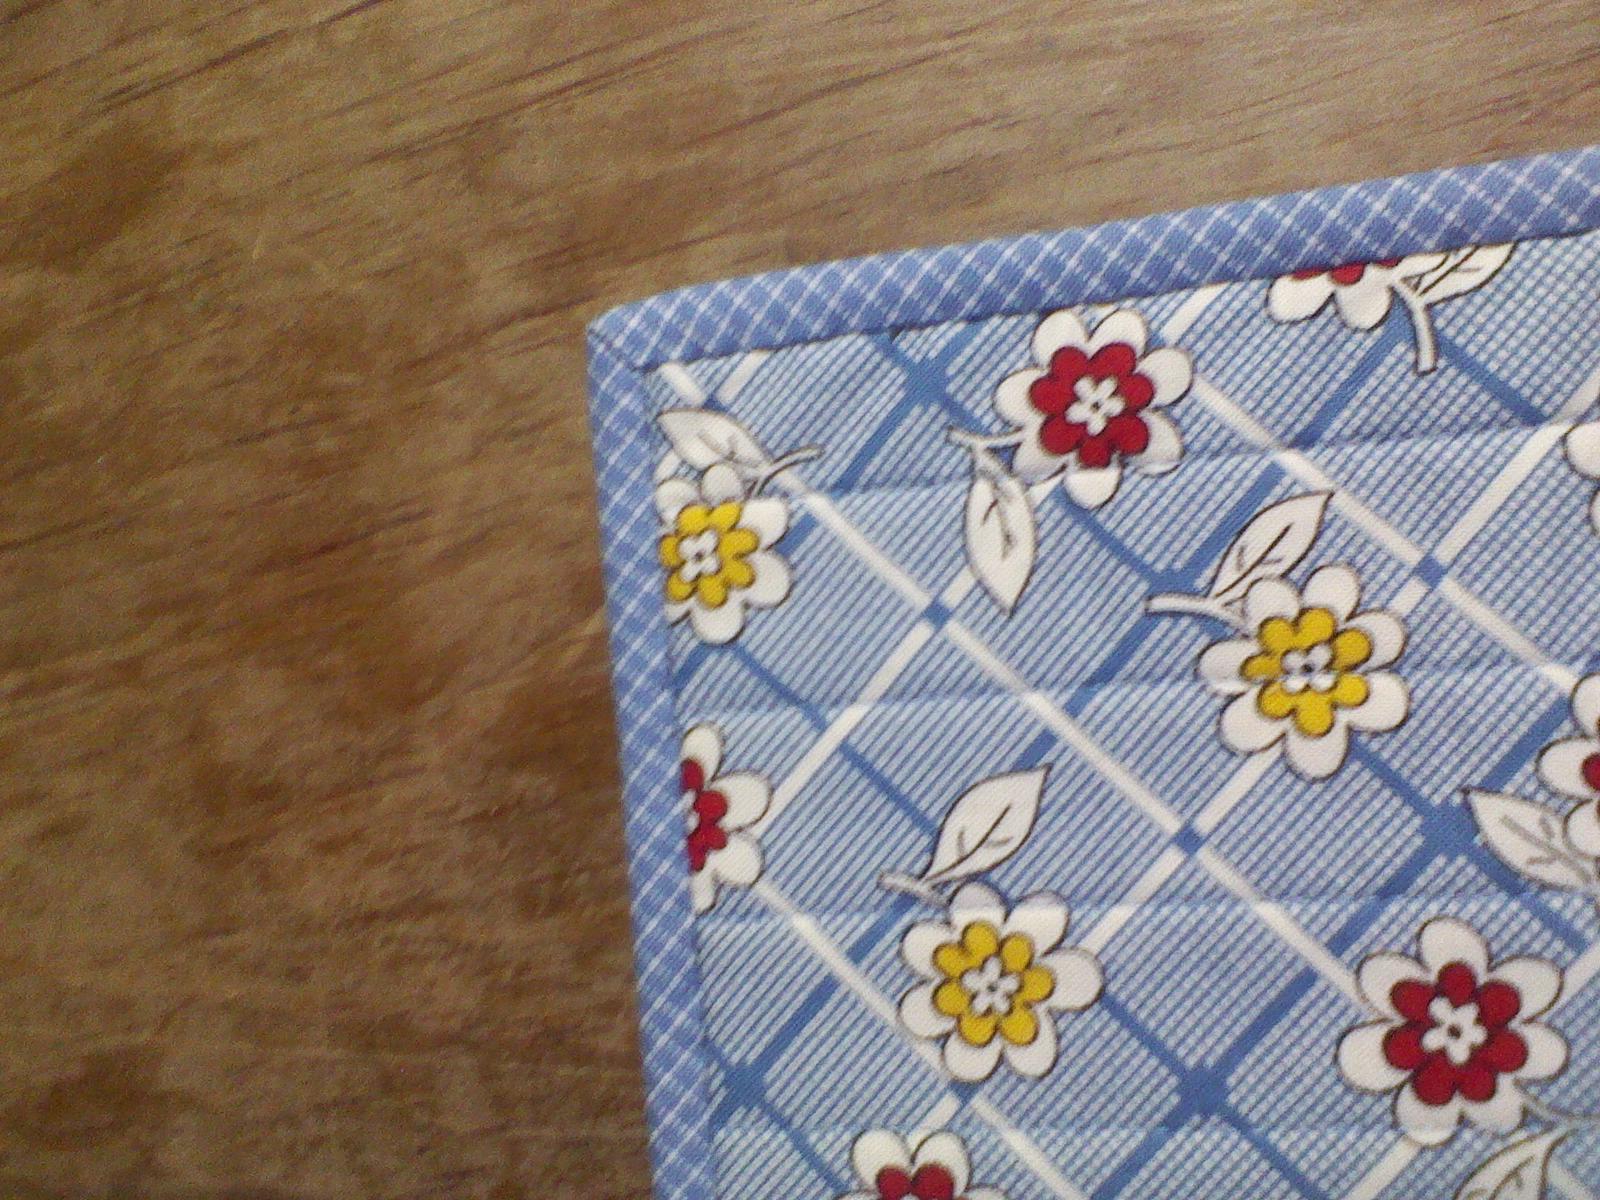
This is what it will look like when you are finished.

6) When you have finished sewing the binding on and are ready to blind stitch it to the back, flip the binding around to the back as shown in the picture. You can see that the corner is a folded miter on the front.

7) As you are sewing the binding down on the back side, as you get close to the corner, pull the binding over along the side you are sewing. You can see at the corner, the binding makes a diagonal.

8) I press the binding down with my finger at the end

9) And bring the other side over with my other hand so that the binding makes a perfect miter. If it doesn't, I go back and start over with step 9 and make sure my finger is making a "break" at the edge of the other side.

10) I pin the two sides to hold in place while sewing.
I just realized that I didn't take a picture after I finished slip-stitching the binding down. Here is a picture of my SEW & QUILT-IN-ONE PLACEMATS that I made.

The front....
and the back.
When I am sewing the binding on, I lay the binding down one side of the piece and then move down as far as I can to start sewing the binding on. I highly recommend that you lay the entire binding around your work to make sure that where you start won't have a seam (of the binding) near a corner. If this happens, it is very difficult to make a nice clean corner with the added bulk. For example, with these placemats, I would move down and start sewing about 3 inches from the corner. I do this so that I have plenty to work with when I get back around to finish. I also will stop after rounding the last corner about 3 inches from the corner. Since I have joined the strips for the binding with diagonal seams or "invisible" seams, I want to join the beginning and the end with a diagonal seam.
UPDATE! MAKING INVISIBLE BINDING JOINTS EVEN EASIER!
I wrote this tutorial two years ago and have since learned a much easier way to join the binding with invisible joints. I have removed the original tutorial and am sharing with you this easier way to join them.
It is always good to know we are never too old to learn a better and easier way to do things.
I always leave a generous amount to work with. The actual amount depends on the length of the project. I have at least several inches at the beginning when I start before the corner and then at least several inches after I "round" the last corner.
These pictures are from a table runner I made and had about 15 to 20 inches free to work with.

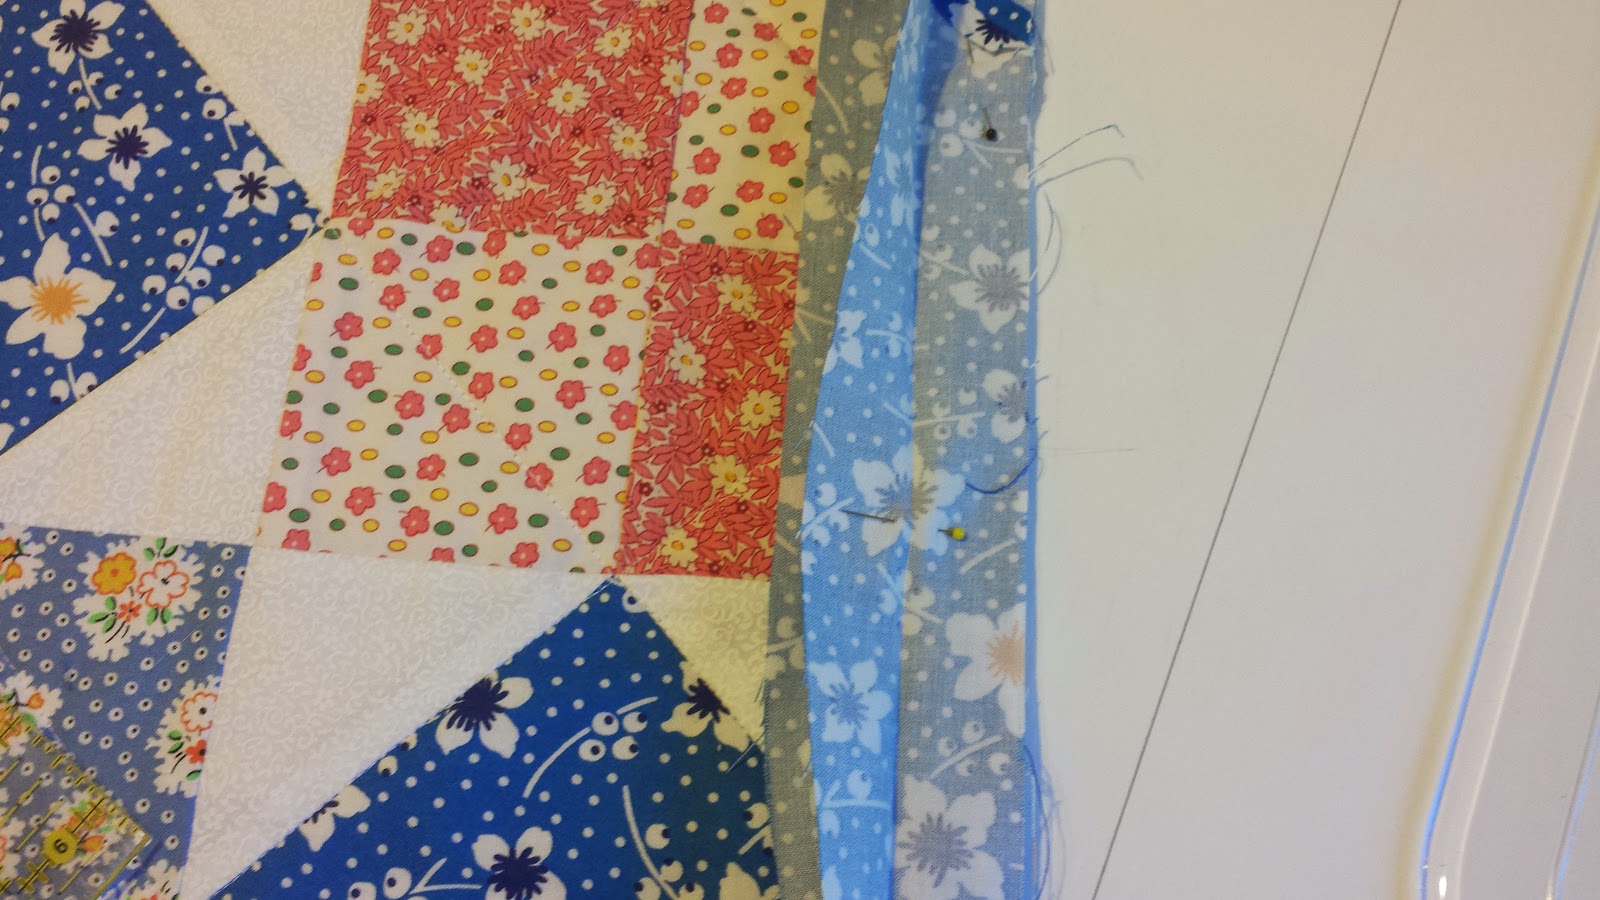
I pinned the two pieces together to just recheck that they were flat and there was no excess.


I really have to thank my friend Kay who taught me this method. It is so easy. It makes all those other methods seen confusing to me.
As always with my tutorials, if you have any questions or comments you would like to leave, I will get back to you as soon as I see them.
Would love for you to let me know if this was helpful.
Hi - I am so grateful to you for helping us amateurs with your wonderful instruction......
ReplyDeleteThe last time I did any proper sewing was 4o years ago learning at school and eventually making my own wedding dress. Time goes by and I have a lovely granddaughter so I took up my old crochet skills and did a very trendy Blackberry stitch blanket in all of the new vibrant colours now available, but when it was complete I felt it needed to be bound so I bought some lovely deep purple wide satin ribbon and would you believe - I have sewn it on and unpicked it 2 times. Thankfully I have found your instruction for mitred corners and binding and hopefully I will be able to unpick for a 3rd time and put it back on perfectly.
How wonderful it is to be learning again!! and thank you for all the instructions I am so so grateful.
thank you so much for your words. I am so glad that my tutorial was helpful for you. You peaked my curiosity with your BlackBerry stitch. I will have to look that up and see how to do it. Hopefully third time will be charmed and you will be pleased with the outcome of your binding. Again thanks so much I really enjoyed hearing from you.
Delete