Today started off a little earlier than usual for me as I had an echo cardiogram done at 7:30. Will have to wait to hear from my doctor for the results. (I have a heart murmur that the doctor first heard a year ago at my yearly checkup.)
Back home for about an hour and then I was off to the church for Blankets of Hope. Our group was small again---just Fran, Janice, and me, but we did manage to tie a lap throw that Fran took home to sew the binding on. I brought a Christmas throw that I had finished and Fran brought back what we call the "lobster quilt" that is big enough for a twin bed that she had sewed the binding on. (I think she was the one that sewed the top together after they "laid" it out several months ago.)
After a super good hamburger at 64 Tavern and Grill, Janice went to pick up Patricia and then the four of us were off to Kay's for a fun afternoon of Mexican Train. Marilyn drove up right after we arrived at Kay's.
I had been at Kay's last Saturday night for the Dinner Club, a couples small group in the Northland New Neighbors League and enjoyed seeing all of her holiday quilts and stitchery works she has on display. Since I didn't take any pictures last Saturday night, I decided to do so today and share them with you. (Kay is so talented and I have to admit I am envious of her talents.)
Hope you enjoy her treasures.


This is one Kay has been working on for over a year. The center is all embroidery with quilt squares making up the border. This was hanging on her design wall. I couldn't get the whole top in my picture.
Here are some pictures of some of her stitchery.
These are some cute refrigerator magnets she made using plastic rings. She embroidered the designs on the counted crossstitch material. Glued it to the back of the ring. She then covered the back with a gold seal and glued a round magnet to it. I think these would look cute as an advent calendar. With a calendar backdrop, each day of the week counting down to Christmas, you could add a different "magnet".
This was a cute wooden Santa, that I admit, none of us noticed and Kay pointed it out to us. He will fit around any door frame or window frame. He would be easy to make.
Here it is close up. The black mittens are glued on top and help to keep it resting on the frame as they fit on the outside of the frame.
Kay served Hot Spiced Wine to enjoy while we played Mexican Train. It was a recipe she got from Judy Anderson, a co-worker back in the mid 70s. Everyone thought it was a perfect addition to our game.
HOT SPICED WINE
1 quart Burgundy wine
1 quart water
1 cup sugar (or more to suit your taste)
1 fresh lemon - thinly sliced
4 cinnamon sticks
14 whole cloves
Put all of the ingredients except the wine in a 2-1/2 quart pan and bring to a boil and boil for 5 minutes. Turn down the heat to low and add the wine. Serve hot.
Store leftovers back in wine bottle in refrigerator.
Note from Judy: This is best when it sits a day in the refrigerator and reheated on low before serving.
For dessert Kay served her mother's recipe for SOFT GINGERBREAD. I shared it earlier this year when Kay made it for a gather. It is so good.
I'm looking forward to a quieter Friday and hopefully getting to work on my newest grandson, Henry's baby blanket. Time is running out.
Where does time go? It is hard to believe it is already the second week in December.
We just got back from spending a week in Branson, MO Saturday afternoon. We had a great time and enjoyed some very good shows. We had plans to go to Silver Dollar City on Thursday but the weather had different ideas. A winter storm moved in and by the time it finally quit snowing Friday around noon, there was 10 inches of snow on the ground. Fortunately though we were able to get our money back on our tickets we had purchased. I was so looking forward to seeing all the Christmas decorations and the shows there too though.
I need to be decorating my house for Christmas. I need to get the Christmas ornaments packed off to mail to my grandchildren in CO (since we didn't get to spend Thanksgiving with them). I need to clean house since we have been gone for a week.
But what did I do this afternoon? I found myself looking for something to bake. I decided to go through my mother's recipe box and see if I could find something that looked good to make. I actually found several good prospects, but decided to make these chocolate chip mini muffins. The recipe was simple enough and I didn't want to make too much of anything that would be too tempting to eat.
The recipe was cut from a magazine and was submitted by Joanne Shew Chuk of St. Benedict, Saskatchewan. She said, "I bake a lot of different muffins, but I use this recipe the most."
After baking them, I can say they were thoroughly enjoyed by both my husband and me. I managed to eat only two of them, but my husband had to come back for a third one later. The mini chips sink to the bottom of the thin batter so you are surprised when you bite into them and see the mini chips. That is, if you don't just pop the whole muffin in your mouth in one bite.
CHOCOLATE CHIP MINI-MUFFIN BITES
1/2 cup sugar
1/4 cup shortening
1 egg
1/2 cup milk
1/2 teaspoon vanilla extract
1 cup flour
1/2 teaspoon baking soda
1/2 teaspoon baking powder
1/4 teaspoon salt
2/3 cup miniature semisweet chocolate chips
Preheat oven to 375 degrees. Spray mini muffin tins with cooking spray.
In a mixing bowl, cream sugar and shortening until fluffy.
Add egg, milk, and vanilla; mixing well. (I found this easier to do with my whisk.)
Combine dry ingredients in a small bowl. Gradually add the flour mixture to the creamed mixture; mixing well with a whisk.
Fold in chocolate chips.
Spoon 1 tablespoon (my cookie scoop is exactly 1 tablespoon) of batter into each cup.
Bake for 10 minutes or until muffins test done. Cool in pan 10 minutes on wire rack.
Remove and finish cooling. (I loosened the muffins with a knife.)
Have you ever made something and then misplaced the recipe ? Well, that is what I did several weeks ago. I made this delicious Banana Gingerbread and then couldn't find the recipe when I got ready to put it here on my blog. I searched everywhere! The bad thing was I had no recollection of anything about how the recipe looked....whether it was on a card, something I had cut out of the newspaper or magazine, or in a cookbook. My mind was totally blank. I really hated it because I LOVED the gingerbread.
Then I decided to do a google search and see if anything looked familiar. I found a couple of recipes but I knew they weren't the right ones. They all called for cardamon and I knew I didn't use that. (I'm not sure I even know what spice that is....I have heard of it, but never had any.)
With a little time on my hands, I decided to look again....afterall it has been at least 3 weeks since I made it. Not in my recipe box. Then I picked up my 4 subject spiral notebook that I have told you about before. I started pasting recipes I wanted to try back in the 80s. I was almost through the bread section and there was a recipe that wasn't glued. It was for eggnog-nut stollen. I turned it over and almost fainted. There was the recipe for banana gingerbread.
It was a prize tested recipe from the Better Homes and Gardens Test Kitchens. I couldn't believe it. It was a $100 winner for Deanna Burch from Mentone, Ind. She was 14 years old and had decided to combine two favorite breads to make this holiday nut loaf. This was back in December, 1990. Better Homes and Gardens had decided it was a "keeper" and I certainly agree with them.
BANANA GINGERBREAD
2-1/4 cups flour
1/2 cup sugar
1-1/2 to 2 teaspoons ground ginger (I used 2)
1 teaspoon baking powder
1 teaspoon ground cinnamon
1/2 teaspoon baking soda
1/4 teaspoon salt
1 cup mashed ripe bananas (2 to 3 medium bananas)
1/2 cup butter-flavored shortening or margarine
1/2 cup molasses
3 eggs
1/2 cup chopped walnuts
Preheat oven to 350 degrees F. Grease or spray 3 mini-loaf pans.
In a large mixer bowl combine 1 cup of the flour, sugar, ginger, baking powder, cinnamon, baking soda, and salt.
Add mashed banana, shortening or margarine, and molasses. Beat with an electric mixer on low speed till blended, then on high speed for 2 minutes.
Add remaining flour and eggs; beat till blended. Stir in nuts.
Pour batter into prepared pans.
Bake for 40 minutes or until a toothpick inserted near the center comes out clean.
Cool for 10 minutes on a wire rack.
Remove from the pans and cool thoroughly on the wire rack.
These were be perfect to give to friends and family for holiday gifts.
This Thanksgiving found my husband and me celebrating alone. We had plans to go see our newest grandson (for the first time) and the rest of the family, but those plans got changed. My husband said we could go out to eat, but I hated to do that when I could easily cook something for us. I also knew I would get more food than I could eat....my stomach has shrunk with my recent ordeal with a bacterial intestinal infection.
So I decided to make my Sweet Potato Souffle (a recipe I got from friends (Joyce and Stephan) when we first moved to Ventura, CA in the late 80s. They were from AL and Stephan's family cook made it when he was growing up.) and the dressing recipe that I got from a teacher at Westwood Elementary School in Springdale, AR when I taught there in the late 70s and early 80s. (I didn't write her name down on the recipe card.)
In place of a turkey I decided to buy a whole chicken and just cook it in the crock pot. (That would be just about the right amount of meat for us for a couple of days.) Usually when I cook a chicken in the crock pot I just sprinkle on some seasonings and about 1/2 cup of water. This time I decided to pour a can of cream of chicken soup over it. (I had the can leftover from when I mixed up the dressing. I didn't realize until I opened the cans -- instead of one can of cream of mushroom soup and one can of cream of chicken soup, I had bought two cans of cream of chicken. And of course I didn't realize it until I opened both cans.) I then cooked the chicken for 5 hours on high. It was really good and the "gravy" was good over the dressing.
DRESSING
1 14-oz pkg Pepperidge Farm Herb Stuffing mix
1 cup margarine
1 cup chopped celery
1 cup diced onion
5 eggs
1 pan of cornbread
1 can cream of chicken soup
1 can cream of mushroom soup (can substitute cream of celery if you don't like the mushrooms)
3 cans of chicken broth (14 - 16 oz cans)
Preheat oven to 400 degrees F.
Saute the celery and onion in 2 sticks of melted margarine until tender over low-medium heat.
Crumble the pan of cornbread and mix with the stuffing mix in a BIG bowl. (Cornbread can be made the day before if you like.)
You can find my recipe for the best cornbread in the world HERE.
Add the celery and onions
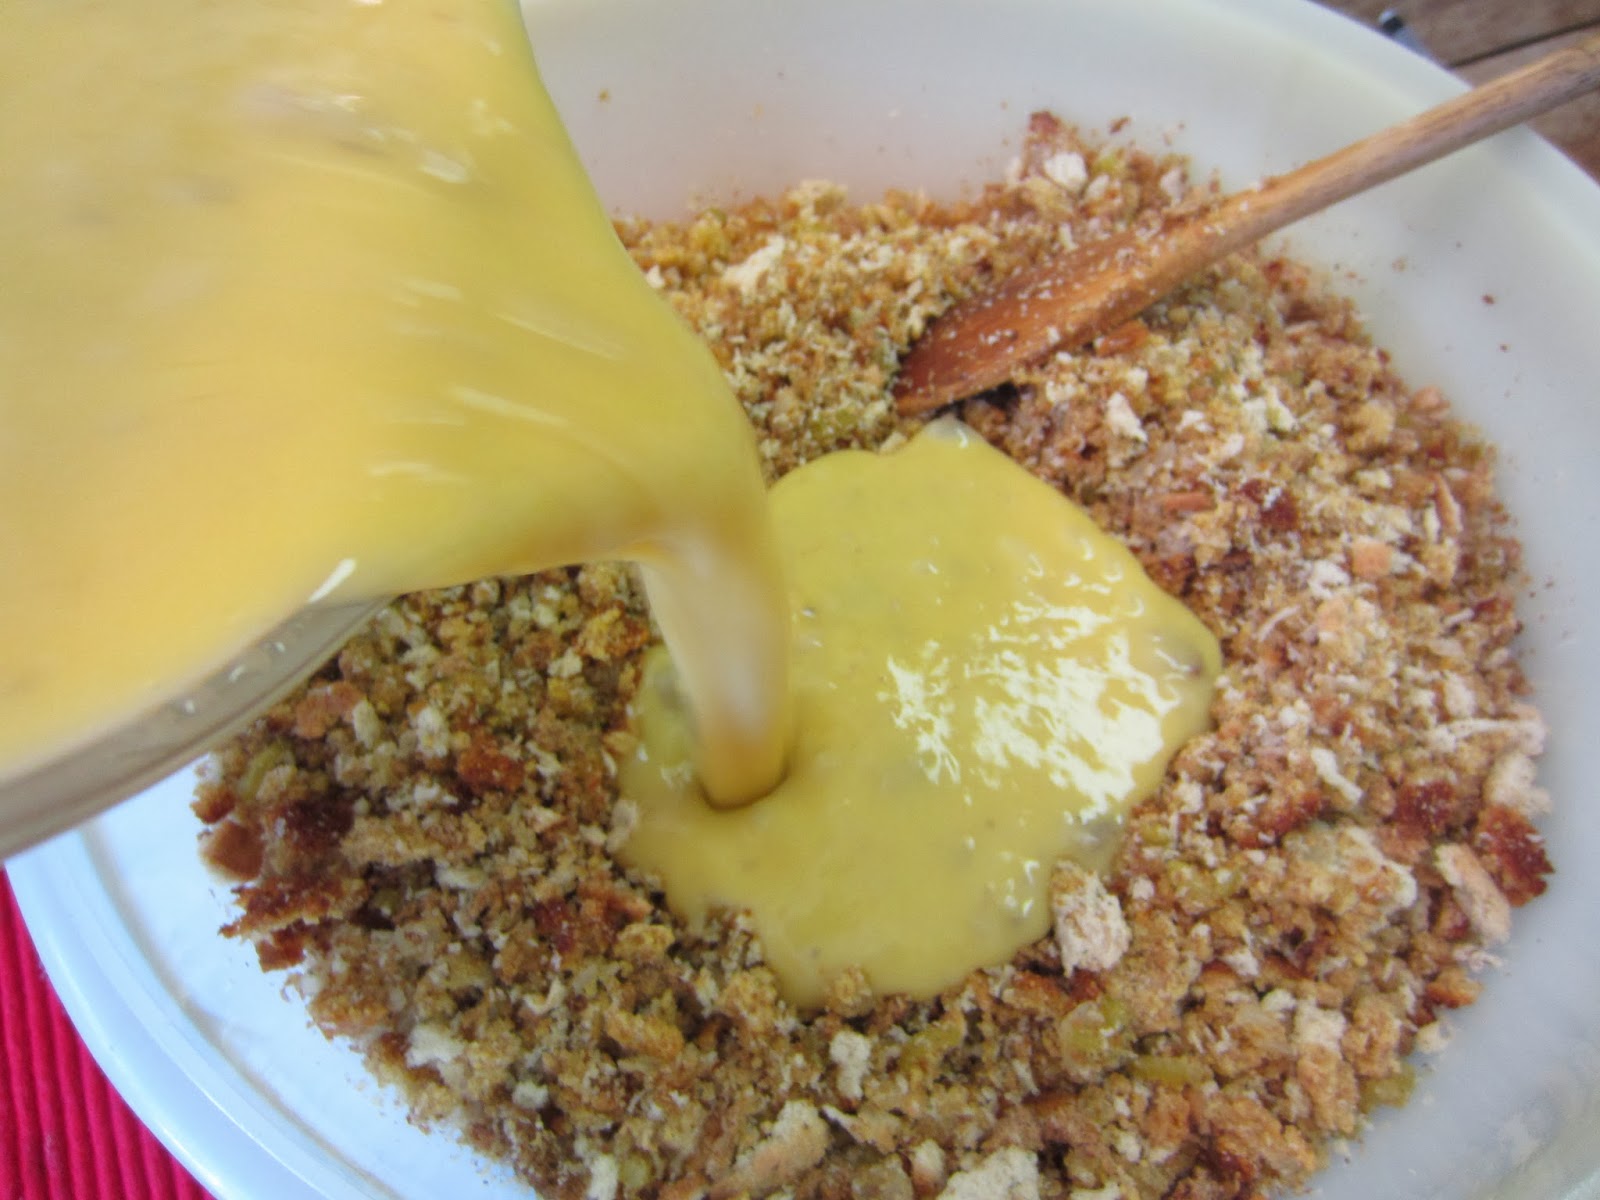
Combine the eggs and soups in a smaller bowl. I added a little of the broth to "rinse" out the soup cans.
Add to the stuffing mixture
and stir
If mixture is too thick, just add a little more broth.
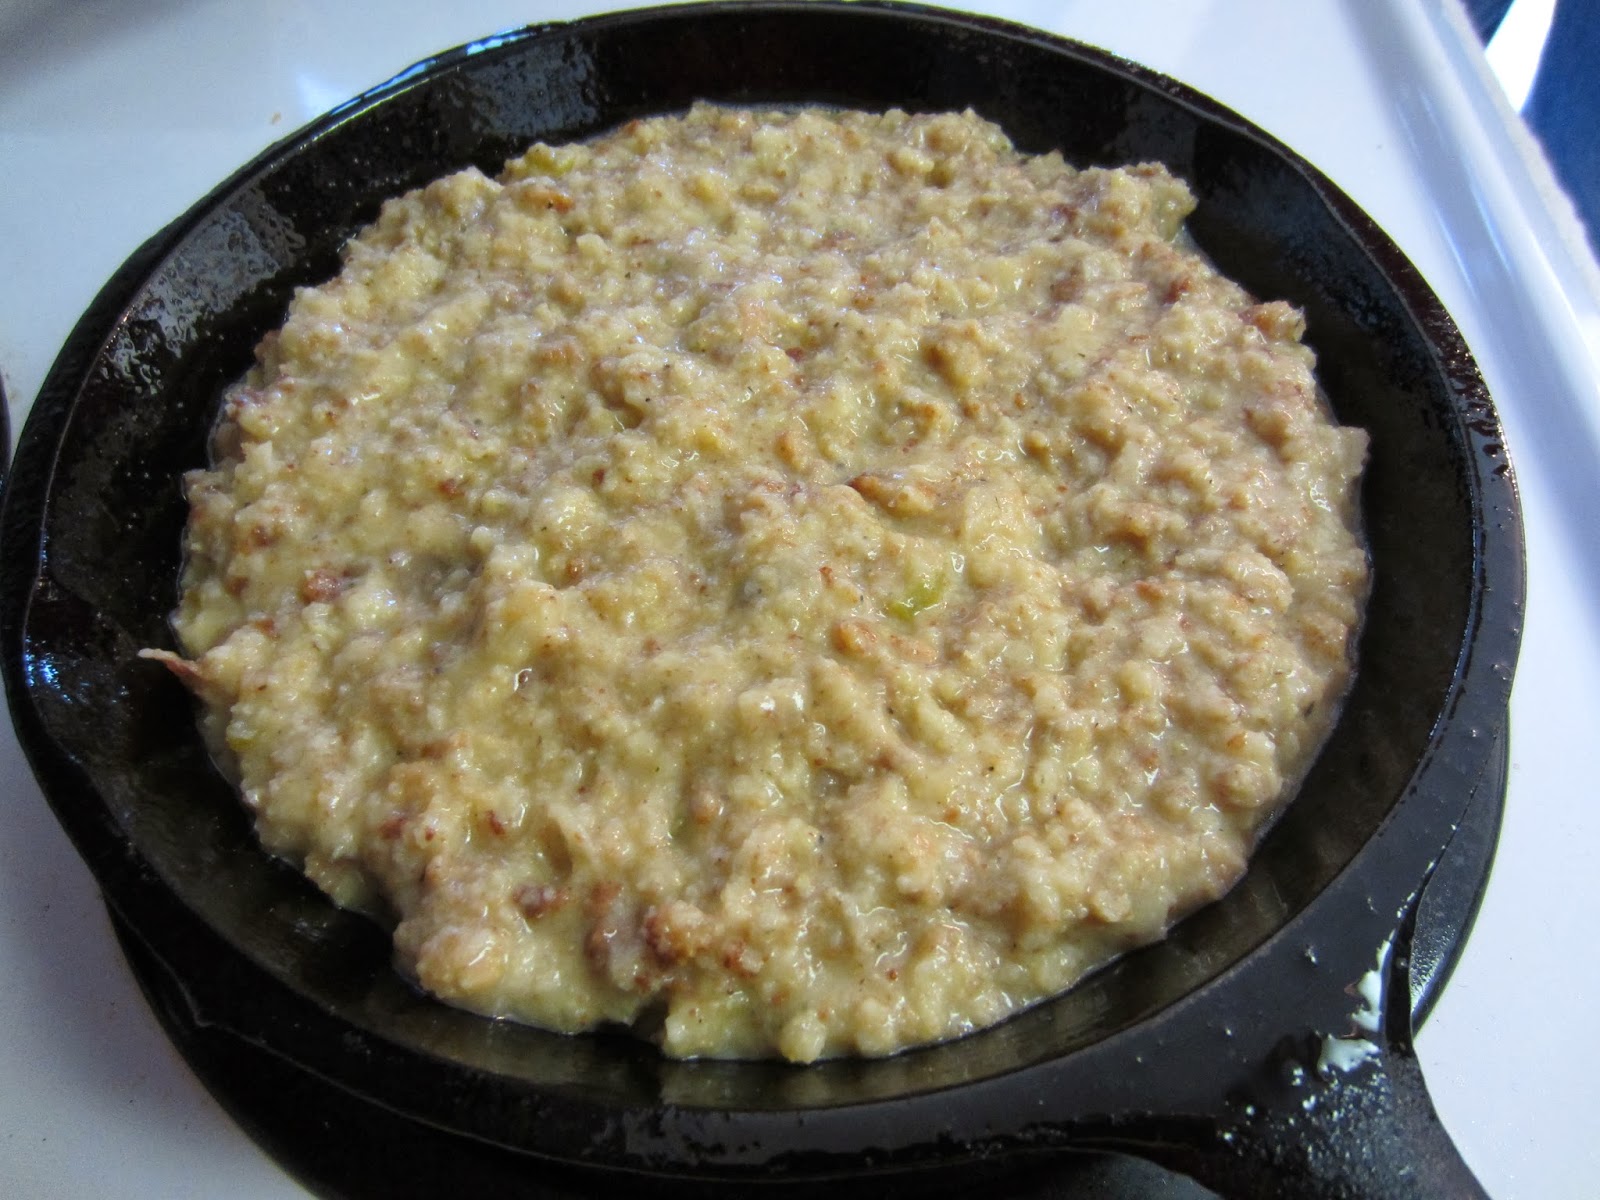
Since it was just the two of us, I cooked a small amount in my 7.5 inch iron skillet that I sprayed with cooking spray.
I baked it for about 20 minutes.
You could bake it in a 9 x 13 - inch sprayed pan for about 45 - 60 minutes or til edges are brown and top is golden brown and set in center. You can also check with a toothpick in the center.
Here is a tip that you might find helpful. I cook most of the dressing in my shallow muffin tin.
I checked the center with a toothpick after 15 minutes and they were done.
After they had cooled, I removed them from the muffin tin and placed them on a cookie sheet to place in the freezer to quick freeze.
About an hour later, I removed the pan from the freezer and wrapped each one individually with plastic wrap.
Then I placed them in a gallon freezer bag and returned them to the freezer.
When my husband wants one or two to eat, he simply takes them out of the bag, places them in the microwave on defrost and then heats til hot. (He doesn't remember the length of time for each process.)
The mixture made the one 7-1/2 inch pan and 29 muffins. The last pan only had 5 of the cups filled. I filled the empty cups with a little water so the filled ones would cook evenly.
Here is a picture of the sweet potato souffle I made. I featured it last year HERE.
I made us the pumpkin streusel custard I featured a couple of days ago for dessert. It whips up so quickly and tastes so-o-o-o good. Missed it? Check it out
HERE,
 Back home for about an hour and then I was off to the church for Blankets of Hope. Our group was small again---just Fran, Janice, and me, but we did manage to tie a lap throw that Fran took home to sew the binding on. I brought a Christmas throw that I had finished and Fran brought back what we call the "lobster quilt" that is big enough for a twin bed that she had sewed the binding on. (I think she was the one that sewed the top together after they "laid" it out several months ago.)
 Hope you enjoy her treasures.


 For dessert Kay served her mother's recipe for SOFT GINGERBREAD. I shared it earlier this year when Kay made it for a gather. It is so good.