I'm a believer! I admit I was skeptical when I first saw Christine's post on her blog Fantastic Family Favorites for Slow Cooker Lasagna. But I tried it and now I am a believer!
My concern was getting the lasagna out to serve it so it looked like the lasagna that you bake in the oven. Christine had a picture that looked like that regular baked lasagna, but I just wasn't sure.
Well, it was so easy to prepare and cook AND it came out easily and it looked like that regular baked lasagna. A winner all around! Yay!
See how pretty it was in the Crock Pot...
The only problem with it is....it makes a lot. Just like that regular baked lasagna. I mean my husband and I didn't hardly make a dent in it. My solution is to cut it into individual servings and freeze them.
Another great thing about it besides being so easy is it was so easy to use half ground beef and half ground turkey for the meat. I cooked the ground beef (for me) and put it in a bowl. Then using the same skillet, I cooked the ground turkey (for my husband). Since you layer the ingredients into two main divisions, I put the ground beef in for one of the meat layers and then the ground turkey for the other layer.
Anyway, if you have any doubts about the success of making lasagna in a slow cooker for company, don't. It is so easy, prepare it and then forget about it and it is ready for dinner. I also goofed and added all of the cheeses together and just added a little extra for the top. It worked great but if you have a package of 2 cups shredded mozzarella cheese, just hold out a little to sprinkle on top to melt for looks.
SLOW COOKER LASAGNA
1 lb ground beef or turkey (I used 1/2 lb of each)
1 jar of your favorite spaghetti sauce (my jar was 26 ounces)
1 cup water
1 15 - oz container ricotta cheese
2 cups shredded mozzarella cheese, divided
1/4 cup grated Parmesan cheese, divided
1 egg
2 tablespoons chopped fresh parsley
6 lasagna noodles, uncooked (I used whole wheat ones)
Brown meat, drain if necessary.
In a large bowl, combine the spaghetti sauce, and water. (I did this a little differently than Christine.)
Combine the cheeses, egg, and parsley together in a bowl. (I used the full amount of all of the cheese. Christine used 1-1/2 cups of the mozzarella cheese and 2 tablespoons of the Parmesan cheese.) I started by beating the egg and then adding the ricotta cheese til smooth.
Then I added the other cheeses. (You may have noticed from the pictures that I forgot the parsley...oops, my mistake.)
Spray the Crock pot with cooking spray (for easy cleanup). I used my 6 quart Crock pot. I started using my 3 quart one and it was too small.)
Place half of the meat in the pot. (I put the half lb of ground beef I had browned.)
Top with a layer of 3 of the lasagna noodles. (Break them up to fit.)
Spoon and spread half of the cheese mixture over the noodles.
Pour half of the spaghetti sauce over all.
Top with the other half of the meat. (This time I put the ground turkey in.)
Top with the other 3 noodles.
Then the rest of the cheese mixture.
Finally the last of the spaghetti sauce mix.
Cover and cook on LOW for 4 - 6 hours or until liquid is absorbed.
Sprinkle with remaining cheese if you saved some or just sprinkle with additional cheese like I did.
Recover, and let stand at least 10 minutes or until cheese melts. (I let mine stand about 30 minutes because we weren't ready to eat yet.)
When ready to serve, cut through making sure you cut the noodles and spoon out. I have a big serving spoon that is fairly flat that I used and it worked perfectly.
Remember, if you wish to print this recipe using the print icon below, you will be given the option to "remove images" when the print window opens. If you do not see the print icon below, you need to go back to the title of this post and tap/click on it. Then just this post will open and the print button will be included with the share buttons at the bottom. Home will return you to the blog and the most recent posts.
I don't drink coffee. Never really have. When I was little, my maternal grandmother would treat us (me and my cousins) to a little cup of coffee. She had these little green cups. I think she put a lot of milk in it and probably sugar too. Anyway, that was always a special time for us growing up. When I got older and first went to college, I tried drinking coffee, but quit when I realized I had almost as much sugar in the cup as I did coffee. True story. I promise.
Anyway, if I did drink coffee, I think this Apple-Nut Coffee Cake would taste great with it. It tastes even better the second day... so moist.
It was just what I needed after a busy afternoon of making a dessert (Turtle Cake) to take to a party and another batch of apricot jam. According to my recipe card the recipe came from Better Homes and Garden, but I don't know any particulars.
APPLE-NUT COFFEE CAKE
1/4 cup shortening
1/2 cup sugar (I used 1/4 cup stevia/sugar baking blend)
1 large egg
1/2 teaspoon vanilla
1 cup flour
1 teaspoon baking powder
1/4 teaspoon baking soda
1/8 teaspoon salt
1/2 cup dairy sour cream (I used vanilla Greek yogurt)
3/4 cup finely chopped peeled apple
1/4 cup chopped nuts
1/4 cup brown sugar
1/2 teaspoon ground cinnamon
1 tablespoon butter, melted
Preheat oven to 350 degrees F. Grease an 8 x 8 - inch square baking pan.
Cream shortening and sugar together.
Add egg and vanilla; beat well.
Sift flour, baking powder, baking soda, and salt.
Add flour mixture to creamed mixture alternately with sour cream (yogurt) beginning and ending with the flour mixture.
Fold in apple.
Spread batter in baking pan.
Combine nuts, brown sugar, cinnamon, and butter.
Sprinkle over batter.
Bake for 30 to 35 minutes.
Cool on wire rack for 10 minutes before cutting.
Remember, if you wish to print this recipe using the print icon below, you will be given the option to "remove images" when the print window opens. If you do not see the print icon below, you need to go back to the title of this post and tap/click on it. Then just this post will open and the print button will be included with the share buttons at the bottom. Home will return you to the blog and the most recent posts.
I have seen recipes for an Earthquake Cake several times, but I never really looked at the recipe to see how it was actually made. When I got an email from Cindy, one of the assistant managers at Hillcrest Thrift Shop, asking me if I could trade shifts for the next day, I needed something to make in a hurry. I usually try to work the first shift at the shop except once a month when our Blankets of Hope quilting group meets in the morning at church. That means I end up making whatever dessert I am taking to the volunteers on Monday. Well, our meeting got cancelled due to Vacation Bible School so I just decided I would make my dessert on Tuesday morning before going to work at 12:30. So when I agreed (at 7:30 p.m.) to come in for the first shift that's why I was almost in a panic to find something I could make quickly before going to bed. (I considered not taking anything but decided I didn't want to disappoint my friends.)
Looking through several cookbooks, I picked up one of my latest estate sale finds called Angel in My Kitchen, a spirited collection of recipes from St. Ann's Parish, I stopped and actually read Jane Palmer's recipe for Earthquake Cake. It didn't look too difficult and except for the German chocolate cake mix, I had all of the ingredients. Since I didn't have the cake mix the recipe called for, I decided to substitute and use a traditional chocolate cake mix (no pudding). Since I have never eaten a piece of Earthquake Cake, I hope it won't make a difference. I can't see how it would, just a little different taste with the cake.
EARTHQUAKE CAKE
1 cup coconut
1 cup pecans (chopped)
1 box German chocolate cake mix (I did use a traditional chocolate cake mix)
1 stick margarine (melted) (I used butter)
1 8 - oz cream cheese (I used fat free)
1 lb. box powdered sugar (4-1/3 cups)
Preheat oven to 350 degrees F. Grease and flour a 9 x 13 - inch pan. (I used my homemade Pan Grease.)
Spread the coconut and then the pecans on the bottom of the pan.
Mix the cake according to package directions.
Pour the cake mix evenly over the coconut and pecans. (I forgot to take a picture. Oops.)
Melt the margarine in a saucepan over LOW heat. Add the cream cheese and stir it til it is smooth (and somewhat melted).
Remove from heat and slowly add the powdered sugar
stirring with a wooden spoon til smooth.
Spread over the cake mix. (This took longer than I wanted as I didn't want to pour (dump) the mixture and the recipe did say to "spread". I wanted to keep this mixture an even layer above the cake mix. Since I have never seen one of these cakes made, I don't know if this is the way it is supposed to be done or not.)
Bake in oven for 45 to 50 minutes.
Cool on wire rack.
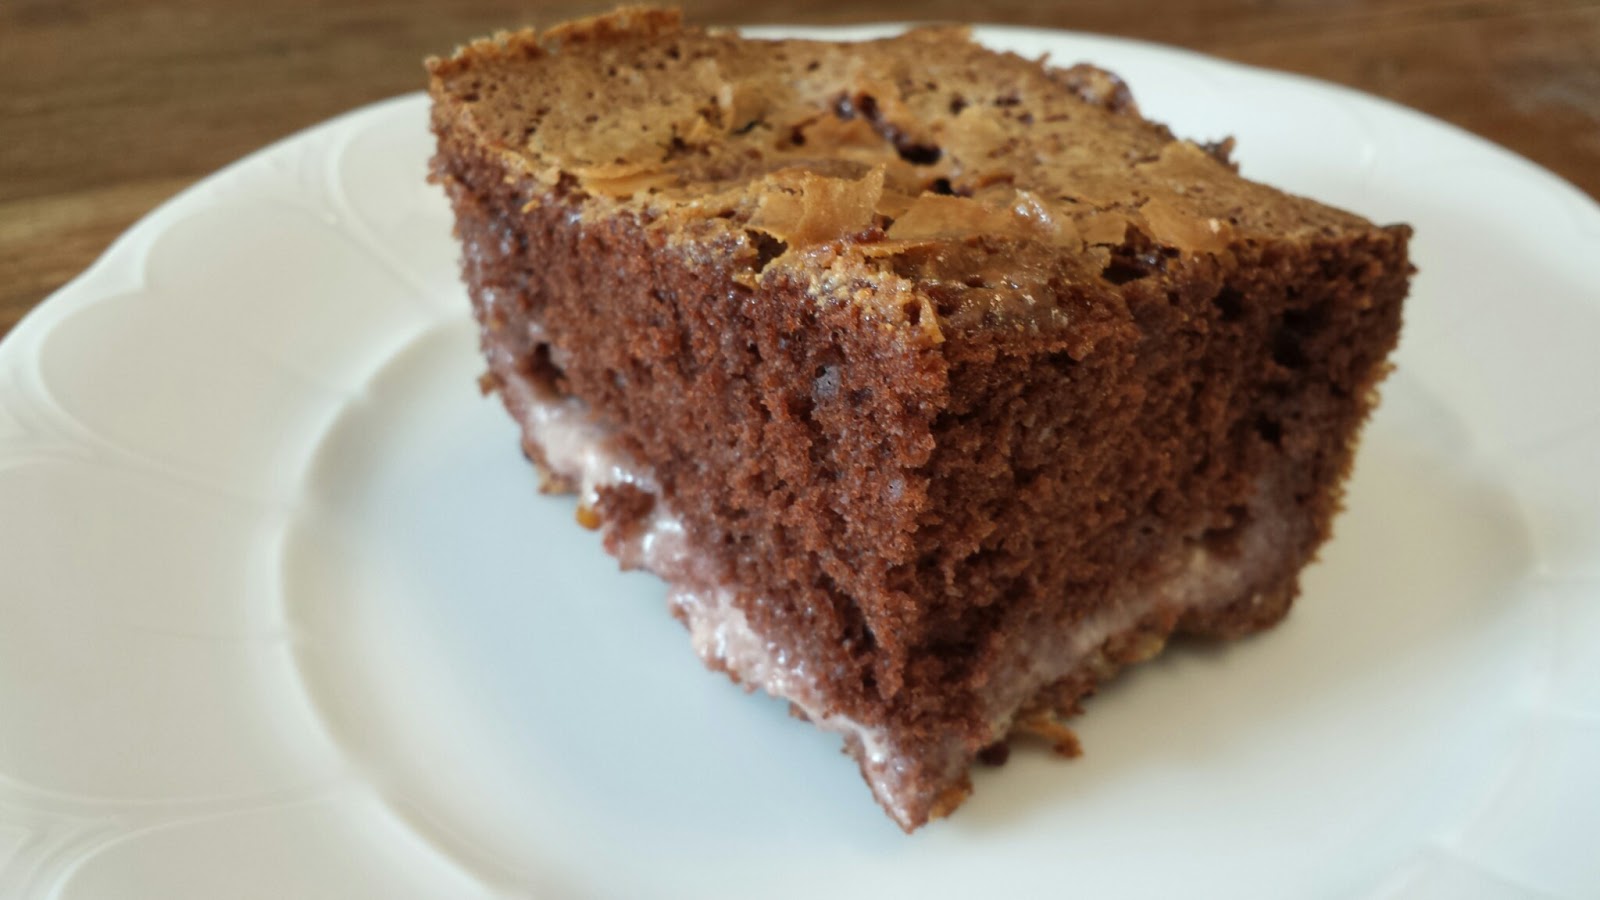
What a surprise I had when I cut it before taking it to Hillcrest...
Remember, if you wish to print this recipe using the print icon below, you will be given the option to "remove images" when the print window opens. If you do not see the print icon below, you need to go back to the title of this post and tap/click on it. Then just this post will open and the print button will be included with the share buttons at the bottom. Home will return you to the blog and the most recent posts.
Last Friday when Friend Janice and I went to estate sales, I bought a 6 - cup Bundt pan. I had never seen one before and thought it would be cute to make a smaller Bundt cake. They actually had three for sale, but I just bought one. After researching, I now know I should have bought two of them. I might have thought of doing that had I realized the larger pan is 12 cups not 10 cups. That way I could have mixed up a cake for the larger pan but made two of them using the smaller pans. I probably won't see another one now that I want to buy one.
I did see that a recipe for an 8 x 4 - inch loaf pan can be baked in it. That's what I decided to do. I had received an email from Daily Dish for this recipe for a Lemon Coconut Loaf. I had copied it down and when I saw it was baked in an 8 x 4 - inch loaf pan, I decided to give it a try. I had to watch it while it baked since I figured the cooking time would be different, but it did turn out really cute.
If you don't have a 6 - cup Bundt pan, just make it in an 8 x 4 - inch loaf pan. It tastes better the next day. It is so much more moist.
LEMON COCONUT CAKE
1/2 cup truvia (stevia/sugar blend) or 1 cup sugar
1/2 cup butter, softened (15 sec in microwave)
2 large eggs
3 tablespoons lemon juice
1 teaspoon lemon zest (I use McCormick's lemon peel)
1-1/2 cup flour
1 teaspoon baking powder
1/4 teaspoon salt
1/2 cup milk
1/2 cup coconut (I used unsweetened)
Lemon Drizzle
3/4 cup powdered sugar
2 teaspoon lemon juice
Preheat oven to 350 degrees F. Grease a 6 - cup Bundt pan or an 8 x 4 - inch loaf pan. I used my homemade Pan Grease.
Beat the sugar and butter til light and fluffy.
Add eggs, one at a time, beating well after each addition.
Stir in lemon juice and zest.
Combine the flour, baking powder, and salt in another bowl.
Add the dry mixture alternately with the milk into batter not overmixing.
Fold in coconut just enough to evenly combine.
Pour into pan.
Bake about 40 minutes for Bundt pan and 60 minutes for loaf pan. Check doneness with a toothpick.
While baking, combine the powdered sugar with the lemon juice in a small bowl. Add enough lemon juice to make it the consistency you wish to glaze the cake with. Set aside.
Cool 10 minutes in pan on wire rack.
Remove cake to serving tray.
Drizzle glaze over the cake.
Cover til next day before serving.
Remember, if you wish to print this recipe using the print icon below, you will be given the option to "remove images" when the print window opens. If you do not see the print icon below, you need to go back to the title of this post and tap/click on it. Then just this post will open and the print button will be included with the share buttons at the bottom. Home will return you to the blog and the most recent posts.
Lately I have been craving chocolate and especially wanting to make a chocolate pie. The hard part has been trying to decide which would be a good recipe to try. There are so many.
When the Northland New Neighbors' League Mexican Train group met at Friend Fran's house, the gathering was small - only 5 of us. As soon as I saw this, I decided it would be a perfect time for me to make a pie....a chocolate pie. Finally!
As I said, I had so many choices and kept changing my mind until the night before I had to make it. The recipe I finally chose was one I had in my recipe box of older recipes. Since I started my blog, I don't use it any more. What I mean is I don't add any more recipes to it. It won't hold any more cards anyway so I guess it is a good thing. I have so much trouble whenever I try to look through it. I end up just pulling out a whole section of cards...I can grab hold of the tabs for the divisions.
Everyone thoroughly enjoyed it after we finished our game of Mexican Train. I intended to cut it into 6 servings (which everyone agreed that would have been too big) but forgot and cut it into 8 servings. That meant though I could bring a piece home for my husband and leave the rest for Fran's daughter and sil.
GERMAN CHOCOLATE PIE
1 (8- or 9- inch) unbaked pastry shell (I used my 8-1/2 - inch pie plate)
1 (4 ounce) package sweet cooking chocolate (German)
1/4 cup margarine or butter (1/2 a stick)
1 (14 ounce) can sweetened condensed milk (I used fat free)
1/2 cup unsifted flour
1 teaspoon vanilla extract
1/8 teaspoon salt
2 eggs, beaten
1-1/3 cups flaked coconut
1 cup chopped pecans
Preheat oven to 350 degrees F.
Prepare pie crust.
In a heavy saucepan, over LOW heat, melt the chocolate bar and butter.
Remove from heat and
add the milk, flour, vanilla, salt, and eggs; mix well.
Reserving 1/4 cup coconut for garnish, stir in remaining coconut and nuts.
Pour into pastry shell.
Garnish with remaining coconut.
Bake 40 to 50 minutes or until top is firm and coconut is lightly browned.
Cool thoroughly before cutting.
Garnish with a dollop of whipped cream if desired. (I intended to do this but forgot the whipped topping at home. Next time I won't forget it.)
Remember, if you wish to print this recipe using the print icon below, you will be given the option to "remove images" when the print window opens. If you do not see the print icon below, you need to go back to the title of this post and tap/click on it. Then just this post will open and the print button will be included with the share buttons at the bottom. Home will return you to the blog and the most recent posts.


 Brown meat, drain if necessary.
 Combine the cheeses, egg, and parsley together in a bowl. (I used the full amount of all of the cheese. Christine used 1-1/2 cups of the mozzarella cheese and 2 tablespoons of the Parmesan cheese.) I started by beating the egg and then adding the ricotta cheese til smooth.
 Then I added the other cheeses. (You may have noticed from the pictures that I forgot the parsley...oops, my mistake.)
 Place half of the meat in the pot. (I put the half lb of ground beef I had browned.)
 Top with a layer of 3 of the lasagna noodles. (Break them up to fit.)
 Spoon and spread half of the cheese mixture over the noodles.
 Pour half of the spaghetti sauce over all.
 Top with the other half of the meat. (This time I put the ground turkey in.)
 Top with the other 3 noodles.
 Then the rest of the cheese mixture.
 Finally the last of the spaghetti sauce mix.
 Cover and cook on LOW for 4 - 6 hours or until liquid is absorbed.
 Sprinkle with remaining cheese if you saved some or just sprinkle with additional cheese like I did.
 Recover, and let stand at least 10 minutes or until cheese melts. (I let mine stand about 30 minutes because we weren't ready to eat yet.)
 When ready to serve, cut through making sure you cut the noodles and spoon out. I have a big serving spoon that is fairly flat that I used and it worked perfectly.