Thursday, January 12, 2017

MINT CHOCOLATE BROWNIES

I think I have mentioned that I started 2017 off with a sinus infection. At least that is what I think I had. The official diagnoses was an acute supperative inflammation of the nasal sinus. I didn't see that title until the nurse came in to give me my discharge papers so I asked the pharmacist when I picked up my prescriptions if that was a sinus infection. She said she thought so.

I was almost through with my medication when I broke the corner off of one of my molars eating a granola bar so that I could take my antibiotic with food. I was almost finished with the bar. I only had one more bite to eat. I couldn't believe it. I really like my dentist, but going to the dentist has always been on my list of least favorite things to do. Since I always try to find something good in every situation, I was thankful that there was no pain. My tongue hasn't been too happy - the molar was in the bottom and my tongue rests against it.

I managed to get to my dentist for him to check it out yesterday. I prayed that my cough would be quiet and my nose too. You see as soon as my meds ran out, my sinuses started draining again and my cough which I developed the day after I saw the doctor, got worse. For the most part I thought my prayers were being answered until I ate lunch. Whether eating was the reason or not, by the time I got to my dentist at 2:30, my cough was nonstop and my sinuses were almost as bad. I was surprised that the dentist was willing to start the prep work for the crown with my coughing. I stopped him and told him I was concerned. Long story short, I will be going back next Thursday to do the prep. He did smooth the edge of the tooth off so my tongue would be happier. The gold inlay in the tooth is a different matter but the exposed edge of it doesn't bother my tongue too much as it is on the top of the tooth.

One reason I bothered you with this story is I usually bake something for my dentist and the staff when I go see them. Since I usually go only twice a year for my 6 month cleanings, at least Dee, the office manager, didn't ask me if I had brought anything when I walked in. (like Volunteer Mark does at Hillcrest Thrift Shop) I did tell them when I was leaving that I was about to mix up some brownies to bring them when my husband asked me to drive him to his doctor as he thought he had an ear infection or something. (He was dizzy and didn't think he should drive.) She laughed and said laughing, "So it is your husband's fault we didn't get anything." I told her I would bring something next week when I came back.

To be honest yesterday has been the first day that I really felt like getting back in the kitchen and these Mint Chocolate Brownies sounded so good. Nothing would do me but I decided to mix them up and put them in the oven to bake while we ate leftovers for dinner.

I asked my husband if he preferred fudgy brownies or cakelike brownies since the recipe had two different cooking times. He said he preferred fudgy ones so I only cooked them 25 minutes. We tried them after they had cooled a little and they are so good, so minty. I will have to make them again next Thursday when I go back to the dentist.  

Personal note: The Andes creme de menthe baking chips might be a seasonal item in the grocery store. I always buy several bags when I see them during the holidays so that I have them through out the year. You can buy the small Andes mints during the year. If this is all you can find, I would highly recommend doing this and just chop them up and add. They do melt in the baking so you just have that delicious minty taste.


MINT CHOCOLATE BROWNIES

2/3       cup sugar
1            stick of butter
2           tablespoons water
1            cup semisweet chocolate chips
1-1/2     teaspoons vanilla
2           eggs
1-1/4     cups flour
1/2        teaspoon baking soda
1/2        teaspoon salt
1            cup Andes creme de menthe baking chips

Preheat oven to 350 degrees F. Lightly spray a 9 - inch square baking pan with cooking spray.

In a large microwavable bowl (I used my large batter bowl), heat sugar, butter, and water in the microwave for 2 minutes til butter melts.
(Just a little bit of the butter had not melted, but after stirring it with a wooden spoon a little bit, it completely melted.)

Add the chocolate chips
and stir til they melt and mixture is smooth.

Add the vanilla and let the mixture rest for 5 minutes.

Beat in the eggs, one at a time, until mixture is smooth.


Whisk together the flour, baking soda, and salt in a smaller bowl.

Add the flour mixture all at once
and stir til smooth. (I continued to use my whisk til the end and switched back to my wooden spoon to add the chips.)

Stir in the mint chips with the spoon.

Pour mixture and spread evenly in prepared pan.


Bake 25 minutes for fudgy brownies or 30 minutes for cakelike brownies.


Cool on wire rack.


Fudgy brownies will sink as they cool.


(If you want to have nice clean cuts on the brownies, cut brownies with a plastic knife.)


Then get ready to eat the absolute best brownie you have ever eaten.

Wednesday, January 11, 2017

OUR CHRISTMAS TREE

This year as I was decorating our Christmas tree, I was a little more sentimental than usual. I got to thinking about the ornaments and how they came about being on our tree. 

I grew up with mostly real Christmas trees, but my parents and I even had the aluminium tree with the revolving light. We lived in a small rural community and didn't have tree lots. We found a live tree and my daddy cut it down. The needles, if it were a pine tree, made a mess the closer it got to Christmas, but probably not any more of a mess than the icicles did that we always had on the tree. I miss those.

Not sure why when my husband and I celebrated our first Christmas together that I wanted only ornaments on the tree that I had made. The only ornaments that I remember on our first little tree were three wise men that I made from felt, sequins, and decorative tape. I tried to make the camels, but I remember that their legs were so narrow, I just couldn't stuff them with cotton and then hand stitch them together with an overlapping stitch. They never got finished. I need to find a picture of our first Christmas tree. I am sure I have one. I remember a picture of our first Thanksgiving turkey and our new puppy, Nikki, that I was holding. That will serve as evidence of that first Christmas tree. I am curious to see if the oldest ornament that I have was on that tree. It was made by one of my students the first year I taught school (Christmas, 1969). I don't remember his name but remember that he was a cub scout.

Here are the three wise men I made. The green robed one on the right suffered some damage several years ago when one of our pets pulled it off the tree. I need to repair it, but never have. I always make sure the other two are hung high on the tree now.


Other ornaments that may not have been on that first tree but might have been were two "bells" from our wedding cake. They have really aged and so this year when I found two more in a drawer, I added them to the tree.


The next ornaments to be added to our tree were these - Santa's boot and a "liberty" bell. I first made a bowl of fruit with this method. The Styrofoam shape was completely cover with a straight pin, a bead, and a sequin. Labor intensive work. 


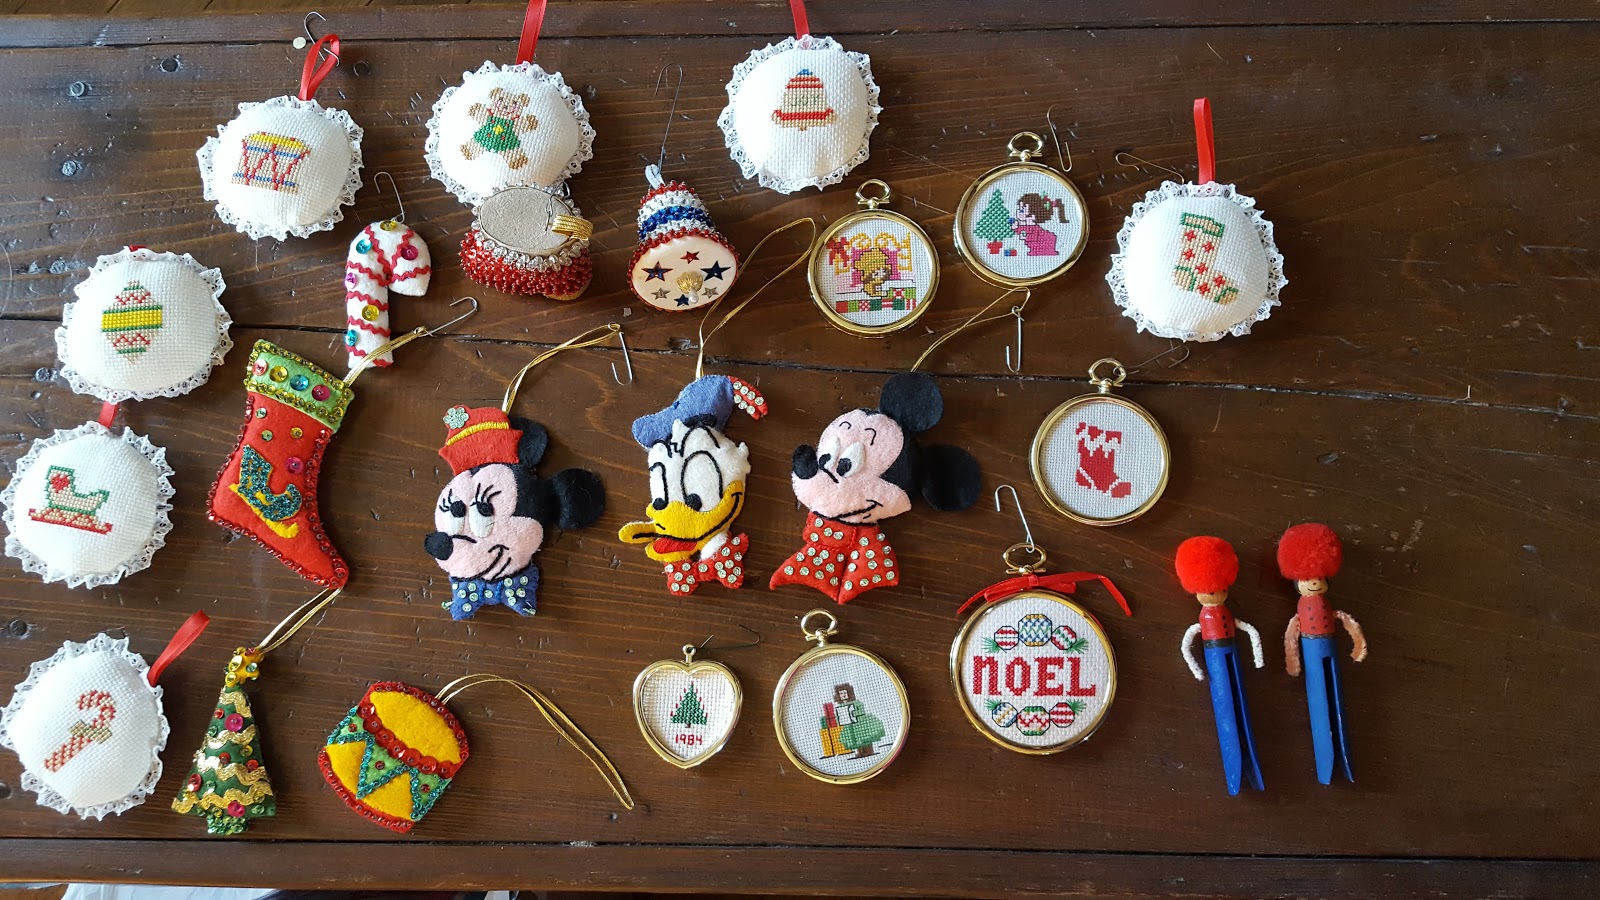
Later ornaments I made depended on what craft was popular at the time. In this picture you can see what variety that was...


The stuffed decorated felt ones (candy cane, stocking, tree, and drum) are probably the oldest one here; made during those first years we were married. The clothespin solders with a pompom on their "heads" were made by my mother and me early on. Counted cross stitch was something I did a lot in the early 80s. The framed NOEL ornaments says that Mother and I made it. My guess is she started it and I finished it for her. I don't really remember it. I think the Disney characters were made last. (Since Grandson Tyler loves Mickey Mouse, he especially likes those when he sees them on the tree.)

These little "manger" scene ornaments were made when we lived in CA.  I think we made them at church at an Advent Night gathering. They are so pretty. Made with 2 Christmas cards and flat toothpicks, they have a picture on each side of the ornament. It is a great thing to make with your children using old Christmas cards.


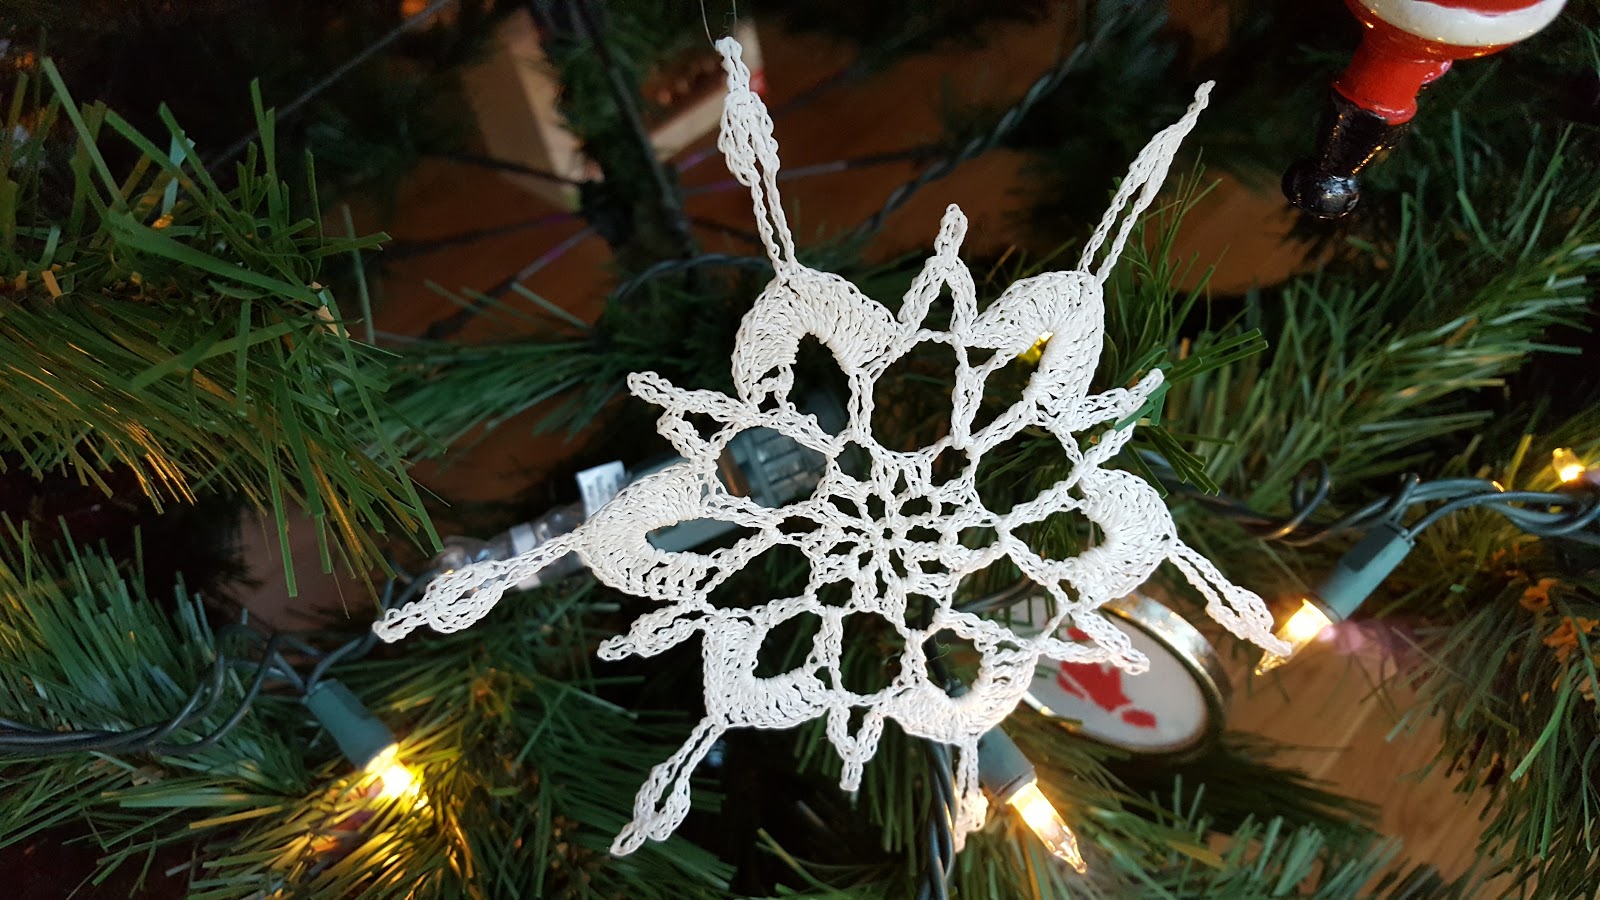
There are a number of decorations that my mother and my Auntie crocheted and gave me. I have enough of the snowflakes Mother crocheted and the medallions of two different sizes to totally decorate a tree. I have never done that. Next year I should have a smaller tree and just decorate it with them.


Mother also crocheted some beautiful individual ornaments that I really love and always include them on the tree.


These angels Mother made using a cotton boll are very special to me. She made them and sent them to me when we lived in CA. I usually put one on the tree and then I have another small tree that I place on a table that only has them on it. Here are two of them...


After Mother and Daddy both died, I took most of their ornaments (except glass ball ornaments) and added them to ours. At about the same time, I gave to each of my sons, ornaments that I had made or gotten for them each year. I didn't really realize until this year how many of Mother and Daddy's ornaments I had on our tree. It took two pictures to show them all. A lot of them are wooden. She painted the wooden angel and made the beaded ornament. I had three of those similar and gave one to each of our sons, her grandsons, and kept the other third one.


She made the candy cane stockings and the  two elephants and snowman. I assume she made the beaded angel.


There are three wooden ornaments that she and I painted together. This is one of them...


There are a number of beautiful shell ornaments that we bought when we lived in CA. The largest "star" is always at the top of the tree. (I used to have a crocheted angel that Mother made and gave us on top but the thread yellowed after a few years and I discarded her.)


Our tree wouldn't be complete without ornaments that students gave me over the years. Some I got in gift exchanges also.


I always enjoy placing the personalized ornaments for us. It isn't always easy finding the grandkids names, (Colby and Hallie are really hard to find). I think this year though I will look for personalized ornaments for them all to add to the tree next year.


The birds on the left of the above picture are favorites of my husband. I am not sure where we got them; I just remember how he always made sure they were on the tree early on. They are kinda cute on the tree.


Not sure when we got each of these. Jeffrey always liked Bert (and Ernie) when he was little. We got the Energizer Bunny when he was a fad. Not sure about the story with Snoopy.


I think a student made this beaded star and gave me but I don't really remember.


I made this post for my sons and their wives so they would have a record to turn to if they wondered about any of the ornaments (after we are gone), but if you stopped by to read the post, I hope you enjoyed seeing our Christmas tree. The one thing I never did was take a picture of the whole tree. I tried but never could get one that showed the tree and the ornaments well. Next year..... 

Monday, January 9, 2017

SAUSAGE AND PINEAPPLE PARTY BITES

One of the appetizers that Friend Linda made when the Bridge Couples group got together a week or so ago were these delicious little Sausage and Pineapple Party Bites. She was browning the sausage pieces when we all arrived so they were a pleasant blend of warm and cold (from the pineapple chunks.) I did sneak one later and it was good totally cool too.


SAUSAGE AND PINEAPPLE PARTY BITES

1       pack (precooked) pork sausages such as Kielbasa
Pineapple chunks
toothpicks or party picks

Slice the sausage into 1-inch slices.

Gently fry in a little oil until brown.

Place on paper towels to absorb excess grease.

If using a fresh pineapple, cut chunks into bite sized (about 1-inch) pieces. (Linda did use a fresh pineapple, but you could use canned pineapple chunks if a fresh one wasn't available.)

Place one pineapple chunk over a piece of sausage and insert toothpick or party picks in the center through both. 

Serve.

Thursday, January 5, 2017

OH SO EASY MARINATED CHICKEN IN THE SLOW COOKER

I reminded myself twice last night as I went in the kitchen to refill my big water glass, that I should write up the recipe for today's post and both times by the time I got back downstairs to my comfy chair, it had totally skipped my mind. I will just blame it on my headache and other symptoms while I am dealing with acute suppurative inflammation of nasal sinus. That's a mouthful, don't you think? I think it is just a fancy way to say a sinus infection.

Fortunately, I have only been sick since Sunday night. We were able to ring in the new year with dinner and an evening of cards (canasta) with our friends, Janice and Leon Saturday night. Sunday morning we were up early to get to church to set up communion for the 9:15 worship service. (We also had to clean up and then set up/clean up for the 10:45 service.) After going to lunch, we went to Kohl's to spend some of my gift card that my husband gave me for Christmas. I didn't start feeling bad until after that, but by yesterday I was feeling worse and decided I should go to the doctor. Problem is my doctor is off on Wednesdays and not one of the other doctors in the clinic had an opening. I made an appointment for today, but told the receptionist that if I got to feeling worse, I would go the the Urgency Room and then cancel my appointment. (She thought that sounded like a good plan.) My cough did get worse and sounded terrible so after lunch I told my husband I thought I shouldn't wait until Thursday. (I really like to see the same doctor but I sometimes end up with bronchitis and I felt the sooner I got treated, the better. Besides we were forecasted for snow and bad roads for Thursday morning and I was afraid if that happened we wouldn't be able to get to my doctor's office Thursday.)

I had to wait 2 hours at the Urgency Room (lots of other people in their sounding like me) but the doctor said my lungs sounded clear but my sinuses were swollen. Hopefully, the meds he gave me will help me feel like my old self really soon.

When I woke up yesterday morning, I decided to put some chicken in my slow cooker so we would have something to eat for dinner. I got the idea when we were in CO visiting with our older son and his family. Dil Sara probably uses her slow cookers more than she uses any other pot/pan in her kitchen. With homeschooling their three older children, entertaining their 3 year old along with a couple of foster children, she needs all the help she can get. It is so easy to make up several recipes/ingredients, freeze them, and then take them out when she is ready to cook them. She also plans out her menus for the month, so that frees her up also.

Anyway, while we were there, she prepared a lemon chicken dish that cooked in one of her slow cookers. She has made it before for us when we visited. I asked her again this time what she had used for the lemon flavoring. She said it was just a lemon marinate that she buys in a bottle. That was all.

Well, I told her I was going to try it when we got back home using a 30 - minute marinate my husband had bought at Aldi Food Market. It was so good and the chicken was so moist. There were a couple of different "flavors" of marinate at the store. I will have to check them out when I go back the next time and see what the other flavor is. I will buy another bottle of the Hawaiian with pineapple juice from concentrate, too.

I meant to cook mine 6 hours on LOW, but forgot to reduce it to keep warm when I left for the doctor's office. It was fine with 8 hrs, but I think it would have been ready after 6 hours too.


OH SO EASY MARINATED CHICKEN IN THE SLOW COOKER

2-4       skinless, boneless, chicken breasts (I had 2 really big ones and 1 smaller one.) Frozen is fine.
1          bottle marinate (I used 12 - fluid ounce bottle of 30 - minute Hawaiian marinate)

Spray the inside of your slow cooker with cooking spray (for easy cleanup).

Place chicken breasts in cooker - okay to overlap.

Pour marinate over the breasts to cover all. (The chicken breasts wasn't completely submerged by the marinate.)


Bake on LOW for 6 - 8 hours. (I always start on HIGH for about 30 minutes then lower temperature to LOW.)


Coat chicken in marinate in cooker before serving. 


Serve with additional marinate.

I didn't take a picture of my serving on my plate, but the chicken just pulled apart so nicely when I touched it with my fork. I did spoon a little of the marinate from the cooker over it before eating.

This is what it looked like here when I got up this morning.


Cars are going down the road behind our house, but I doubt we will be getting out today unless it is an emergency. That's what is nice about being retired. 

Wednesday, January 4, 2017

BAKED EGG, SAUSAGE, HASH BROWN POTATO CASSEROLE

When we were in CO for Christmas, my husband's sister and her husband came over for brunch one day. They brought a huge bowl of fresh fruit and a delicious egg casserole. They are used to seeing my recipes on Facebook when they are posted, so they weren't surprised when I asked if I could take a couple of pictures and share their recipe here. It is a recipe they often make and take to church gatherings.

I asked her if she mixed it up the night before and just baked it in the morning. Sondra said, "Dave always browns the sausage the night before and I just mix it all together and bake it the next morning before we leave.


BAKED EGG, SAUSAGE, HASH BROWN POTATO CASSEROLE

1       pound ground sausage (Use Hot Sausage if you want more flavor)
3      cups grated cheese (Sondra uses whatever she has in the frig.)
12    eggs, scrambled
2     cups milk
2     cups frozen hash brown potatoes, thawed
salt and pepper to taste

Preheat oven to 350 degrees F. 

Spread cooked sausage in the bottom of a 9 x 13 - inch baking dish.

Top with cheese and then spread hash browns evenly over cheese.

Scramble eggs in large bowl. Add milk and salt and pepper. Mix thoroughly.

Pour egg/milk mixture over ingredients in baking dish.

Bake for about 45 minutes.

Optional add-in:  diced onion

Serve with salsa if you like.


Thanks Sondra and Dave for sharing your casserole and fruit with us that morning and for allowing me to share your recipe here on My Patchwork Quilt.

Tuesday, January 3, 2017

CROCHET LACY SCARF

I got off to an early start this year making a scarf since I didn't make my grandchildren any. I guess I got in the mood when I decided to make them the crochet candy cane stockings. (See picture below.) I also made some darling snowman gift card holders that can hang on the tree (I need to write up a post for them. They were really cute and the grandkids all liked them.)

I picked up a couple of those free instruction sheets in the yarn section of a store and one of them was for a crochet lacy scarf. I rarely crochet scarves. Not sure why. I just usually knit them. I know I have had the instructions before to make a scarf that I liked the looks of but they crochet it horizontally and you have to chain a gazillion to start which I do not enjoy doing. 

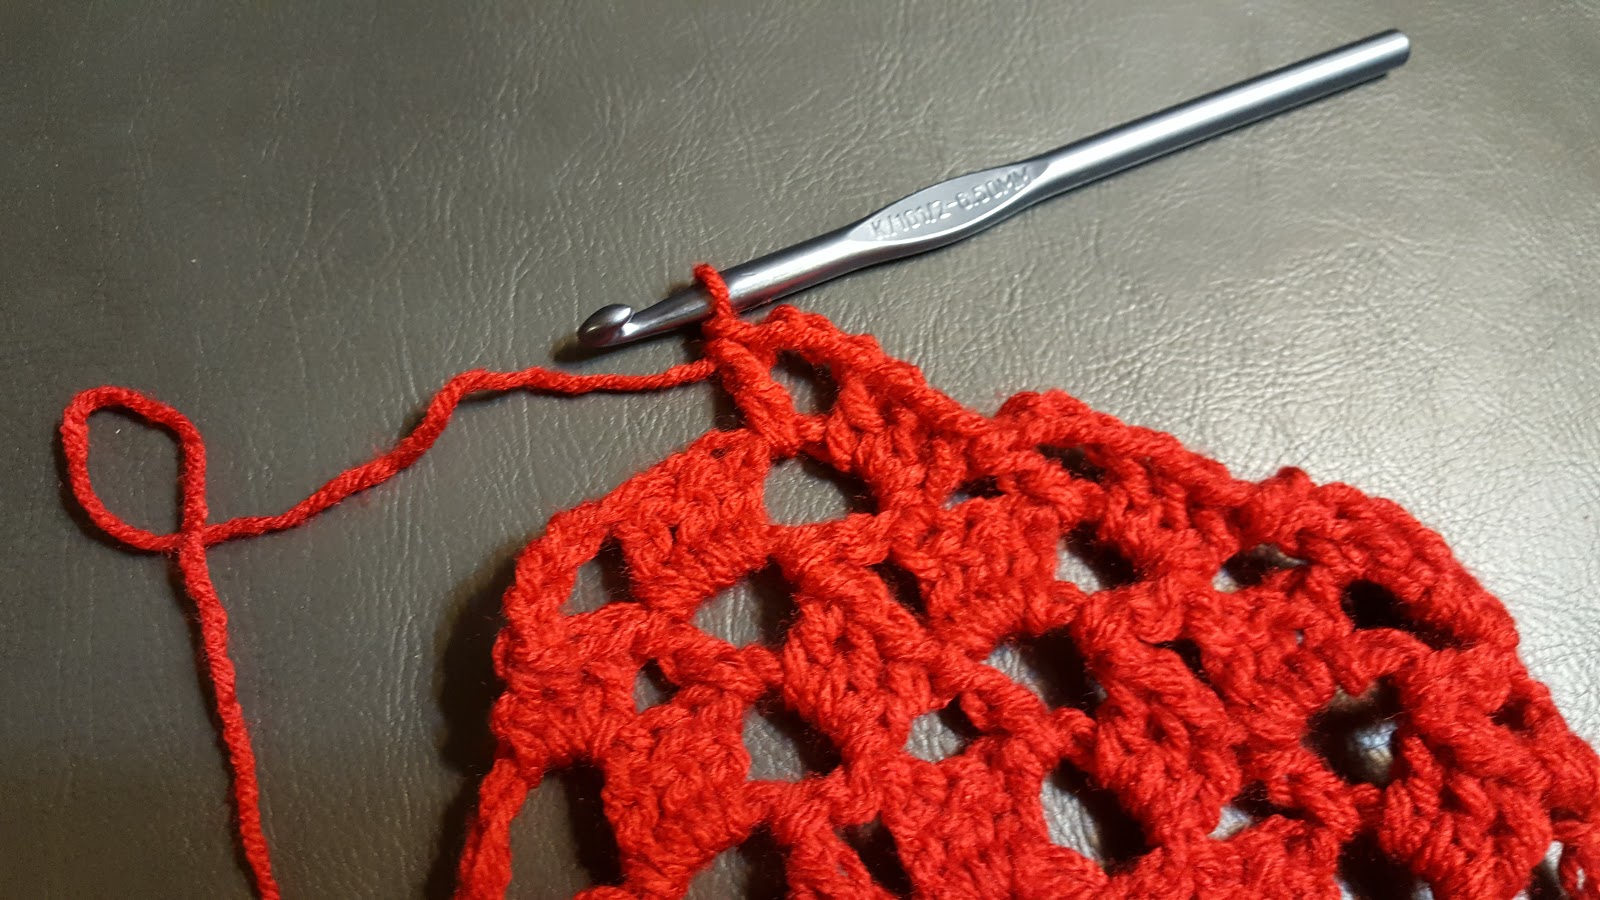
This one was especially easy after I was able to see the pattern. (Not a good idea for me to start a project and watch television at the same time. I had to take out and almost start over a number of times. I took a few pictures for visuals just in case you are like me.) I didn't use the size needle the directions called for. I think I have a crochet hook size N but I couldn't find it. I used my size K and was happy with the gauge. It will certainly make a larger "lace" with the N.


CROCHET LACY SCARF

Size N crochet hook. Anything from a size K up will work - just depends on the size you want your scarf.

Chain 19

Row 1: Dc in 5th ch from hook (first 4 skipped chs make turning ch-sp),  *(dc, ch 3, dc) in next ch, skip next ch, dc in next 2 ch; rep from * across to last ch, dc in last ch - 3 pattern reps at the end of this row.

Row 2: Ch 4 (for turning ch-sp), turn, *(3 dc, ch 3, dc) in next ch-3 sp; rep from * across to turning ch-sp, 3 dc in turning ch-sp.

Rep last row until almost all the yarn has been used (or the scarf is the size you want it)

Weave in ends to finish.

You may not be like me but as I was into the pattern, I felt like the ch 4 was the end of the row. It is actually the beginning of the row. At first I found myself ch 4 when I was finished and ready to cut the yarn and weave in the ends. That's when it really hit me that the ch 4, turn was the beginning of the row and that the row ended with the 3 dc in the turning ch 4 from the previous row.


3 dc,ch 3, dc in ch 3 sp from previous row
(Slide the 3 dc to right in the ch 3 sp to get the diagonal look.)


The first dc in the turning ch-sp

The second dc in the turning ch-sp

The 3rd dc in the turning ch and then the ch 4 to start the next row. You can see the 3 pattern repeats (3 dc, ch 3, dc) 
The finished size of my scarf using the crochet hook size K was almost 6 x 68 - inches. If you used the recommended size N, the directions said make the scarf 9 x 76 - inches.

Here are some pictures of the crochet candy cane stockings I made for my grandchildren.


Monday, January 2, 2017

MEATBALL SLIDERS

Remember the Butter Pecan Banana Cake I  made before Christmas for our bridge couples' get-together for December and then the gathering got cancelled because the weather acted up and I was left with a whole big cake? Well, we tried again last Friday night and I made the cake again. (Oh the cake was a big hit, btw.)

It was a fun evening (as it always is) because we were with friends who just happen to be great cooks, too. I have several recipes I will be sharing with you from the evening.

Friends Linda and Mitch were the host and hostess again this year and Linda outdid herself with tasty dishes to eat. The first one I am sharing is for the meatball sliders she made. Oh my gosh, they were so yummy. She found the recipe at homemadeinterest.com. and made a few changes.

Linda said these were so easy. All I can say is, they were so delicious! You could make as many of these as you liked. So I have written the recipe in general terms with Linda's amounts in parentheses. If you are not having a big get-together, use the recipe to generally see ingredients and how to make them and use your own amounts accordingly.


MEATBALL SLIDERS

(Linda made 24 sliders. Her amounts are in parentheses)

Slider buns (Linda used King Hawaiian Savory Butter Rolls and sliced them.)

Meatballs (Linda was going to make her own ones but then saw some Italian style pre-cooked ones that were good sized ones. If you make your own, make them in a muffin tin.)

1         24 - oz jar of your favorite spaghetti sauce (Linda used a tomato basil one)

Mozzarella cheese, shredded (Linda used about 12 ounces or 3 cups)

Parmesan cheese (Linda grated the cheese and used about 4-1/2 tablespoons)

Italian seasoning (Linda used 1-1/2 tablespoons)

Olive oil (Linda used 3 tablespoons)

Preheat oven to 350 degrees F. Lightly spray bottom of baking dish. (Linda used a 9 x 13 - inch baking dish and a 9 - inch square for the 24 sliders.)

Place the bottom half of the bun in the dish.

Place a little of the sauce on the bun.

(Linda cut the meatballs in half.) Place a meatball on top of the sauce. Spoon a little bit more of the sauce on top.

Sprinkle some of the grated Mozzarella cheese on top of the meatball.

Place the top of the bun on top and brush the top with a little olive oil.

Combine the grated Parmesan cheese and seasoning together and sprinkle a little on the top of the bun. 

Cover the dish with aluminium foil and bake for 10 minutes.

Remove foil and bake for an additional 10 minutes.

Serve.


Linda placed the dish in her casserole carrier to keep them warm.


(My husband's phone doesn't take pictures as good as my phone does. Sorry it looks a little blurry. I need to remember to charge my phone before leaving the house.)