Friday, January 10, 2014

PORCUPINE MEATBALLS

Things are looking up.  It is actually 41 degrees.Today Janice and I were able to go to an estate sale....it's been a while.  We also went to the Hillcrest Thrift Shop in Platte City (Janice had never been.) and several antique malls. We also enjoyed a good lunch at Roxanne's in PC.  The day would have been just about perfect if only the sun had been shining, but I won't be greedy.  I will eagerly take what I can get.
Our forecast for next week is looking good too....highs in 40s and lows in upper 20s and lower 30s.  After the arctic blast we had, that will feel like a heat wave.  OK, I exaggerate a little. 
    
I have had this recipe for a long time.....probably back to the earlier days of marriage....back when I wrote recipes on recipe cards and kept them in a recipe box. I didn't write the source of the recipe so I can't give any credit for the recipe. I did indicate that I made them twice in 1985 on the back of the card.

It has been quite a while since I made them, but yesterday when we went to the commissary at Fort Leavenworth, I bought some Laura's Lean Beef. The cows have been given no hormones or antibiotics and are vegetarian fed. It cost more than your average ground beef, but I think it is worth it.  (I'm not being reimbursed to say so.)  I had been thinking about something different to cook and remembered the porcupine meatballs.  While we were in CO visiting my son Jeffrey and his family, Sara prepared the frozen meatballs with grape jelly and chili powder in the slow cooker and they were so good.  So I guess "meatballs" were on my mind.

The recipe makes enough to serve 5 - 6 people depending on the size you make the meatballs and how much other food you serve with them.  It will make between 14 and 20 meatballs.


PORCUPINE MEATBALLS

1       beaten egg
1       10-3/4 oz can condensed tomato soup
1/4    cup uncooked long-grain rice
2       tablespoons finely chopped onion
1       tablespoon parsley
1/2    teaspoon salt
dash of pepper
1       lb. ground beef
1       teaspoon Worcestershire sauce


Combine the egg, 1/4 cup of the tomato soup, rice, onion, parsley, salt, and pepper in a large bowl.


Add beef, mixing well.


Shape into (20) meatballs.  I used an ice cream scoop I found at an estate sale.  It is a little smaller than 1/4 cup. Worked great.  You will need to make them using less for each if you want to make 20 meatballs.


Place in skillet.


Mix the remaining soup, 1/2 cup water, and Worcestershire sauce in a small bowl.


Pour over meatballs.


Over medium heat, bring to boiling...


reduce heat slightly and simmer, covered, for 40 minutes, stirring often....turning the meatballs over in liquid.

They were delicious with our baked sweet potatoes and field peas with snaps.

Thursday, January 9, 2014

EASY BUTTERSCOTCH CHIP CHOCOLATE COOKIES

My husband thinks these are some of the best cookies I have made! The only sugar is in the butterscotch chips! But wait....I'm getting a little head of myself.

When I was cleaning up my sewing room, I found a plastic grocery bag with odds and ends of papers in it.  I decided while I was watching television at night, I could go through it and also a pile of magazines I found.  The magazines were from 2010 so it was about time I looked at them. I have to admit it was difficult going through the magazines with the arctic blast we are enduring right now. Why?  They are mostly magazines from the spring and summer. There was one fall issue which helped a little. I tore out recipes and ideas that looked interesting and this recipe for easy butterscotch chip chocolate cookies was one of them.  The recipe was with an ad for Nestle Toll House Butterscotch Flavored Morsels.

I used a sugar free Devil's Food cake mix for the chocolate cake mix.  The recipe called for 2 cups (12-ounce package) of butterscotch chips.  Well, I think that's too many.  I had to squeeze the dough in my hand to keep it holding together and the last few fell apart when I tried to remove them from the cookie sheet because there were so many chips in the cookie.  I even had chips left in the bowl that I ended up just throwing out.  Next time I will use only 1 to 1-1/2 cups of butterscotch chips.


EASY BUTTERSCOTCH CHIP CHOCOLATE COOKIES


1      box chocolate cake mix (I used Pillsbury Sugar Free Devil's Food)
1/2   cup canola oil
2      eggs
1 to 1-1/2 cups butterscotch flavored chips (see above)
1/2  cups chopped pecans (optional)

Preheat oven to 350 degrees F.

Combine the cake mix, oil, and eggs in large bowl.

Stir in chips and pecans.

Drop by rounded tablespoon onto ungreased baking sheets  (I used my cookie scoop and squeezed the dough together in my hand to hold its shape.)


Bake for 8 to 10 minutes or until centers are just set.

Let stand for 2 minutes; remove to wire racks to cool completely.


Wednesday, January 8, 2014

A SCARF FOR COLBY-TUNISIAN CROCHET

Last winter when I had nothing better to do and to get a headstart on Christmas, 2013, I knitted scarves for my two CO granddaughters, Hallie and Sadie.  They turned out so cute.  I shared them with you back then.  See pictures below at the end.


For Colby, my oldest grandson, it took a little bit longer to pick out the yarn and pattern. One of my earliest pins on Pinterest was for a crochet stitch called Tunisian Crochet. 


Mary at Crocheting and Knitting the Day Away did an outstanding tutorial HERE.   I could have taken lots of pictures as I did Colby's scarf, but decided I didn't need to when she had done such an excellent job.


As it turned out, I couldn't have been more pleased with the end result and the pattern was so easy.  Mary did say to keep the stitches loose on the needle, this is really important.


A change I made from Mary's directions...I did use a size K 6.5 mm afghan hook (my husband bought it for me and that was the only size the store sold) but it turned out fine. I also used a  chunky weight yarn called Serenity from the Deborah Norville Collection. I really liked the way the pattern turned out with that yarn. I also did chain 15 stitches to begin as Mary suggested.  Remember to keep the stitches loose! It took a little less than 1 and 1/2 skeins to make it the 50 inches it needed to be for Colby.

For this post I thought I would address a couple of issues that Mary didn't share in her tutorial.


The scarf will need blocking (pressing). The ends and edges did curl up....the ends the worst.  


To do this use a pressing cloth (dish towel works great) and a steam iron. I set my iron to wool setting. Laying the cloth over the scarf making sure the scarf is "flat" underneath, press the iron over the cloth for several seconds. You may need to repeat especially on the ends where the curl was more prominent.


Another hint....when you have to add another skein....make sure you remove the yarn from the skein the same way as you did the first skein.  This way, any pattern with colors will "run" the same way.


And Colby loved it!


Sadie's scarf before I added the fringe....


and after I added the fringe for her...  She really loved it, too.


I used the seed stitch to make this one. See my tutorial HERE. 


Hallie's scarf...  Do I need to tell you she loved it, too? She and Sadie both wore them just around in the house.  They did look so cute on them...Did a grandmother proud.


I used the sand stitch for Hallie's scarf.  Tutorial HERE.


Now for next year.....hmmmmm.

Tuesday, January 7, 2014

HIGH TEA LEMON COOKIES

When we visited with our son Jeffrey and his family for Christmas last week, our dil Sara's mother had made several types of cookies that we really enjoyed.  Of course I took some pictures and asked to share the recipes here.

One of the cookies was called High Tea Lemon Cookies.  Vicki found the recipe here from Whatscookingamerica.net.  I will be sharing some hints following the recipe.


HIGH TEA LEMON COOKIES

2     cups butter, room temperature*
2/3  cup powdered sugar
1     teaspoon grated lemon zest
1/2  teaspoon vanilla
2     cups all-purpose flour
1-1/2 cups cornstarch

Preheat oven to 350 degrees F.

In a large mixing bowl, beat the butter until creamy looking.

Add the powdered sugar and mix til light and fluffy.

Add the lemon zest and vanilla and beat bell.

Add the flour and cornstarch to the butter mixture and mix until well combined.

Using your hands (a cookie scoop works well also to measure the amount of dough) roll cookie dough into 1 - inch balls.

Place on ungreased cookie sheets and bake 15 minutes or until the bottoms are light brown.

Remove from the oven and carefully remove to cool on a wire rack.

When cookies are cooled, spread lemon frosting on top of the cookies.  Recipe makes 6 dozen cookies.


LEMON FROSTING

1/3    cup butter, room temperature*
1       teaspoon grated lemon zest
1/3 to 1/2 cup freshly-squeezed lemon juice
4       cups powdered sugar

In a medium bowl, combine the butter, lemon zest and juice, and powdered sugar.  Stir until well mixed.  (Additional lemon juice may be needed to get the frosting thin enough.)

*Butter is at room temperature when it can be squished between your thumb and forefinger.  It will take at least one hour or can leave out overnight.  You can speed up the process if you cut the butter into slices and let them sit out at room temperature for about 10 to 15 minutes.  

Monday, January 6, 2014

ANOTHER CHRISTMAS HAS COME AND GONE

As I write this post, it is -8 degrees and they are predicting that it might eventually get to 3 degrees later this afternoon.  Windchill factor has it about -30 degrees.That is the coldest weather KC has seen in over 10 years.  That is the arctic blast I refer to.  I would not want to go up in the attic today.  

Anyway, I am sharing two tips I learned last year that makes it so much easier to store your Christmas decorations.  If you have already packed away your Christmas, just remember it for next year.  

I am looking forward to 2014 and all the posts that I will share with you.  One thing I want to make sure I share with you this year are the quilts I made for my CO grandchildren in 2012.  I know it has been a while but I got busy with everything else that was going on. Also I started the quilts before I started this blog, so the thought wasn't there when I made the quilts.  And of course I will be sharing lots of recipes.  I have already found several I am anxious to try.

Hope to see you back.  Would love your comments also if you especially like what I am sharing.  Now my tips.....  

After getting back from celebrating Christmas (and New Years) with our son Jeffrey and his family in CO, I was ready to get some work done. 

The first thing I needed to do was pack up all the Christmas decorations back in the attic.  I didn't actually have that much because since I was late decorating this year, I didn't put out much.  

Our weather forecast was for an "arctic blast" to come down on Saturday so I knew I had to take advantage of the temps just being around freezing while I could.  It is cold up in the attic, but gloves and extra clothes help.  Actually after one or two times up the pull down stairs, I don't need the extra clothes.


Packing up the ornaments was so much easier this year since I had tried a tip I saw on Pinterest last year. I thought I did a post on it last year, but when I looked for it, I couldn't find it.  So I will show you how to do it on this one.  It was really nice this year decorating and undecorating the tree.


Since our first Christmas (married) the ornaments on our tree have been homemade.  Eventually I received ornament gifts from students and friends.  So now my collection of ornaments are homemade or purchased gifts.  Because of this, this method works really well.  I can put more than one ornament in a cup.

What you need:

plastic storage tub
larger sheets of cardboard
hot glue gun and glue sticks
plastic cups
knife or scissors to cut the cardboard

I started by cutting a piece of cardboard the size of the bottom of the plastic storage tub.  I used the box that granddaughter Madison's Hot Wheels came in.


Spread the hot glue all the way around the base of the plastic cup.


Then position on the cardboard.  (I arranged the cups first to see how they would fit on the cardboard.  My tub gradually got bigger to the top so I could have the top edges of the outside cups extend slightly over the edge of the cardboard.)

That's it.  Then after it dries, you are ready to place the ornaments in the cups..... 


....and then lower into the box.


So that's why it was so easy Friday when I packed them up. You might notice I stuff some fingertip towels that I have down the sides of the bottom for padding.  It isn't really necessary, I just like utilizing my space well.  I don't show it in this picture, but I also placed a placemat between the two layers for the same reason.  The rest of the set of placemats were placed on top of the top layers.  In between them I placed some of the crochet ornaments that need to lay flat that my mother and Auntie made that won't fit in the cups.

Another tip I learned from Pinterest is how to keep the wrapping paper on the rolls.  I thought I had shared this last year also, but didn't.  

This tip is even easier.  All you need is a pair of scissors and empty toilet paper/paper towel rolls. The stronger the roll the better it works.  Last year some of the rolls I used were thinner and they don't hold on as well....(they stretch out).

All you have to do is cut down the roll with a pair of scissors.


Then wrap it around the roll of wrapping paper.  The roll will secure the paper.  


Pretty neat!    


Then you just put them away for another year!


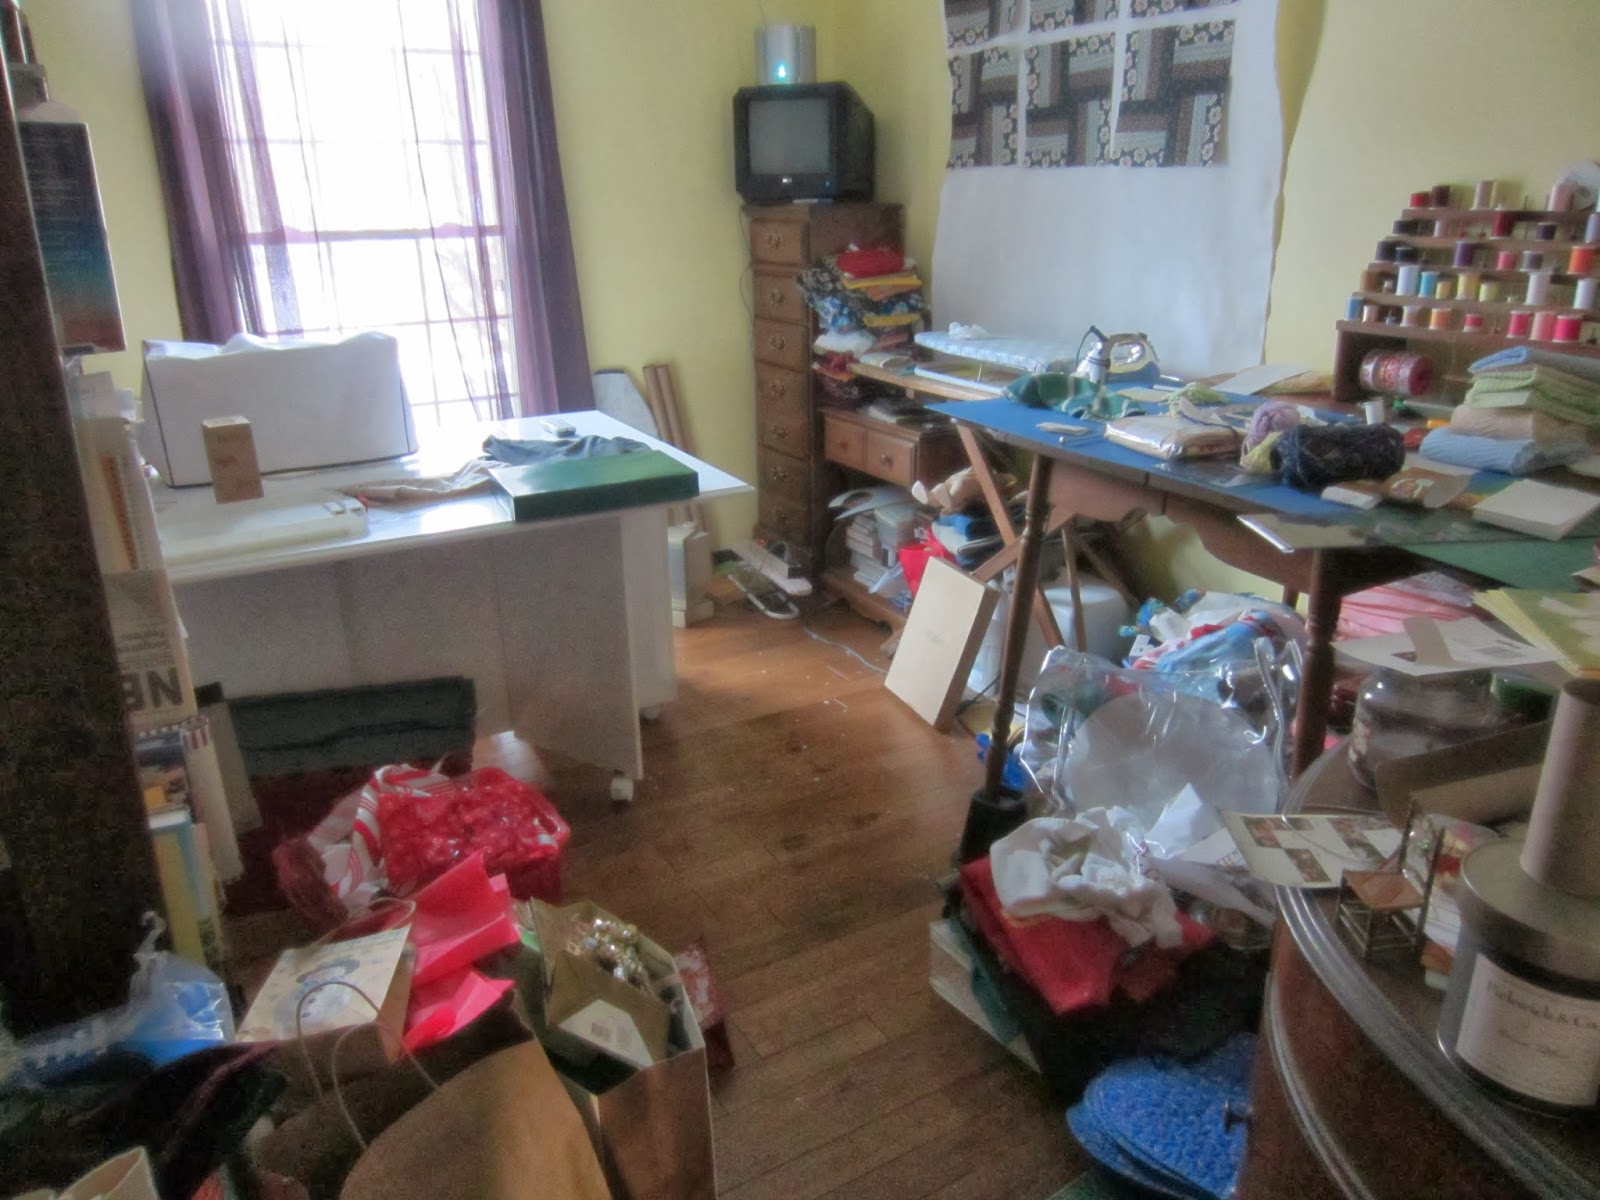
I was busy up until the day before we left finishing our newest grandson Henry's baby blanket. So I knew my sewing room was a mess.  (Plus it was the "collect-all" room for Christmas wrapping paper, etc.)  

Here is a picture of what it looked like when I got started...


By mid afternoon, I could see most of the floor.  I didn't take a picture because I want to wait to show you what it looks like when I get it finished.  It isn't a job that can be finished in just a few hours...if I want to do a really thorough job.

Sunday, January 5, 2014

PERSIMMON BREAD


Persimmon bread is a favorite recipe of my friend Carol.  Her husband gets the ripe persimmons at a golf course where he plays. Carol says that persimmons must be completely soft to be ripe. Keith either picks them off the ground or uses a stick to shake a branch in the tree causing the ripe ones to fall off.

To prepare the pulp, they wash the fruit and remove the stems. They put the fruit in a food mill and stirs until the pulp is removed and only the skin and seeds remain in the mill.  

Carol says it is interesting to know that some people believe you can cut the seed apart and you will see a spoon, fork, or knife shape.  A spoon means there will be lots of snow this winter, a fork indicates light snow, and a knife indicates "cutting" cold.  Everyone they cut open showed a spoon which would mean we will be getting a lot of snow.  We will see if we do.

Carol says this bread freezes well. 


PERSIMMON BREAD


1         cup persimmon pulp
2        teaspoons baking soda
1         teaspoon lemon juice
2        cups Splenda
1         cup Splenda brown sugar blend
1         cup vegetable oil
4        eggs
1-1/2  teaspoon cinnamon
1/2     teaspoon nutmeg
1-1/2  teaspoons salt
1         teaspoon vanilla
1/3     cup water
1/3     cup honey
3        cups all-purpose flour
1         cup walnuts
1         cup raisins

Preheat oven to 350 degrees F.  Grease 3 - (6 x 3") pans.

In a small bowl, stir the persimmon pulp, baking soda, and lemon juice. Let stand for 5 minutes to thicken the pulp.

In a medium bowl, combine the sugars, oil, eggs, cinnamon, nutmeg,  vanilla, honey, water, and salt.  Mix until smooth.

Add the persimmon pulp and water alternately with the flour.  Fold in the nuts and raisins.

Pour the batter in the prepared pans and fill 2/3 full.

Bake for 45 minutes to an hour or until a toothpick comes out clean when inserted in center.

Cool for 10 minutes before removing to a wire rack.

To serve, Carol cuts slices in half and spreads cream cheese in between the layers.


I had never eaten persimmon bread until Carol brought it to the December Dinner Club gathering.  I loved it.

Thanks Carol for sharing the recipe with me so I could share it with you.

Friday, January 3, 2014

FUDGE BROWNIE COOKIES


I had a box of sugar-free brownie mix but I didn't just want to make brownies.  I saw this recipe on Pinterest and thought I would give it a try. Kevin & Amanda called their recipe Soft Batch Peanut Butter Double Fudge Brownie Cookies. They used Reese's pieces and chocolate chips. I had these dark chocolate & mint morsels and decided to use them. I used some in another recipe and really liked the addition of the mint.  


FUDGE BROWNIE COOKIES

1/4     cup margarine, melted
1/4     cup water
2        large eggs, beaten
1        box fudge brownie mix (I used Pillsbery Sugar Free)
1        cup flour
1        cup dark chocolate & mint morsels (or any chips/candy)

Preheat oven to 350 degrees F.  Line cookie sheets with parchment paper.

Combine the melted margarine, water, eggs and brownie mix together in a mixing bowl.

Add the cup of flour, stirring til just combined.

Stir in chips.


Using a cookie scoop space cookies about 2 inches apart on cookie sheet.


Bake for 10 minutes.


Remove from the cookie sheet and cool completely on wire rack.