I had so much fun making the Jack-o-lantern bib for my grandson Tyler and it was so easy. If you missed it, you can check it out HERE. The last few days I have been thinking how I could make him a turkey one.
I had a general idea about what it would look like, but nothing definite. Sunday afternoon I spent a couple of hours looking through some craft magazines from 1999-2003 that I have saved, mostly "Crafting Traditions". I found several pictures that I liked and finally came up with something to work with.
Then I went over to Janice's with an assortment of prints and my pattern that I had made and together we came up with a design.
Yesterday my husband and I had dinner at Cracker Barrel and I saw a really cute bib that they were selling with a turkey on front.
So today, I decided to make the bib but made a little change with the feathers and after a couple of hours I had it finished. It took a little bit longer to make this one than it did the Jack-o-lantern one because there were more appliques and I was figuring out the steps to make it. If I made another one, it would go really quickly.

I bought a brown hand towel and cut the bib from it. The towel was wide enough that I laid the pattern down on it across the width. That way I have enough towel left to cut at least two more bibs from it. One of them will be a Rudolph for Christmas.
I drew my pattern for the turkey on white paper and made it fit the front of the bib.

I made the feathers by cutting the same shape (a feather) out three times and arranged them on one side to see how they would fit. I drew the outline of the three "feathers" on a piece of paper and then folded the paper in half to draw the other side. That way the feathers were the same for both sides.
I used scraps of material that I had to make the head and feathers for the turkey. I used paperbacked adhesive transfer web (Pelon Wonder Web) that I ironed on the wrong side of the scraps of material to make each applique piece. I go into more details using the Wonder Web on the post of the Jack-o-Lantern bib.
 This is the piece I used for the feathers. When it cooled, I drew the outline for the feathers on the paper.


I cut along the drawn lines and carefully pulled the paper off.

I positioned the "feathers" on the bib and with a damp cloth over it

pressed the applique to the towel over the damp cloth.

I made patterns of the individual pieces of the turkey and repeated the process to press the Pelon Wonder Web to scraps of materials. The easiest way to do this is to cut the Wonder Web a little bigger than the size you need, and press it to the wrong side of the material that is cut a little bigger than you need. This way you don't have to be concerned about messing up the bottom of your iron if the material is cut smaller than the piece of Wonder Web. After it cools, draw your pattern on the paper side and then cut it out.
As I cut the pieces out, i.e. the beak, I pressed it in place once again using the damp cloth. Then the wattle, then the eyeballs, and finally the iris.
With the pieces ironed in place, I used matching color thread for the pieces and with a close zigzag stitch sewed them down.

Using flannel, I cut two bib shapes to use for the back and "batting". Make sure the three "bibs" are put together with the wrong side of the back next to the "batting". In the picture below, the center "bib" is the back. The "batting" is on the left. It doesn't matter which side is up as it only shows on the edge.

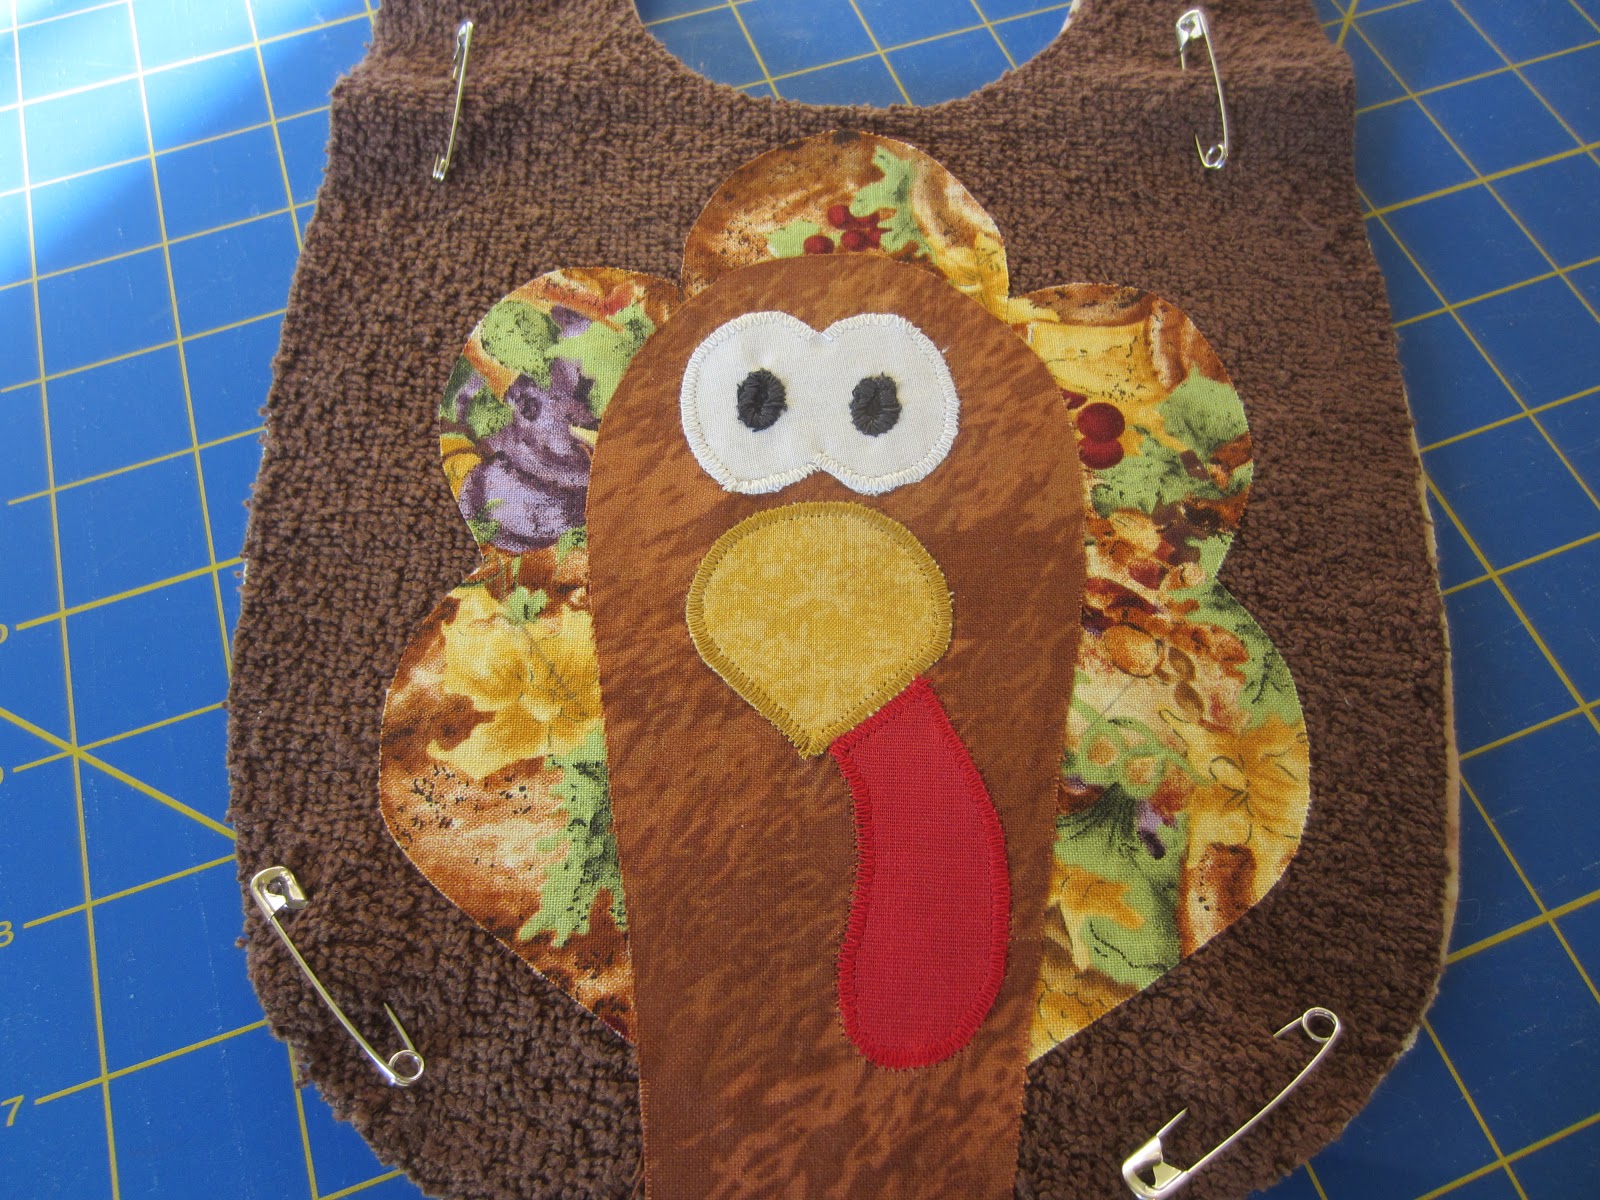
Next, I centered the head over the feathers and pressed it down and then pinned the bottom and top of the bib layers to hold in place while I zigzagged the appliques down.

I zigzagged the feathers on first and then the head. Finally I sewed the three layers together all the way around 3/8" from the edge.

I added the snap and it was finished.
I had a general idea about what it would look like, but nothing definite. Sunday afternoon I spent a couple of hours looking through some craft magazines from 1999-2003 that I have saved, mostly "Crafting Traditions". I found several pictures that I liked and finally came up with something to work with.
Then I went over to Janice's with an assortment of prints and my pattern that I had made and together we came up with a design.
Yesterday my husband and I had dinner at Cracker Barrel and I saw a really cute bib that they were selling with a turkey on front.
So today, I decided to make the bib but made a little change with the feathers and after a couple of hours I had it finished. It took a little bit longer to make this one than it did the Jack-o-lantern one because there were more appliques and I was figuring out the steps to make it. If I made another one, it would go really quickly.

I bought a brown hand towel and cut the bib from it. The towel was wide enough that I laid the pattern down on it across the width. That way I have enough towel left to cut at least two more bibs from it. One of them will be a Rudolph for Christmas.
I drew my pattern for the turkey on white paper and made it fit the front of the bib.

I made the feathers by cutting the same shape (a feather) out three times and arranged them on one side to see how they would fit. I drew the outline of the three "feathers" on a piece of paper and then folded the paper in half to draw the other side. That way the feathers were the same for both sides.
I used scraps of material that I had to make the head and feathers for the turkey. I used paperbacked adhesive transfer web (Pelon Wonder Web) that I ironed on the wrong side of the scraps of material to make each applique piece. I go into more details using the Wonder Web on the post of the Jack-o-Lantern bib.


I cut along the drawn lines and carefully pulled the paper off.

I positioned the "feathers" on the bib and with a damp cloth over it

pressed the applique to the towel over the damp cloth.

I made patterns of the individual pieces of the turkey and repeated the process to press the Pelon Wonder Web to scraps of materials. The easiest way to do this is to cut the Wonder Web a little bigger than the size you need, and press it to the wrong side of the material that is cut a little bigger than you need. This way you don't have to be concerned about messing up the bottom of your iron if the material is cut smaller than the piece of Wonder Web. After it cools, draw your pattern on the paper side and then cut it out.
As I cut the pieces out, i.e. the beak, I pressed it in place once again using the damp cloth. Then the wattle, then the eyeballs, and finally the iris.
With the pieces ironed in place, I used matching color thread for the pieces and with a close zigzag stitch sewed them down.

Using flannel, I cut two bib shapes to use for the back and "batting". Make sure the three "bibs" are put together with the wrong side of the back next to the "batting". In the picture below, the center "bib" is the back. The "batting" is on the left. It doesn't matter which side is up as it only shows on the edge.

Next, I centered the head over the feathers and pressed it down and then pinned the bottom and top of the bib layers to hold in place while I zigzagged the appliques down.
I zigzagged the feathers on first and then the head. Finally I sewed the three layers together all the way around 3/8" from the edge.

I added the snap and it was finished.
No comments:
Post a Comment