Saturday, November 9, 2013

MOIST BANANA BREAD, AN AMISH RECIPE


I recently went to the library to pick up some books I had requested. (I have to lead a discussion in the book club this next year and it is terrible trying to choose a book that I think everyone will read and then discuss well.)  

While I was there I couldn't help but notice some books they had on display. One of them An Amish Kitchen, by Kelly Long, was a collection of three novellas with recipes in the back that were made in the stories. The stories were Amish stories by three different authors.

One of the stories called "A Spoonful of Love" was written by Amy Clipston. She provided and tested the recipes from the story. I ended up writing down two of them before I returned the book to the library....Moist Banana Bread and Apple Roll-Ups. I will be making the apple roll-ups later. (UPDATE! See link below) Today I am sharing the Moist Banana Bread recipe.

The recipe did call for margarine.  The substitutions of light margarine, the 1/2 cup of trivia blend for the cup of sugar, and the skim milk for regular milk were my own to reduce calories and sugar. (Today I use butter exclusively and would probably use it for the margarine.)


IF YOU WOULD LIKE A PRINTABLE VERSION OF THIS RECIPE, CLICK HERE.


MOIST BANANA BREAD

2         eggs
1/2      cup (1 stick) margarine (light margarine works)
2         tablespoons skim milk
1/2      teaspoon lemon juice
1/2      cup truvia blend (or 1 cup sugar)
3         medium bananas, mashed (about 1-1/2 cups)
2         cups flour
1-1/2  teaspoon baking powder
1/2      teaspoon salt
1/2      teaspoon baking soda
1/4      teaspoon nutmeg

Preheat oven to 350 degrees F. Spray one large loaf pan or two mini loaf pans with cooking spray.


Beat together the eggs, margarine, milk, juice, and sugar. 


Add mashed bananas and mix.


Sift the dry ingredients together in a bowl and add to the other mixture. Stir just til flour is moistened.


Pour batter into pans.


Bake for 45 - 50 minutes if making one loaf or 35 - 40 minutes if making the mini loaves. Test doneness by inserting a toothpick in the center of the loaf. It should come out clean.


Cool in pans for 20 minutes.


UPDATE!  I made the Apple Roll-Ups featured in the same book last week.  They were really good.  You can check them out in this POST.  Here are two pictures of them... after....


before....

You roll them up like you would cinnamon rolls. Hard to see the dough in this picture...

Friday, November 1, 2013

MARGUERITE GOODRICH-ORANGE DATE NUT BREAD

I found this recipe in a cookbook the women at College United Methodist Church in Ventura, CA compiled.  It was submitted by a dear lady, Ruth Simcox.  I don't know who Marguerite Goodrich was.  Maybe if some of my CUMC friends read this and can let me know, that would be great. 

I have had the recipe marked to try for quite a while. I thought it would be a good choice for me to bake and take to Hillcrest Thrift Shop to share with the volunteers.  I decided to make it in two mini loaves instead of the larger single loaf.  I never know how many volunteers are going to be there on Tuesday when I go to "work" my middle shift at the register. (update:  I got sick and wasn't able to go in last Tuesday for my shift.  I froze one of the loaves and my husband and I have been munching on the other one.  I will make it again the next time I go in.)  Love the orange taste and the dates. I used walnuts for the nuts, but you could use pecans as well.


MARGUERITE GOODRICH-ORANGE DATE NUT BREAD


2     cups flour
2     teaspoons baking powder
1/2 teaspoon baking soda
1/4 teaspoon salt
1/2 cup sugar
2     teaspoons orange rind, grated
1/3 cup shortening
1     egg, beaten
1/2 cup nuts
1/2 cup milk
1/2 cup orange juice
1     cup dates, chopped

Preheat oven to 350 degrees.  Spray one larger loaf pan or 2 mini loaf pans with cooking spray.  (I used two of my Pyrex mini loaf pans...they are a little larger than the mini loaf pans.)

Sift together the flour, baking powder, soda, salt, and sugar.  Add the orange rind and cut in the shortening.  (I use my hand to "cut" in shortening.  Old habit with biscuit making.)

Add beaten, egg, nuts, milk, orange juice, and dates. Stir with wooden spoon til completely moistening.


Pour batter into prepared loaf pan(s).


Bake for 1 hour if using one loaf pan or 40 - 45 min if making mini loaves.

Cool in loaf pan(s) for 20 minutes before removing.


Monday, October 28, 2013

MOUNT AIRY, NORTH CAROLINA

On our return trip from our recent vacation to Myrtle Beach, South Carolina, we took a detour into Mount Airy, North Carolina. Mount Airy is the home town of the late Andy Griffith and affectionately called Mayberry RFD.  

When we left Burlington, NC that morning it started raining....the first and only rain we saw the whole 12 days we were gone.  By the time we got to Mount Airy, the clouds were still there but the rain had stopped. The main street is one-way so we had to do some fancy driving to get to the far end of the street so we could drive all the way down the street in town.  

We drove around a bit and even down the main street and actually was heading out of town without getting out of our car when I saw the produce market.  I had been wanting to get some "local" sweet potatoes ever since we had left Myrtle Beach several days earlier.  So we stopped.  By the time we left, we had 40 lbs of sweet potatoes, several varieties of local apples for 70 cents/lb  (even honeycrisp), a bunch of bananas, smoked ham slices, and 3 pumpkins.  


After talking to a couple of people at the produce market, we realized we had to go back "into town" and enjoy their famous pork chop sandwich at the Snappy Lunch. (It was really good and very reasonably priced.) The walls were full of memorabilia.  Andy would often come there for lunch when he was in school before the school had a cafeteria. In an early episode of the Andy Griffith Show, Andy tells Barney they should go get lunch at the Snappy Lunch making it the only actual place in Mount Airy referred to in the show.  Next door is Floyd's Barber Shop and next to it was Opie's Candy Shop.


Here are some of the sites around the city.
The side of a building off Main Street.

Pretty flowers on one corner.


Andy Griffith's home that is now available as lodging.  They hang a sign outside asking to respect the guests privacy when it is occupied.


On the other side of Andy Griffith's Museum is the separate Playhouse.


Just a house I liked.


At the Snappy Lunch I saw a hanging kitchen towel for sale that I decided I wanted to make when I got home. I usually make them with a crochet top for hanging but liked the idea of the double towel.  It was very easy and fast to make. 


I had this set of two hot pads and 1 towel that I bought several years ago and just hadn't done anything with it.


I folded the towel in half with right sides together and pressed it with the iron.  


I wanted a "line" to follow to sew a gathering thread.


I drew a line in the middle of the hot pad with a marking pen.  I also marked the line dividing it into fourths.


I  divided the towel into fourths by folding it in half and then folding the sides to the middle.  (I marked the points with pins.) 
((The picture is distorted because I took the picture from the side instead of over the top.))


I pulled the gathering thread and with the right side of the towel facing the right side of the hot pad matched the (quarter)pins with the dots on the line on the hot pad.  Evenly spreading the gathers, I pinned the towel across the hot pad and sewed the towel onto the hot pad.


Top half of the towel turned down over stitching.


I sewed a large button on the front of the hot pad. (end without the loop).  


Bring the loop on the hot pad over to "button" the button which allows it to hang over the oven door handle.


We ended up spending about 2 hours in Mount Airy.  It was one of those "side-trips" that you take almost on a whim that turns out to be one of the memorable times of your trip.

UPDATE:  On Saturday, I made a new hanging kitchen towel to have up for Valentine's Day.  I actually bought the two hot pads to make two for Christmas, but didn't get around to them. 


I had a towel left over from last year when I made my plastic bag holder and so I decided to use it with one of the red hot pad. Tutorial HERE.


Before.....


and after.....


and hanging....

Thursday, October 24, 2013

CHEESY CHICKEN & RICE CASSEROLE

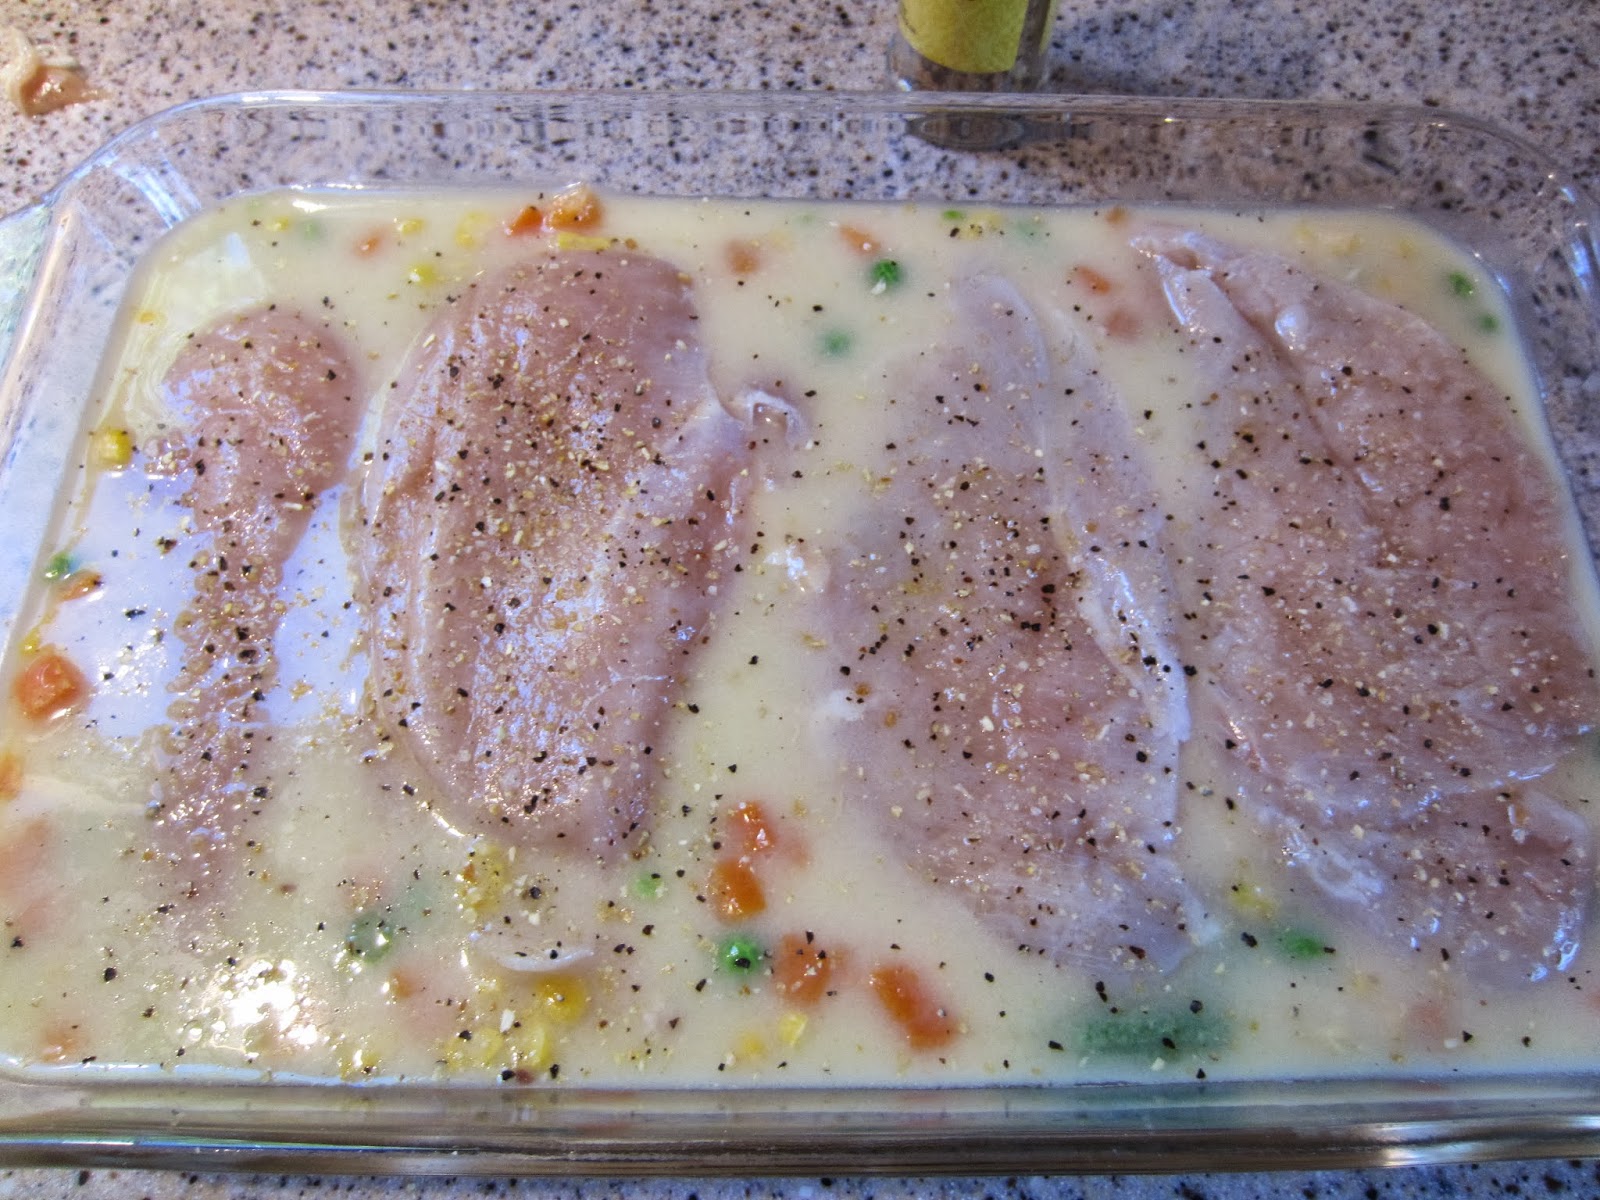
The other night I decided to try this recipe for Cheesy Chicken & Rice Casserole. I have had this recipe from Campbell's since 2006 but, as my usual story goes, I've just never got around to making it. It takes only about 5 minutes to prepare it and 45 - 60 minutes to cook it. I used brown rice so I cooked mine 60 minutes to make sure the rice cooked. I also lowered the oven temperature to 350 degrees because I was using  a glass baking dish. I did use the 98 % Fat Free cream of chicken soup. I forgot to cover the dish when I baked it, but it turned out okay. The mixed vegetables might not have looked dry looking, but they didn't taste dry.


After putting it in the oven (without the cover), my husband and I decided to take a walk around the neighborhood and enjoy some of the fall colors. We have maple trees in our yard but they are always the last ones in the neighborhood to turn. It is really interesting. We are just two doors down from the next cross street, but the maple trees on that street always turn first. We don't really understand but this has happened every year since we moved here 5 years ago. The trees on that street will be almost bare of leaves when our trees finally turn.


Since our trees haven't turned yet, I had to make our front "porch" at least look festive.


CHEESY CHICKEN & RICE CASSEROLE

1        can (10-3/4 oz.) cream of chicken soup (regular or 98 % fat free)
1        can water
3/4   cup uncooked long-grain rice (white or brown)
2       cups fresh or frozen vegetables (I used frozen mixed vegetables) 
1/2    teaspoon onion powder
4       skinless, boneless chicken breast halves
1/2    cup shredded Cheddar cheese (I didn't use that much)

Preheat oven to 375 degrees F. (350 degrees F if using a glass baking dish)

Stir the soup, water, rice, vegetables and onion powder in a 12 x 8 -inch baking dish.

Top with chicken.  Season the chicken as desired.  Cover with aluminum foil.


Bake for 45 - 60 minutes or until chicken is done.


Top with cheese.  Return to oven to melt the cheese, if necessary.

Makes 4 servings.

Variations:

Mexican Fiesta:  In place of onion powder, use 1 teaspoon chili powder.  Substitute Mexican cheese blend for the Cheddar cheese.

Taste of Italy:  In place of onion powder, use 1 teaspoon Italian seasoning.  Substitute 1/3 cup shredded Parmesan for the Cheddar cheese.

Go HERE. to see some of my other favorite chicken recipes. 

Wednesday, October 23, 2013

PUMPKIN MUFFINS

I missed going in to volunteer at Hillcrest Thrift Shop due to conflicts for three weeks.  So I had to look for something to bake to take this week.  I didn't have to look too hard though.

I actually made some banana gingerbread on Monday since I had the time.  (I will be writing up that recipe soon.  It was really good.) While it was baking in the oven, I was just looking through a file of recipes to try and found a recipe I had cut from a newspaper (didn't save or write which newspaper, but I think it was the Ventura Star Free Press not the name of the paper anymore).  It was a recipe for muffins.  I put it aside just in case I felt like trying it Tuesday morning before going in at 12:30.

Well, I got up Tuesday morning and you know I decided to make them.  I told my husband to eat one to let me know how they tasted. (I didn't want to take them if they weren't good....I did have the banana gingerbread I could still take.)

I was fixing my hair and he came in and said, "Well, I ate one of your muffins.  They were good...not sweet though, but good.  Just like I like them."  I told him since they only had 1/4 cup sugar in them they were probably more of a breakfast muffin.  So when I took in ten of them (I left one more for my husband to eat later), the volunteers were finishing up their lunch. They "oohed and ahhed" when they saw them (they usually do when I bring in my treats).  I told them they weren't sweet.  Jim, the manager, took one and said it was good....he needed to eat less sugar.  N.C. came by the register later and told me what a good cook I was and I should open a business. When my shift was over, I went to the community room to get my container. There were 5 left.  I took one to eat and left the other four. Dana said she hadn't gotten one yet.  I told her to take whatever was still there when she left. 

When I got home, I ate the one I had taken.  They aren't sweet, but they were really good.  In fact, they were just right. My husband thought I was eating the one I had left (for him), but I told him I had brought it from Hillcrest and I had left the one for him.  He immediately went and got it and ate it. (I think he thought they were just right too.)

They were so good....can you guess what I am doing this morning?  Yep.  I am making another batch.  (I made the second batch and lowered the temperature to 375 degrees and they didn't get as brown.  I also only had 4 paper liners and so I just sprayed the other cups with cooking spray and that worked out fine.)


PUMPKIN MUFFINS

2      cups buttermilk baking mix
1/2   cup raisins
1/3   cup canned pumpkin
1/4   cup chopped walnuts
1/4   cup sugar
1/4   cup skim milk
2      tablespoons oil
1       teaspoon ground cinnamon
1       egg

Preheat oven to 375 degrees F.  


Combine all ingredients in a bowl.  Mix just until blended.  (I added the raisins first in the baking mix and made sure they were all separated before adding the rest of the ingredients.)


Pour batter into 12 paper-lined muffin cups.  (My batter was thick. I spooned it in the cups.  It also works fine without the paper liners.  Just spray the muffin cups with cooking spray.)


Bake until golden brown, for 16 - 18 minutes.  Remove from pan immediately.


Makes 12 muffins.