I have recently gotten two new Amish cookbooks. Each had a recipe for Buttermilk Cookies. Both were different. When I wanted to make some cookies to take to Hillcrest Thrift Shop yesterday, I had a hard time choosing between the two. I chose Beverly Lewis' paternal great-grandmother's recipe she shared in her The Beverly Lewis Amish Heritage Cookbook. "Lettie Jones was the mother of nine children and cookie-maker extraordinaire. Baked with her loving touch in each cookie." The other recipe was Emma Raber's from Holmesville, OH and was in Wanda E. Brunstetter's cookbook called The Best of Amish Friends Cookbook Collection. It won a first-place ribbon at the Malheur County Fair in Ontario, Oregon. The only reason I chose Mrs. Jones' recipe was because it didn't make as much. I will have to give the other one a try though.
Mrs. Jones' recipe made about 5 dozen cookies which was really more than I wanted to make, but I kept a couple of dozen at home and took the other three dozen to Hillcrest. I personally like the hint of nutmeg in the cookie. Everyone at the thrift shop just told me how good they were.
BUTTERMILK COOKIES
1 cup margarine or butter, soften (I did use butter.)
2 cups sugar (I used 1 cup of stevia/sugar blend.)
3 eggs, beaten
1/2 teaspoon salt
1 teaspoon baking powder
1/2 teaspoon nutmeg
4-1/2 cups flour
1 cup buttermilk
Preheat oven to 350 degrees F. Grease well a cookie sheet.
Cream butter and sugar together til smooth.
Add beaten eggs and blend.
Combine the dry ingredients in a separate bowl with a whisk.
Add dry ingredients alternately with the buttermilk to the mixture. (I always start and end with the dry ingredients - 4 times dry and 3 times wet this time.)
Drop dough onto cookie sheet. (I used my cookie scoop. The dough didn't flatten out as it baked, so I started flattening the scoop of dough with my fingers.)
Bake about 15 minutes. (I baked mine 11 minutes. They were turning brown on the bottom and I didn't want them to burn. I left them on the cookie sheet for 5 minutes before removing. That is what the other recipe has you do.)
Finish cooling on wire rack.
Since I have changed my shift at the register at Hillcrest Thrift Shop to the first shift, I have to make whatever dessert I am taking to share with the volunteers on Monday. Last week I decided to give them a surprise treat. Hot Lemon Blueberry Cobbler. I made it up before I left the house, plugged it in behind the check-out counter, and then let it cook during my shift.
I was a little concerned when it didn't appear to be cooking and it was getting closer to the end of my shift. BUT the last 30 - 45 minutes it started smelling. Then I knew it was going to be okay. I did let it cook about 2-1/2 hours since that was so I could serve them after lunch. I guess that is what is so wonderful about slow cookers, a little extra time is okay. You could always lower the temperature to Keep Warm if you needed to wait to serve it.
Another great thing about this recipe is the flavors are almost endless. I used a lemon cake mix and blueberry pie filling. A spice cake with apple pie filling would be great. Of course, the chocolate flavored cake mixes work great with cherry pie filling. Other flavored pie fillings will work with a yellow cake mix. If you are counting calories, just use a lite or no-sugar-added pie filling and a sugar-free cake mix. If you want to sprinkle some chopped nuts on top, that would work also.
LEMON BLUEBERRY COBBLER
1 lemon cake mix
2 cans blueberry pie filling
1 stick butter, melted
Spray a larger slow cooker (6 - quarts) with a little cooking spray (for easy clean-up).
Pour and spread evenly the pie fillings in the slow cooker.
Combine the cake mix and the melted stick of butter making sure all the cake mix is wet. (You can always add a spoonful of water if some of it is still dry.)
Sprinkle the crumbled cake mix over the top of the pie filling.
Bake on HIGH for 2 hours or LOW for 4 hours. It was turning brown around the edges.
Serve warm with ice cream or whipped topping or alone as I did.
Last Friday was a gorgeous day with unseasonably warm temperatures for January. My friend Janice and I took full advantage of the day and went to a number of estate sales. The only cookbook I bought, I found at the very first place we went.
It was a "vintage" cookbook published in 1908 by the Walter Baker & Co., Ltd. called Choice Recipes by Miss Parloa and other Noted Teachers. It is a small (only 64 pages), thin, paperback cookbook. It contains many, many recipes - most contain chocolate since the Walter Baker & Co., Ltd., were manufacturers of cocoa and chocolate preparations in Dorchester, Mass (since 1780).
I don't know how many actual recipes I will be able to make (there are no oven temperatures - I wonder why? and most of the recipes do not contain the size of container or baking time) But I am quite proud of my find.
I almost forgot to tell you. The cookbook wasn't marked so I had to go ask how much it was. She looked at it and said, "Oh that is a vintage book. Let me see (lifting a pricing sheet she had)." I was preparing myself for her to tell me several dollars. Instead, she said, "Vintage books are two for fifty cents." Talk about surprised! I managed to control my emotions though and said simply, "Thank you."
I did find one recipe on page 52 that I felt I could make without too much thought. Cocoa Biscuits. It said to bake them in a very hot oven 10 - 15 minutes. That sounds like my own original recipe for Buttermilk Biscuits. A very hot oven = 450 degrees.
I decided to make them the next morning and enjoy them for breakfast. Because of that, I decided to add a thin powdered sugar glaze to them to add a little more sweetness, more like a cake donut.
The recipe didn't say, but I would imagine they were made and served for afternoon tea.
COCOA BISCUITS
2 cups or 1 pint of sifted flour,
3 level teaspoonfuls baking powder,
1/2 teaspoonful salt,
2 level tablespoonfuls sugar,
4 level tablespoonfuls cocoa,
2 level tablespoonfuls butter or lard (I did use butter)
2/3 cup milk or enough to make a firm but not a stiff dough (I did use almost a cup)
(Preheat oven to 450 degrees F.)
Sift all the dry ingredients together, rub in the butter with the tips of the fingers. Stir in the required amount of milk. Turn out on slightly floured board, roll or pat out the desired thickness, place close together in pan and bake in very hot oven ten or fifteen minutes.
I thinly sliced the butter to make it easier to "rub in the butter"
At the last minute I just added the last little bit of milk (the whole cup) and that was a little too much. It just meant I had to add a little more flour on the "floured board" so it wouldn't stick.
I always just pat out my biscuits when I make them.
I didn't spray my pan, but might next time. They would have come out of the pan a little easier.
After 10 minutes....
As I said, I mixed up a thin glaze (a heaping tablespoon of powdered sugar and a little bit of milk)
and spooned it over the hot biscuits. I left one unglazed (on the left), but my husband said the glazed ones tasted better (sweeter).
When my husband and I went to an estate sale in our neighborhood a week or so ago, I couldn't believe all of the cookbooks were just 2 for $1. I showed real control though and believe it or not, I only picked out two. They were really nice cookbook, too. They looked brand new. I had to not look too closely at them.
One of the cookbook I got was Anne Byrn's the Dinner Doctor, Quick Cooking When Time Is Short. I have her the Cake Mix Doctor cookbook and really like it. When I wanted to make a "casserole" that would feed us for several meals, I picked it up to see what I could find.
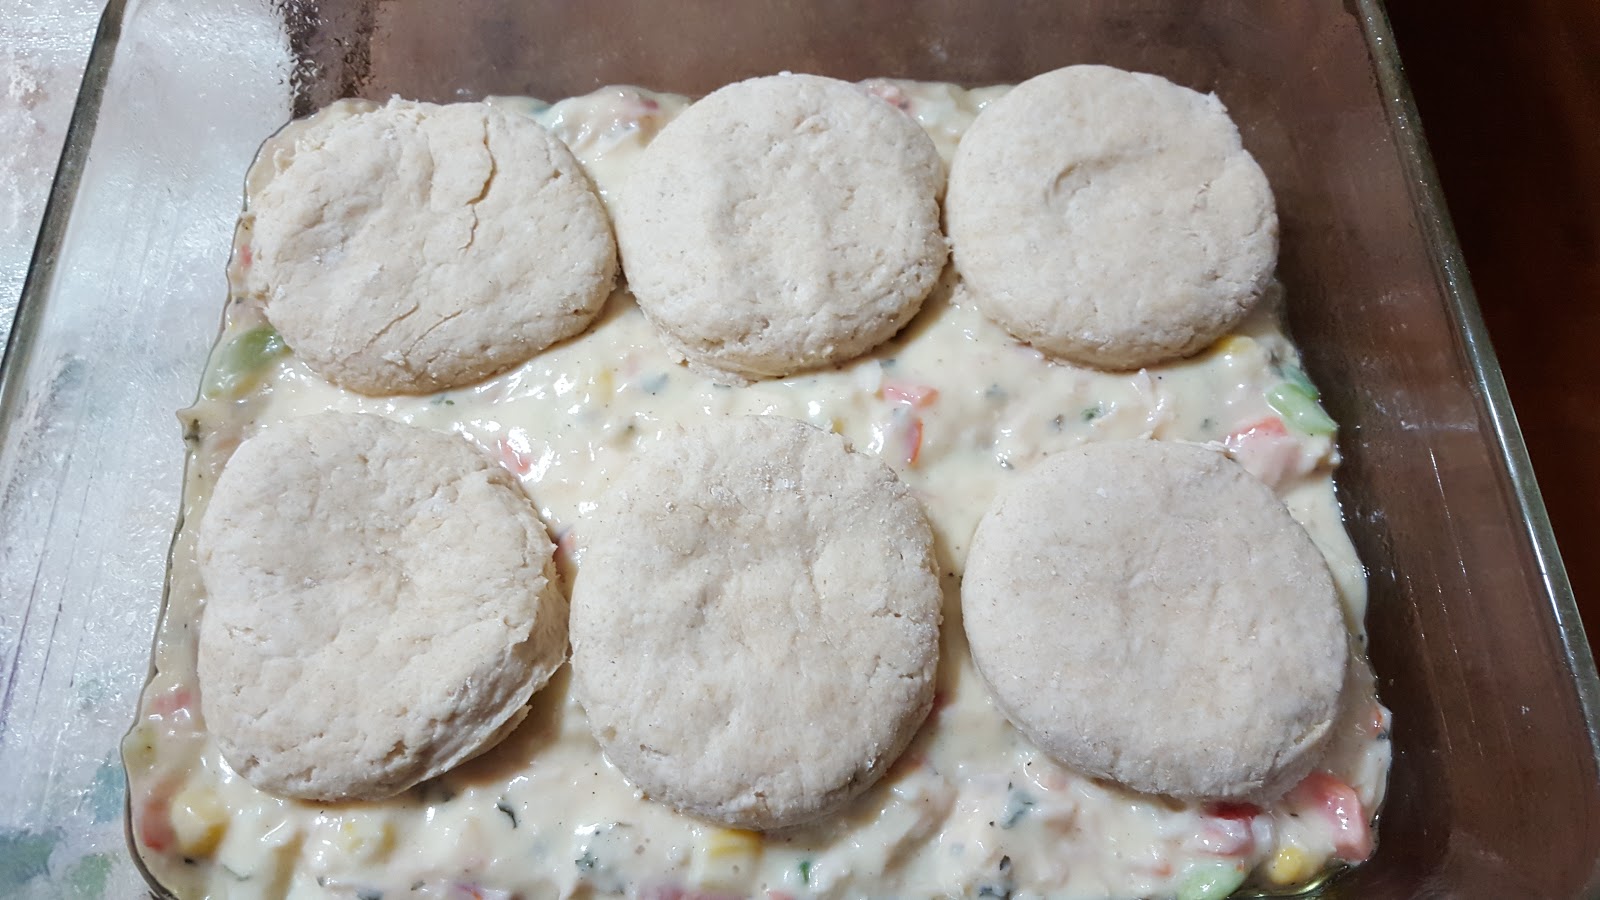
What I found was in a section called one-dish comfort food. What is it about the title "comfort food" that makes you want to eat it? I stayed fairly close to the recipe and only made three changes. I had a 12 - ounce can of chicken, made my own homemade biscuits (see my original recipe here for best Buttermilk Biscuits you'll ever eat), and added some parsley flakes. Well, it did bring us a lot of comfort eating it and it didn't take long either.
PARMESAN CHICKEN AND BISCUIT PIE
2 cups shredded cooked chicken or a 12-ounce can of chicken
2 cups frozen mixed vegetables or canned vegetables would work
1 can (10.75 ounces) cream of chicken soup
Half a soup can (about 5-1/2 ounces) of heavy cream or half-and-half (I used the latter.)
1/4 teaspoon black pepper
1 tablespoon parsley flakes
6 unbaked frozen biscuits (or make your own)
3 tablespoons pre-grated Parmesan cheese
Preheat oven to 425 degrees F. Spray an 11 x 7 - inch (2 quart) glass or ceramic baking dish. (I used a deep glass baking dish that measured 9 x 7 x 2-1/2 inches - 11 cups)
Combine the chicken, frozen vegetables, chicken soup, and cream in a large mixing bowl.
Season with the black pepper and parsley flakes.
Pour into baking dish and smooth the top.
Arrange the biscuits on top of the filling.
Sprinkle the tops of the biscuits with the Parmesan cheese.
Bake the pie until the biscuits are golden brown and the filling is bubbling, 20 to 25 minutes. ( I cooked mine 20 minutes but next time will cook them the 25. The center wasn't as hot.)
Serve at once.
I so enjoyed our warmer January days we had most of last week. This week looks like we are being reminded that it is winter and that means cold and snow.
I made this delicious Coconut Banana Bread last week and couldn't help but feel a little tropical with the taste and the temperatures. I was inspired by a recipe from Jo Anna M. Lund. I didn't have the specific ingredients that her recipe called for so I just decided to experiment with substitutions which also led me to additions.
The results were exceptional. I hope you will give it a try.
HEAVENLY COCONUT BANANA BREAD
1/2 cup plain fat-free Greek yogurt
1/3 cup reduced-fat or fat-free mayonnaise
1/4 cup egg substitute (or 1 egg if you prefer)
2/3 cup mashed ripe bananas
1-1/2 cups flour
1 package (4-serving size) coconut cream instant pudding mix
1/2 teaspoon baking soda
1 teaspoon baking powder
1/4 cup chopped pecans
1/4 cup unsweetened coconut
2 tablespoons mini chocolate chips
Preheat oven to 350 degrees F. Spray an 8-1/2 x 4-1/2 - inch loaf pan with cooking spray.
In a large bowl, combine the yogurt, mayo, egg, and bananas.
Combine the flour, dry pudding mix, baking soda, and baking powder in another bowl. Add it to the wet mixture and stir just til combined.
Add coconut.
Pour batter into pan and spread evenly on top.
Mix the nuts and chips together and sprinkle to cover the top of the batter. Press down lightly.
Bake for about 50 minutes or until a toothpick inserted in the center comes out clean. (You don't want to over bake it.)
Place on a wire rack and cool in pan for 5 minutes before removing.
Finish cooling on wire rack. (Some of the chips and nuts might fall off the top when you remove the baked loaf from the pan.)
I chose to add the chips and nuts to the top to make the top pretty. If you prefer, you could add them to the batter and then bake the loaf.
A couple of months ago, I tried several times to reproduce a pie that a cafe we often eat at makes and serves. They call it a Reese's Peanut Butter Pie. I finally decided to give up ... at least for a while. When the farkle group was meeting at my house last week, I found this recipe called Chocolate Peanut Butter Cup Cheesecake in a new cookbook I got at an estate sale the Friday before.
The Healty Exchanges Cookbook is called Dessert Every Night! by Jo Anna M. Lund with Barbara Alpert. It contains "more than 200 mouth-watering, easy-to-make puddings, pies, cakes, cheesecakes, cobblers, cookies, brownies, and breads that are as good for you as they are good to eat". The person who owned the cookbook had marked this recipe and had written "Good" on a post-it at the bottom of the page.
The pie was similar to the one I had tried to reproduce except for the cream cheese. I had asked at the cafe and they told me it did not have cream cheese in it. Since the gathering was going to be small (only 5 of us in all), I thought a pie would be perfect for me to try.
I did decide to top the pie with the leftover whipped topping and even place a few chocolate chips and peanut butter chips on top. That's what Roxanne's does to their pie.
You don't have to use the sugar-free products, but I would recommend that you use the instant dry milk.
CHOCOLATE PEANUT BUTTER CUP CHEESECAKE
1 (8 - ounce) package fat-free cream cheese
6 tablespoons reduced-fat chunky peanut butter
1 teaspoon vanilla extract
1 (4 - serving) package sugar-free instant vanilla pudding mix
1-1/3 cup nonfat dry milk powder (divided)
2 cups water (divided)
1/4 cup sugar-free whipped topping
1 (6 - ounce) chocolate pie crust (I used a graham cracker pie crust)
1 (4 - serving) package sugar-free instant chocolate pudding mix
In a large bowl, stir the cream cheese with a spoon until soft. (If the cream cheese is at room temperature, this is easy to do.)
Blend in the peanut butter and vanilla.
Add the dry vanilla pudding mix, 2/3 cup dry milk powder, and 1 cup water.
Mix well using a wire whisk.
Blend in whipped topping.
Spread mixture into pie crust.
In a medium bowl, combine the dry chocolate pudding mix, (I did this first) and
then the remaining 2/3 cups dry milk powder, and remaining 1 cup of water. Mix well with wire whisk.
Spread mixture evenly over peanut butter layer. (This layer will be a lot thinner.)*
Refrigerate for at least 1 hour. Serve.
*I refrigerated the pie at this point. (the day before I planned to serve it).
This is how Jo Anna planned to serve it. And you could also.
But...the next morning I spread the rest of the whipped topping (8 - ounce carton) on top. Then I placed a few chocolate chips and peanut butter chips on top. I returned it the refrigerator and served it that afternoon.
I was concerned (always am when I cut the first piece) that the serving might not come out clean, but they did.

 Cream butter and sugar together til smooth.
 Add beaten eggs and blend.
 Combine the dry ingredients in a separate bowl with a whisk.
 Add dry ingredients alternately with the buttermilk to the mixture. (I always start and end with the dry ingredients - 4 times dry and 3 times wet this time.)
 Drop dough onto cookie sheet. (I used my cookie scoop. The dough didn't flatten out as it baked, so I started flattening the scoop of dough with my fingers.)
 Bake about 15 minutes. (I baked mine 11 minutes. They were turning brown on the bottom and I didn't want them to burn. I left them on the cookie sheet for 5 minutes before removing. That is what the other recipe has you do.)
 Finish cooling on wire rack.