Monday, December 18, 2017

CHEESEBURGER SOUP

Almost every Sunday after Sunday school, we go eat at a local restaurant called Roxanne's Cafe. Occasionally they have Cheeseburger Soup for the soup on Sunday. We have never ordered it, but when I was flipping through a notepad I had where I have written some recipes down and saw Cheeseburger Soup, I decided to give it a try.

I saw the recipe in a book I checked out of the library called Lizzie's Amish Cookbook, favorite recipes from 3 generations of Amish Cooks by Linda Byler with her mother and her daughter. I don't know if Roxanne's Cheeseburger Soup is like it, but I may ask the next time we go out there.

My husband says he doesn't normally like cheese soups, but this one he really likes. In all honesty he did take one look at it and said, "I guess you left out the onions?" I didn't answer him, I just smiled. Then he said, "It just looks like a soup that should have onions in it." Then he asked for the minced dry onions and I sprinkled some in his bowl. I should have taken some out for me and then added onions to the rest for him. I'm bad.


CHEESEBURGER SOUP

1/2         lb ground beef
3/4         cup chopped onion
3/4         cup shredded carrots
3/4         cup chopped celery
1/2         stick (1/4 cup) butter, cut into pieces
1            teaspoon parsley
3            cups chicken broth
3            cups peeled and diced potatoes
1/4         cup flour
2            cups cubed Velveeta cheese (this is about 1 lb)
1-3/4      cup milk (I used skim milk)
1/2         teaspoon salt
1/4         teaspoon pepper
1/2         teaspoon celery salt

In a large pot, brown ground beef. Stir frequently to break up clumps. (I sprayed the pot with cooking spray.)


Add onion, carrots, celery, butter, and parsley.

Cook until vegetables are soft.

In a separate large bowl, combine remaining ingredients.
(I put the flour in a small dish and added about equal amount of the broth and stirred with a fork til
smooth and then added it to the mixture.
)


Pour mixture into pot with beef mixture.

Heat until boiling.

Reduce heat and simmer, covered, about 30 to 40 minutes or until potatoes are soft.


Great heated up in the microwave as leftovers also.

Friday, December 15, 2017

CHOCOLATE AND PEANUT BUTTER TRUFFLES

I am so excited about sharing this recipe with you and what a perfect time, too. I took these Chocolate and Peanut Butter Truffles to an Open House with friends last night. They not only are scrumptious, but so impressive looking. Did I mention how easy they are also? You couldn't find an easier gift for someone and then you get to tell them - you made them.

I intended to take something else to the party, but it didn't turn out well (fortunately that doesn't happen too often with me, but it did this time) and so it was just luck that I ended up making these truffles.

These would be fun to make if you have children (or grandchildren) and you let them roll the "balls" in the coatings. The recipe made exactly (well, there was just a little extra on the sides of the bowl that I got to enjoy) 36 truffles. Don't forget the little mini muffin paper cups if you give them as a gift or take them to a party as I did.

The recipe was from The L.o.V.E Chocolate Cookbook and was in the Best of the Best from Iowa cookbook. Believe it or not I didn't make any changes in the ingredients, just in the time suggested. There was just no way the mixture was ready to work with after being in the refrigerator 2 hours as the recipe said. I just decided to leave it over night which was just perfect. It didn't take that long making the balls and coating them the next morning.


CHOCOLATE AND PEANUT BUTTER TRUFFLES

1        cup peanut butter chips
3/4     cup butter or margarine (I used unsalted butter.)
1/2     cup cocoa powder
1        (14 - ounce) can sweetened condensed milk
1        tablespoon vanilla extract

COATINGS: Finely chopped nuts, or unsweetened cocoa, graham cracker crumbs, powdered sugar, or chocolate or candy sprinkles


In a heavy saucepan, over low heat, melt chips with the butter.
Stir til melted and smooth.


Stir in cocoa until
smooth.


Add milk and vanilla.


Cook and stir until thickened and well blended, about 4 minutes.
(I cooked mine 5 minutes and decided to stop because the mixture was smooth but not very thick. I didn't want to burn it though.)


Remove from heat.


Transfer to a different bowl and refrigerator overnight.
You want the mixture to be the consistency that you can work with it.
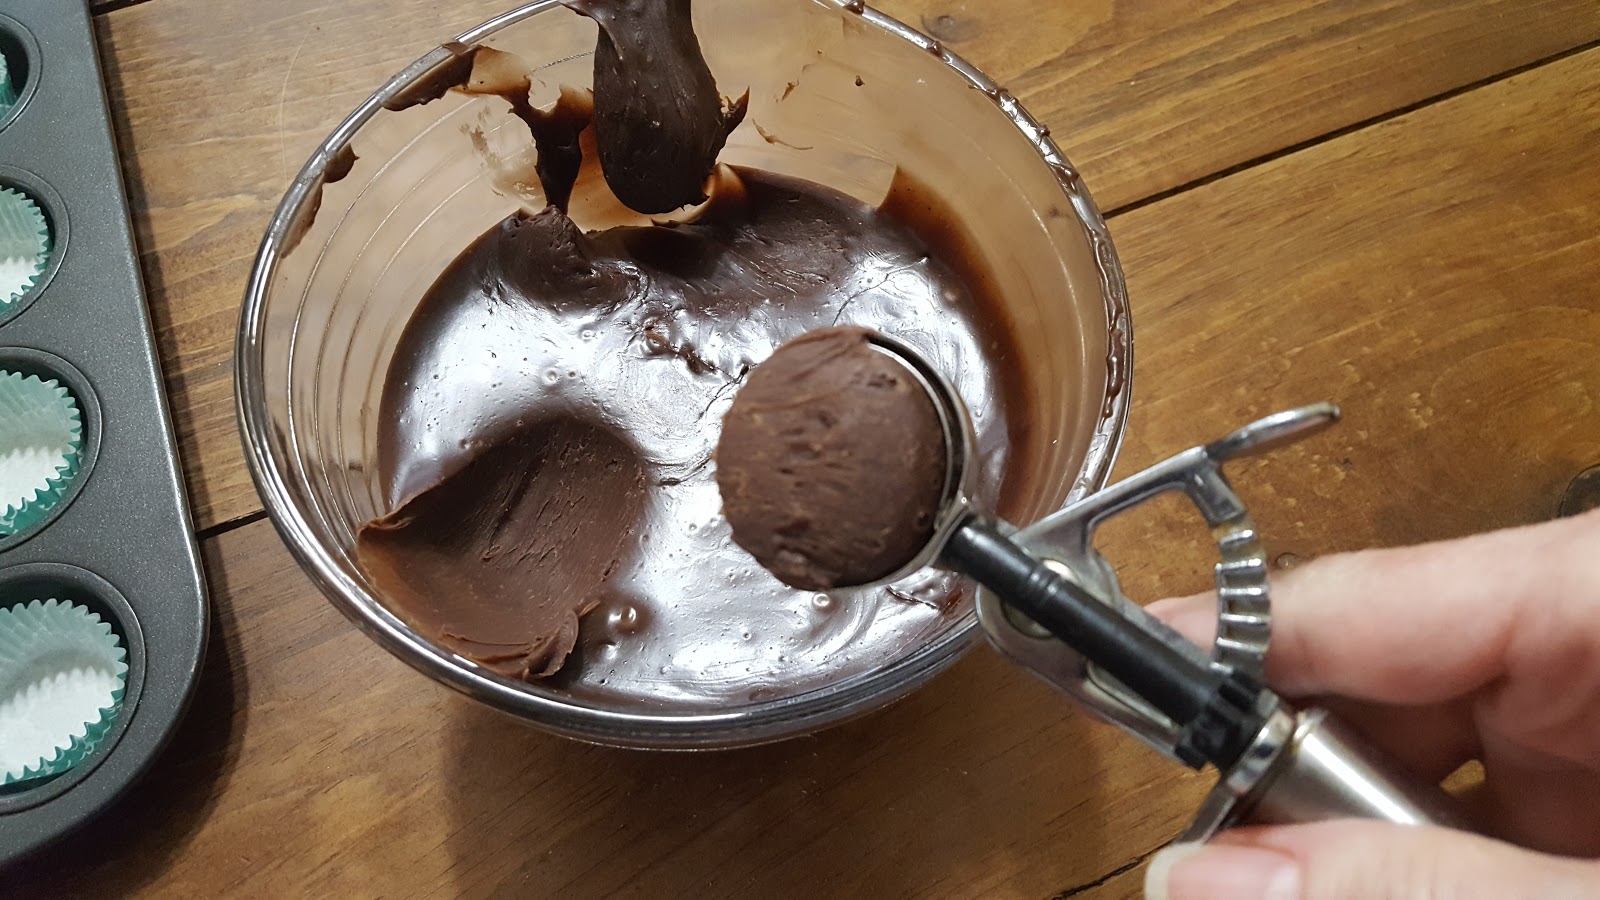
Shape into 1 - inch balls.
(The small cookie scoop works great for this. Mine holds 1 tablespoon of water.)


Roll in any of the toppings suggested or any of your own.


After I rolled the balls, I placed them in a mini muffin paper cup (and then served them in them).

Chill until firm, about one hour. (I rolled mine in the morning and then just left them in the refrigerator all day.)


Store covered in refrigerator.


Thursday, December 14, 2017

SNOWBALLS, AMISH NUT BALLS

The closer it gets to Christmas, the more opportunities we have to eat calorie rich food, aka awesome sweets. We finished the Date Bars and there was nothing else in the house sweet to eat. I don't know if you saw the post for the Date Bars, but they were the best. It took us a few days to eat all of them so the last few were a little dry. All I did was put one on a napkin and heat in the microwave for 10 to 15 seconds on HIGH and it tasted like I had just taken it out of the oven. I definitely need to make them again and soon.

Well, I love this recipe I found in my DIL Sara's cookbook called The Amish Baking Cookbook, Plainly Delicious Recipes Oven to Table by Georgia Varozza and Kathleen Kerr. They called it Amish Nut Balls, but I have seen similar recipes in several of my Amish cookbooks and they called them Snowballs. They are also known by many other names.

What I really love about this recipe is it made exactly 23 cookies. They are so good and literally just melt in your mouth. It is really hard to eat just one. (You could always double the recipe if you wanted more.)


AMISH NUT BALLS

2/3       cup butter, room temperature
1          cup ground nuts (I used pecans.)
1          cup flour
3          tablespoons sugar
1          teaspoon vanilla
1/8       teaspoon salt
powdered sugar

Preheat oven to 375 degrees F.


Combine all ingredients except the powdered sugar in a large mixing bowl.


Work with fingers until well blended.
(I didn't have a lot of time and I took the easy out and used my mixer.)


Shape balls the size of large marbles.
(I used my cookie scoop that holds 1 tablespoon water. Works great.)


Place balls on ungreased cookie sheet.


Bake 10 minutes. 
While still warm, roll in powdered sugar.


(Since I have never made these before, I wasn't sure how soon I should roll the cookies in the sugar. They were a little soft on the cookie sheet, so I took them off the sheet and placed them on a wire rack. After a few minutes, I rolled them in the sugar and placed them on the wire rack to finish cooling. The second pan I removed the cookies to the rack and let them cool longer before I rolled them in the sugar. This way the powdered sugar coated the cookies better. I ended up rolling them all again the second time.


I would recommend that you place a piece of wax paper under the rack because this is really messy.


Wednesday, December 13, 2017

JANICE'S APPLE DUMP CAKE

We celebrated Christmas with our younger son Patrick and his family Saturday night. We had dinner and opened presents. Granddaughter Madison had told her daddy that she wanted burgers so Patrick told me to bring coleslaw and dessert. When I questioned him about the dessert he said apple cobbler. I don't know why I asked because that's usually what he wants. I didn't have to think too long before I decided to make this Apple Dump Cake that Friend Janice makes for her family and for us several times also. I didn't have pictures of when she made it but thought I would take pictures as I made it and then just update this older post. It didn't disappoint Patrick as I couldn't help but see the helping that he dished out for himself. I didn't get a picture, but let's just say it covered the bottom of his 8 - inch paper plate. Think I will probably be asked to make it again. I did leave out the pecans because Grandson Tyler has a tree nut allergy. He was really pleased. (Patricia 12/25/2023)
 
Saturday night when the Tasty Bunch met for dinner, dessert, and gab, we went to a new Texas Road House that opened  nearby for dinner and a little gab. (It is hard to visit much in a busy restaurant and then of course impossible with 10 people sitting at a long table. That's why we decided to go back to the host/ess home for dessert and a quieter place to visit.) Then we went to Friends Janice and Leon's house for dessert and more gab. 

Janice served her Apple Dump Cake for dessert and, as usual, it was so-o-o-o good. She loves making it and I have been lucky enough to enjoy it on several different occasions. Friend Carol wanted the recipe and asked me if I had it on my blog. I told her I did and I would send her the link. 

When we got home, I discovered I had shared Janice's Peach Crisp (which is the same recipe as the Apple Dump Cake but just uses peaches/peach pie filling instead.) and had never shared the recipe using apples. The other thing I noticed is the recipe I/Janice shared was not Janice's own version. At first I thought I would just edit the original post, but after thinking about it for a while, I decided to share her version in a new post. I am sorry that I have only one picture (my serving) but I didn't take a picture of the whole cake because I thought I had already shared the recipe. (You can see a picture of the Peach Dump Cake at that original post here.)

Janice likes to make her version when she wants to serves more than a 9 x 13 - inch pan will serves. She has a glass baking dish that measures 10 x 15 - inches that she uses and it makes enough to serve 12.

PRINT RECIPE.


JANICE'S APPLE DUMP CAKE


Preheat oven to 365 degrees F. Spray a 10 x 15 - inch glass baking dish with non stick cooking spray.


First Layer:


Peel, core, and slice 3 apples and spread over the bottom of the pan.


Spread 2 cans of apple pie filling evenly over the fresh apple slices.


Sprinkle 1/4 cup brown sugar evenly over the pie filling.


Sprinkle a little cinnamon on top.


Carefully pour 1/3 cup water over it all.


Second Layer:


Sprinkle a yellow cake mix evenly over the first layer.


Third Layer:


Prepare topping by combining the following ingredients: 


3/4  cup old fashioned oats
3/4  cup quick oats
3/4  cup brown sugar
1/2  cup chopped pecans


Then sprinkle topping evenly over the last layer.


Melt 2 sticks of butter and drizzle over topping covering it evenly.


Cover pan with foil and  bake for 20 minutes.


Remove the foil and continue baking for 40 more minutes.


Can serve alone, with ice cream, or

with whipped topping.


Now if you want to make her Peach Dump Cake, you follow the same directions except you will use a bag of frozen peach slices (10 - 14 ounces) in place of the fresh apple slices and use 2 cans of peach pie filling. She makes a single layer of the frozen peach slices in the bottom of the pan.

Once again, if you would like to see the original post and a picture of the whole cake, check it out here.