Showing posts with label Cup Cakes. Show all posts

Wednesday, October 30, 2024

SANDI'S PUMPKIN MUFFINS

 I heard so many compliments on these Pumpkin Muffins, but unfortunately I didn't get to eat one. I wanted to make sure that there were plenty for the patrons of the Cafe to enjoy them.  After Cafe Treats Baker Sandi sent me the recipe, I'm not surprised I heard so many remarks. I certainly need to make some of these myself. They will just look different because I don't have the silicon pumpkin and leaf smaller muffin "pan" that Sandi told me she bought with this recipe in mind.

Sandi said she would have used a zero sugar yellow cake mix but didn't have one.


PRINT RECIPE.

PUMPKIN MUFFINS

1     box yellow cake mix

1     can (15 ounces) pumpkin puree

1     tablespoon pumpkin pie spice

1     egg

1/2 cup water

Optional add-ins:

1/2  cup chopped pecans

1/2  cup raisins or dried cranberries

Preheat the oven to 350 degrees F.

Mix all ingredients in a large bowl with a mixer on low speed until just well blended.

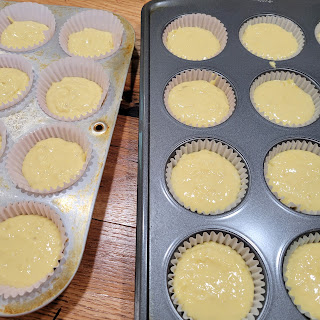
Spoon into muffin pan. Makes 12 regular sized muffins. Bake for 20 minutes.

Adjust cooking time depending on the size of muffins you are making.

Tuesday, September 5, 2023

HELP! MY MUFFINS STUCK TO THE PAPER LINERS

 Don't you just hate it when you make muffins or cupcakes and when you get one to eat and start to pull off the paper liner, it is stuck to the muffin or cupcake? Me, too.

Well, now I know what to do. 

I made some gluten-free banana bread mini-muffins this weekend to take to church for the Cafe Treats. I have been having problems cleaning my mini-muffin pan lately which is a big pain in the wazoo. So when I started to make the muffins from the King Arthur box mix, it said to grease the muffin pan or use paper liners. Since I recently bought some paper liners for  mini-muffins to make clean-up easier, I decided to do that.

I know from experience to spray the paper liners with nonstick cooking spray before filling the cups and I did that expecting that to do the trick. WELL, it didn't. After the mini-muffins had cooled completely, I thought I would see how they tasted.

You can imagine my disgust when I picked at the side of the paper liner and it was stuck to the muffin. I was so upset because the mix had made 52 mini-muffins that I knew would last me at least two Sundays for the Cafe Treats I just sat down on my glider couch and was silent.

After a bit, I decided to google to see if I could find a solution for my problem and of course links came up. I have to say I didn't read them all. The first one I read said to spray your liners first, but I had done that and that didn't keep them from sticking. Then I read one answer that said to freeze them for 5 to 10 minutes and then twist them out of the liner.

I didn't go any farther, but decided I would give that a try.

Well, that worked for about 95 percent of them. The ones that didn't work well, may have been the four I filled before I realized I had forgotten to spray the liners. This was the second pan I was making. Since I was making a banana bread muffin and the batter was a little bit different consistency than a cake mix make be, I noticed the four that didn't do great, had spaces in them so those spaces weren't even touching the liners. Bottom line --  I felt the experience was successful and will remember that again if I have the problem. 

This is what I actually did.

 We recently got a new refrigerator freezer that is about 4 cubic feet smaller. We lost space in the freezer. The compartment is narrower. I have a cookie sheet that fit perfectly in my old freezer, but is too wide for my new one. So I had to find something else that I could use to quick-freeze my baked goods. Solution? I have a tempered glass cutting board that works great. 

After the muffins had cooled completely, I spaced some on the glass board so they weren't touching, closed the freezer, and set the timer for 10 minutes.

When I timer went off, I removed two muffins at a time instead of all of them. It was warm enough in my kitchen that I was afraid the muffins would thaw since they hadn't been in the freezer that long. It took me a minute or two to do all of them and they did get easier to peel by the end. Saying that, I think I would do it again for 10 minutes to start.

I carefully worked with each one, by holding the muffin with one (left) hand and then using my fingernails on my other hand to get the paper started to separate from the muffin. I didn't rush this procedure because I wanted to not disturb the muffin as much as possible. As I worked around each muffin, I peeled back the paper as it appeared to separate best for that muffin.

And you know what? No one noticed so I must I have done a good job. What I did hear was lots of yummies when they bit into them. 

Here are some pictures I took during the process.


This last picture shows three of the four that I didn't consider a success. You can see the spaces I was talking about. Some of the holes were made because some of the muffin still stuck to the paper liner.

Here is a picture of my tempered glass board that I am using to fast freeze some of the muffins for next Sunday. 


Frozen, now I can place them in a freezer bag and they won't mess up until next Sunday. That means I won't have to make something gluten-free next Saturday.


Tuesday, March 15, 2022

COCONUT BANANA MUFFINS


Sorry I am later getting this post out. Troubles with my laptop last night so I just gave up and went to bed. I tell you this morning but one of these would taste really good right now. I know it is early for "cake" but with the time change this week to daylight saving time, anything goes. 

It usually takes me a week for my body and mind to get used to springing ahead one hour on the clock. At least I'm retired so it doesn't bother me as much as it did when I was teaching. I just kinda go with the flow now. 

This recipe though is one to take very seriously. It is so good and with no added sugar, how can you go wrong. Of course, if you are younger and not concerned YET about calories and especially sugar, you can use regular goods to make them. I don't know if I am just used to sugar substitutes but I can't tell the difference. I gave a couple to Techie Friend Sean, still in his twenties, and he told me later they were delicious. 

Either way I hope you will give them a try. I don't think you will be disappointed. And for my friends who don't like banana, try using 3/4 cup of unsweetened applesauce.

Click HERE for a printable copy of just the recipe.


COCONUT BANANA MUFFINS

1       sugar-free yellow cake mix 

3       large eggs

1/4    cup oil

1/2    cup water

1/2    cup plain Greek yogurt

2       bananas, mashed (about 3/4 cup)

1       cup unsweetened coconut  + additional coconut to sprinkle on top


Preheat oven to 325 degrees F. Place muffin paper cups in each cup of 24 muffin cups. Set aside.


Mix all ingredients in large mixing bowl with electric mixer on low

until ingredients are wet. Scrape the sides of the bowl.

Then increase the speed to medium and beat for 2 minutes


Divide batter filling muffin cups 3/4 full.

Sprinkle additional coconut on top.

Bake until done, about 15 - 20 minutes.


Cool in muffin tins on wire rack.

Friday, April 2, 2021

MARISSA'S CHOCOLATE CHEESECAKE CUPCAKES

 This has been a slow week for me as far as cooking has been. Maybe because Wednesday when I had planned to make some cookies, Worker Jay texted a little before noon saying they were on their way to replace my kitchen sink. So no cookie baking for me. Then Thursday morning I went to walk my 30 minutes at the Y on the Lazy River and then I worked a little cleaning and trying to get the kitchen put back together. I didn't feel like cooking so I treated Wayne to a mid-afternoon burger at IHOP. Afterwards we went out looking at new televisions. We are getting a new tv for the back porch and moving the current tv on the back porch to the bedroom.

Fortunately I have one more recipe to share from a friend. This time Hillcrest Thrift Shop Staffer Marisa again. She made the awesome cheesecake bars I shared a week or so with you. Check them out here.

Marissa hit the ball out of the ballfield again with these chocolate cheesecake cupcakes. I even ate mine before I left to come home. If you don't use dark cocoa as she did, you will have a dark layer, a lighter layer, and then the frosting. I love dark chocolate so I didn't care if my cupcake had three layers or not. Thanks, Marissa, for sharing them with us and sharing the recipe with me.

For a printable copy of just the recipe, click HERE. 


CHOCOLATE CHEESECAKE CUPCAKES

For the crust:

3/4       cup chocolate cookie crumbs

2-1/2    tablespoons melted butter

1          tablespoon sugar (I would omit)

     *     *     *

For the cheesecake batter

1         8 - ounce block of cream cheese

1/3      cup sugar

4         tablespoons rounded cocoa powder (Marissa used dark cocoa)

1-1/2   teaspoon vanilla extract

1         egg

1/3      cup whipping cream

     *     *     *

For the chocolate whipped cream

1         cup whipping cream, divided

1/3      cup dark chocolate chips

1         tablespoon rounded powdered sugar

1/2      teaspoon vanilla extract


Preheat oven to 300 degrees F. Place 12 paper liners in 12 - cup muffin pans. Set aside.

Prepare the crust by mixing the cookie crumbs, butter, and sugar, if you using it. Divide the mixture evenly between the 12 muffin cups. Press the crumbs firmly into the bottom of each. Set aside,

Prepare the cheesecake batter by mixing the cream cheese, s sugar, cocoa, and vanilla until smooth. Beat in the egg and then finally blend in the whipping cream until smooth. (You do not beat the whipping cream before adding it to the mixture.)

Divide the cheesecake filling equally between the 12 muffins cups and bake for 20 minutes or until cheesecakes have set and do not jiggle when you give the pan a slight shake.

Remove from the oven and cool completely.

Prepare the chocolate whipped cream by placing the chocolate chips and 2 tablespoons of the whipping cream  in a microwave safe bowl and heat for a few seconds (try 10 - 15 seconds at a time) stopping and stirring each time until all of the chocolate has melted. Let it cool to slightly lukewarm before whipping the cream.

Whip the rest of the whipping cream along with the powdered sugar, and vanilla til firm peaks form. Fold in the melted chocolate by hand into the whipped cream. Don't rush this step and deflate the cream.

Spoon or pipe the chocolate whipped cream onto the cooled mini cheesecakes. If you are piping it, it is best to chill it for half an hour first.

Drizzle a little melted chocolate if you like on top.


Thursday, April 1, 2021

PEANUT BUTTER ICING

 I often share my goodies with Friend Fran. She enjoys them so much and I enjoy giving them to her. It also means there are less to eat in our house. Recently whenever her daughter Sheila decides to bake, Fran will contact me to let me know Sheila has made such-and-such and wanted to share some with us. It's fun being on the receiving end and I always ask her if I can share the recipe here on my blog. 

One day Fran sent me a text to tell me Sheila had made some cupcakes and wanted to share some with us. I love cupcakes because they are smaller and so less calories. These cupcakes with the peanut butter icing were just what my sweet tooth was calling for. I sent Sheila a text asking her to send me the recipe and asked her if she had made the cupcakes from scratch. Her response was too funny for me not to share: Oh heck no...cake mix, hahahaha! Some type of double chocolate, think it was Duncan Hines. 

So I am sharing the super delicious icing on the cupcakes. I bet it would be awesome on a layer cake or one made in a 9 x 13 - inch baking pan.


PEANUT BUTTER ICING

1     cup powdered sugar

1     cup creamy peanut butter

5     tablespoons softened butter

1/4  teaspoon salt

3/4  teaspoon vanilla

1/3  cup heavy cream or 1/4 cup milk (Sheila used more.)


Mix all ingredients except the dairy; beat until creamy. 

Slowly beat in dairy to desired consistency. 

Makes enough for 24 cupcakes - double the recipe for layered cakes.

Yesterday Workers Jay and Josh cut out my kitchen sink and dropped a new granite one in its place. It looks so pretty in my kitchen. Makes me feel like I have a new kitchen.


Thursday, September 20, 2018

BROOKIES

Since I didn't have a new post to share with you, I thought I would look for an "old" one before I had my Facebook Fan Page and share it with you. I do this often when I want something to share with you. I admit I have passed this post several times and saw it as a draft and just never checked it out. Well, imagine my surprise when I did so and saw this perfectly completed post from 2013. I have no idea why I never published it but am certainly doing so now.

Recently Friends Janice, Fran, and I prepared a dinner to take to our friend Rita's house as she was recovering from a procedure . Janice offered to make Brookies for dessert. She was going to use peanut butter cookie squares, but I reminded her that Rita has a nut allergy. (Her grandchildren love the ones she makes using the peanut butter cookie squares, but you can use any flavor.) For the ones we took to Rita's, Janice used chocolate chip cookie squares.


BROOKIES

To make larger Brookies, use a 3-1/2 x 2-1/2 inch muffin cup pan. Spray heavily with cooking spray.

**Duncan Hines Chewy Fudge Brownie Mix (13 x 9  Family size) 

Mix according to package directions with 3 eggs. 

**24 - pk Nestle's Toll House Cookie Squares

Fill muffin cup and then place a cookie square in the center.

Bake at 325 degrees approximately 28 minutes. 


Cool completely to frost, if you like.


and spread icing on top.  (can of Pillsbury or Duncan Hines chocolate frosting.)


Our friend Carol made them recently for our farkle group and she didn't ice hers.

Friday, August 9, 2013

SURPRISE CUPCAKES

I am having fun finding new recipes to make every Tuesday morning to take to Hillcrest Thrift Shop to share with the other volunteers downstairs.  They always like what I take, which is nice, but it is an opportunity to take something that sounds and looks really good, but I don't have to have it in the house tempting me to eat it.  

I have seen recipes with cupcakes or brownies with cookie dough or something like that in the center for a delicious but also interesting look when broken open.  In fact, I have a recipe to share that my friend Janice made and took some pictures during the process for me to share here on my blog.  I just haven't gotten around to writing it up.  Sorry, Janice.

So on Tuesday morning I decided to make a similar recipe that I found last week when I was going through that OLD file of Recipes to Try.  The interesting thing about the recipe clipping I found is that in another OLD 3 - ring recipe binder that I have for recipes that I started writing down when I first got married, I have the recipe written down.  Tonight when I tried to find the clipping so I could maybe figure out where I found the recipe, I can't find it.  So I can't give credit to anyone.

The recipe is called Self-Filled Cupcakes.  I decided to make the name more exciting and am calling them Surprise Cupcakes.  I did make some changes in the recipes so I think it is okay for me to change the name.

I started with a sugar-free Devil's Food cake mix and I substituted stevia for the sugar and omitted the chocolate chips from the filling.  I can't imagine having chocolate chips in it.  If I did, it would have to be the mini-chocolate chips, but I really think that would be too much.  Since I decided to leave out the chips, I decided to double the amount of coconut.  I also use unsweetened coconut.  I normally would have used fat-free cream cheese, but I had some regular cream cheese I bought that I needed to use first so that is what I did.

As usual, I received many compliments.  Several were glad to hear how I had reduced the calories, but then I do that as much as I can.


SURPRISE CUPCAKES

1       pkg Pillsbury Sugar-Free Devil's Food cake mix 
1       8 - oz pkg cream cheese, softened
1/3    cup stevia or sugar
1       egg
dash salt
1       cup unsweetened flaked coconut

Preheat oven to 350 degrees F.  

Mix cake mix according to directions on package (w/ oil, water, and eggs). Blend til moistened and then beat at medium speed for 2 minutes.  Scrape sides of bowl as necessary.

Fill paper cups in muffin pans 2/3 full.


Cream the cream cheese with the stevia or sugar in mixing bowl til smooth, Beat in the egg and salt til smooth.  Stir in the coconut.

Drop one rounded teaspoon of the cheese mixture into the center of each cupcake.


Bake following the directions on the cake mix for cupcakes.....23 minutes.

Remove from oven and allow to cool in pan.


I frosted my cupcakes (to hide the surprise) with the following frosting. I buy my powdered sugar in a 2 - lb bag and store it in a large tupperware container.  So I sifted and measured about 4 cups of  it.  I know that they usually consider a lb box as 3-1/4 to 3-1/2 cups, but I like a little more so the icing is thicker.  I also reduced the amount of milk from 1/3 cup to 1/4 cup so it would be thicker.  I usually use this frosting on my Hershey's Disappearing Cake.  It is so - o - o - o good.  I also like how the Hershey's Special Dark Cocoa made the frosting darker.


CHOCOLATE FROSTING

1       stick (1/2 cup) margarine
1/2    cup cocoa (I used Hershey's Special Dark)
1/4    cup skim milk
1       teaspoon vanilla
4       cups shifted powdered sugar (or 1 lb box sifted)
1/4    teaspoon salt

Melt margarine in a large saucepan over medium low heat.

Add the cocoa, milk, and vanilla.  Stir until smooth.

Remove from heat and add the powdered sugar and salt until smooth.

Will ice 3-1/2 doz cupcakes or a 2 - layer 9 - inch cake.