Showing posts with label With Kids In Mind. Show all posts

Friday, August 29, 2025

MY FAVORITE CHOCOLATE CHIP COOKIE


What is it about a chocolate chip cookie that makes it such a favorite cookie? I know I love them so much. A good chocolate chip cookie just might be my favorite cookie of all time. I am always searching for the recipe for the perfect one and I may have finally found it.

Different people like different ingredients in their chocolate chip cookie. My friend Martin who also happens to be the godfather for my MO grandkids like what some might consider a plain boring cookie. He doesn't want any added ingredients...no nuts, no oatmeal, no pudding, no peanut butter, nothing extra but the chocolate chips. He's not particular about which chocolate you use which is nice. (I will eat any chocolate chip but my favorite is dark chocolate. I also prefer mini-chocolate chips, but won't turn down one with regular size or even chunk chocolate chips.)

Some people like soft chocolate chip cookies, but I prefer a slightly crunchy cookie. Seems like lately more than likely, the cookies I make will be more soft than crunchy.

As I said above, this just might be my favorite recipe, finally. The cookie is raised as it bakes, but in the two minutes you let them cool on the cookie sheet after taking the pan out of the oven, the cookies will flatten nicely. You just bake them until they start turning brown around the edges.

Something I especially like because I try to reduce our sugar intake, you can substitute 1/4 cup of stevia or Splenda for the 1/4 cup sugar and then also substitute 1/2 cup of brown sugar blend (complete) for the brown sugar and anyone eating the cookie would never guess it. 

The recipe makes almost 2-1/2 dozen which is just the right amount for just two people to keep in the cookie jar. If you wanted more, you could just simply double the recipe. 


Print recipe.

Chocolate Chip Cookies

8       tablespoons (4 ounces) butter, softened

1/4   cup sugar (stevia works fine)

1/2    cup packed brown sugar (brown sugar complete works)

1         large egg

1-1/4 cups sifted flour

1/2     teaspoon salt

1/2     teaspoon baking soda

1         teaspoon dried orange peel

3/4     cup chocolate chips (I prefer mini chips)

1/2     cup chopped walnuts (optional)

Preheat the oven to 375 degrees F. Line two cookie sheets with parchment paper. Set aside.


Beat the butter and both sugars in a large mixing bowl until light and creamy. (I used a stand mixer and just  set it to a medium speed and let it cream while I measured out the dry ingredients.)


Sift the flour with the salt and baking soda. Add the dried orange peel. 

Scrape the sides of the bowl and then add the egg. Beat until the mixture is fluffy.


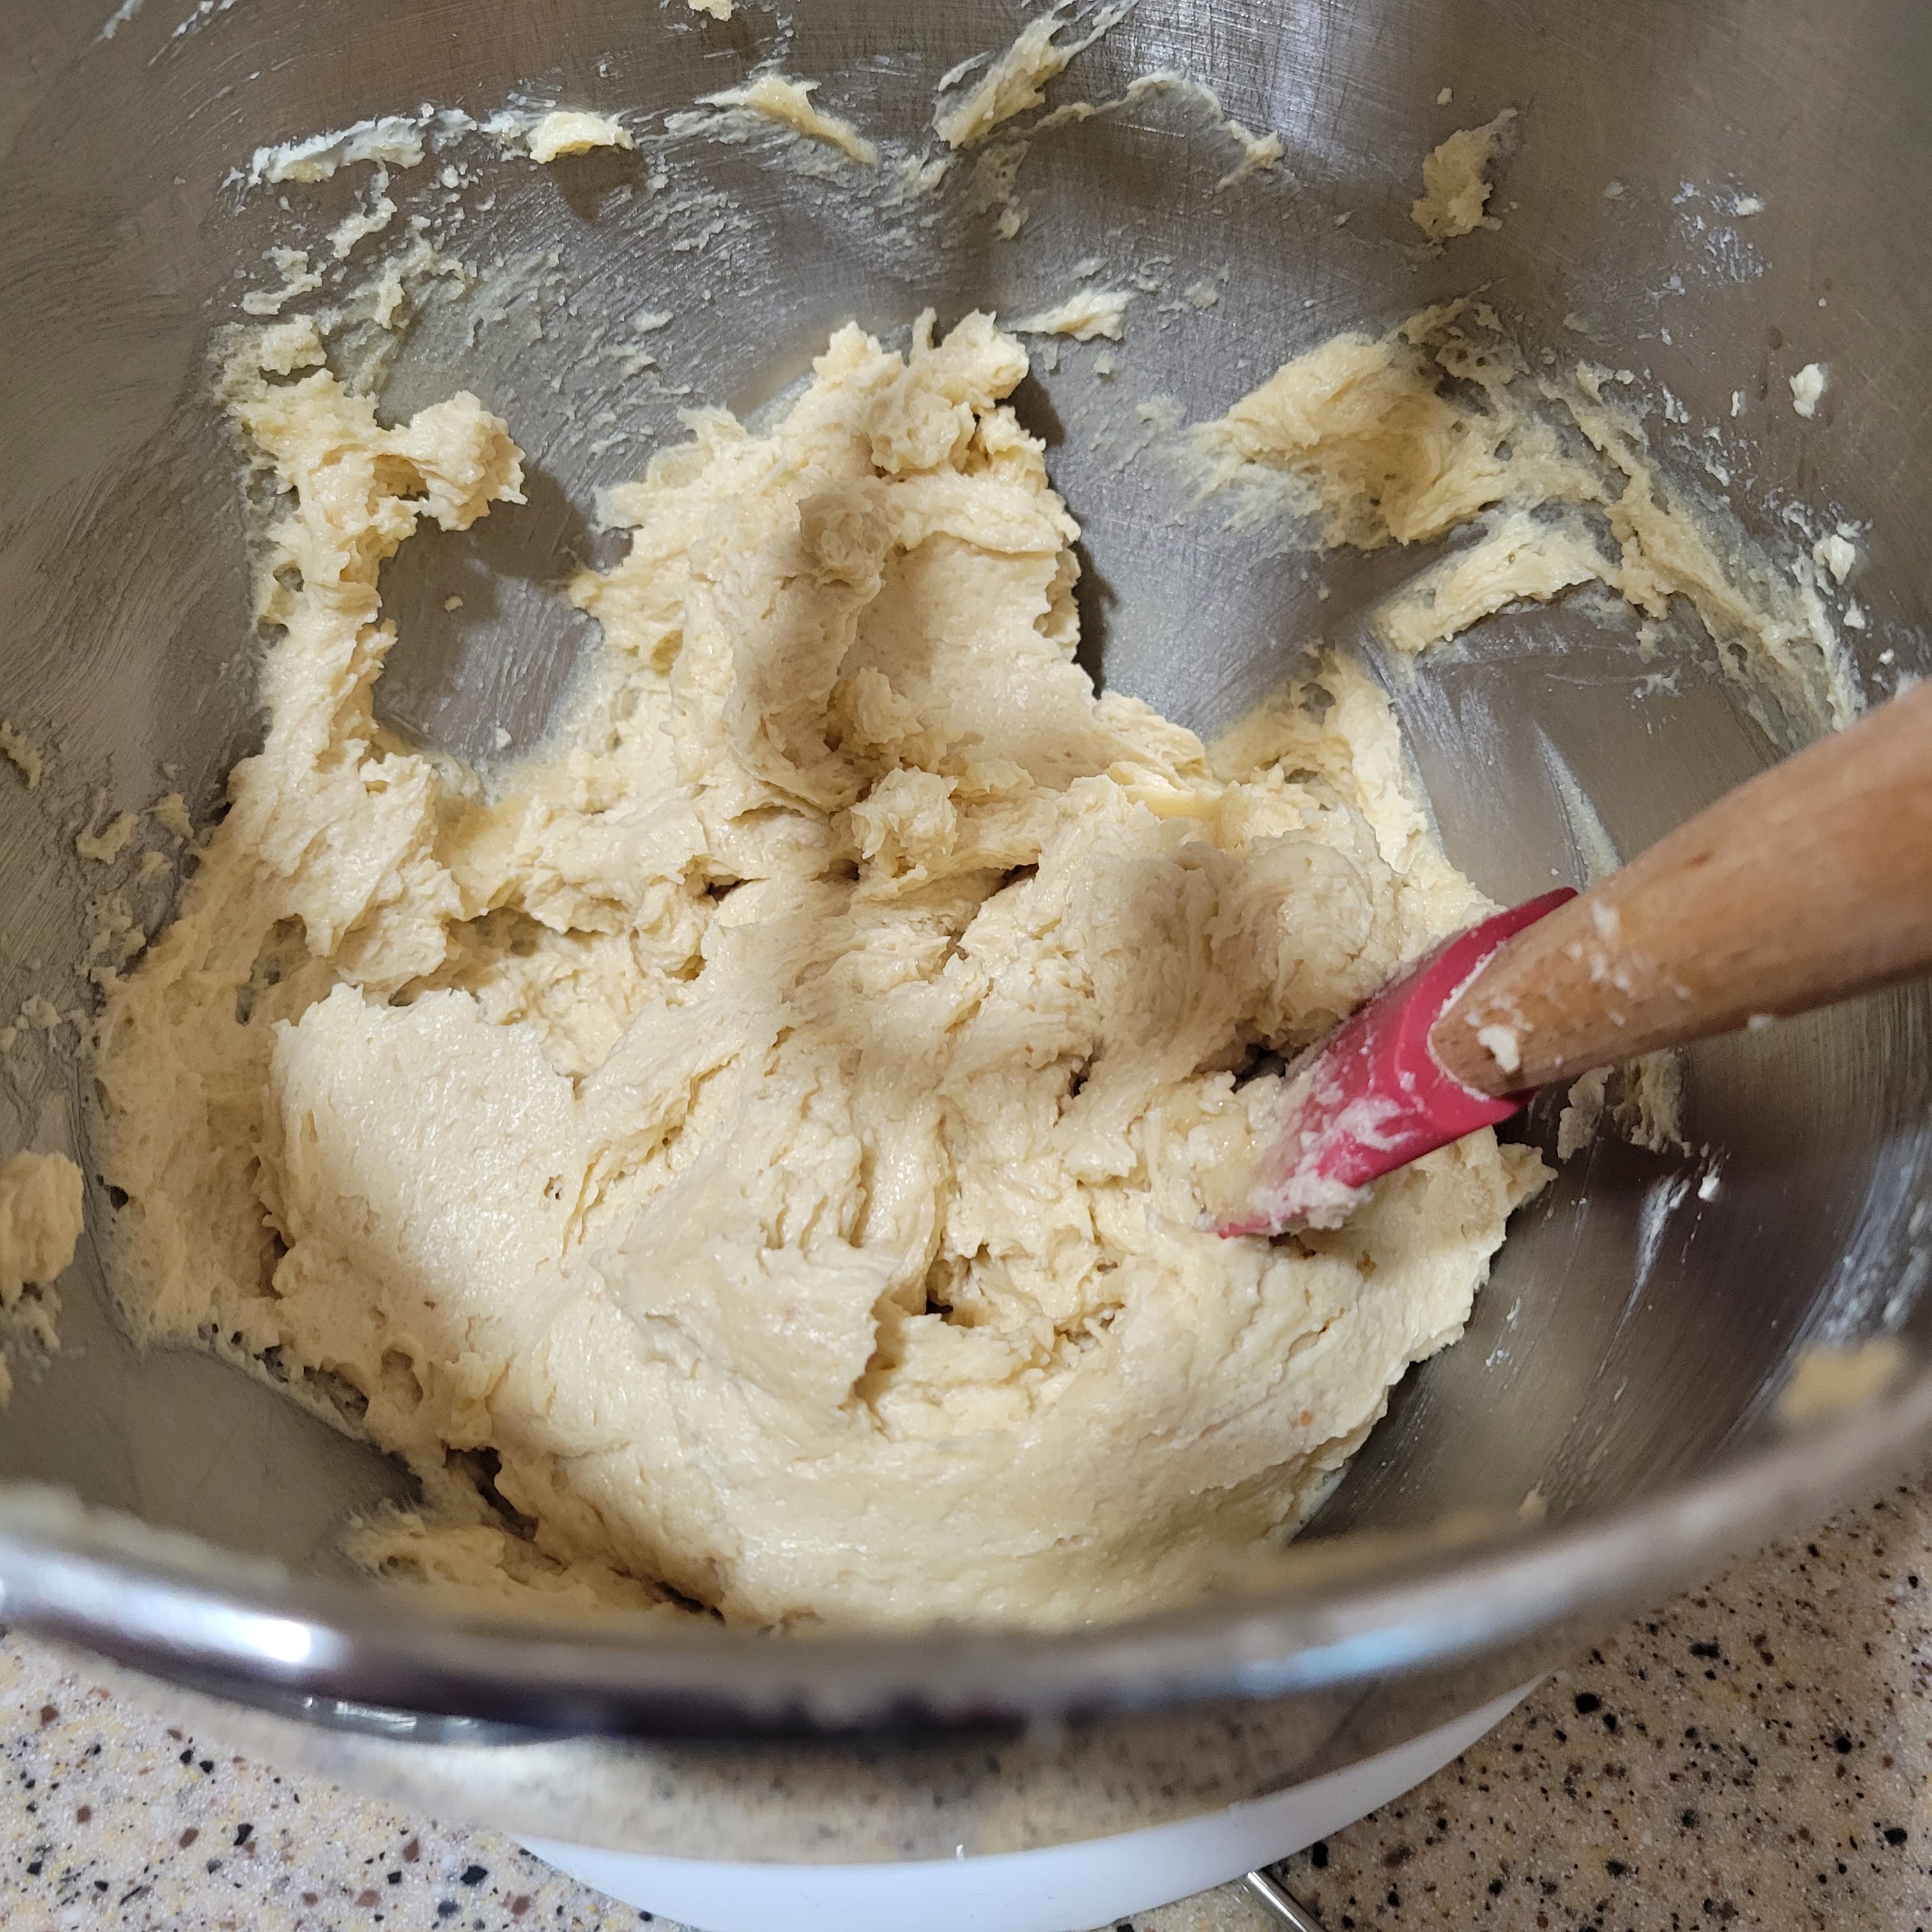
Add the dry ingredients and stir. I just used a spatula and

then add the chocolate chips (and nuts if you are using them).


Using a tablespoon cookie scoop, drop the batter about 2 inches apart on the cookie sheet.


Bake for 10 to 12 minutes, until brown. I baked mine 11 minutes. The cookies will be puffy but should be browning on the edges.

Allow the cookies to cool 2 minutes before removing to a wire rack. Cookies will flatten during this time.


Makes almost 2-1/2 dozens.

Sunday, August 10, 2025

PATIENCE CORNERS BLANKET OF HOPE


The first time I made this block pattern I was involved in a group I found on Facebook that contained thirty women who were to make thirty 12.5 inch quilt blocks, one for each member of the group. With the thirty blocks, each person could then make themselves a quilt with blocks from all over North America. You could make the same block if you wished or make different ones. 

Since then I have made a couple of Blankets of Hope for our church's quilt ministry using the pattern. It makes such a pretty quilt that several other members have used the pattern also. I just finished one that I especially liked because of the fabric prints I used and since I haven't had a tutorial in a while for a quilt pattern, I thought I would show how to make it.

It is such a versatile pattern because of its versatility with fabrics. If you are making a lap size quilt (about 42 X 48 inches), it makes up nicely using a charm pack or make it "scrappy by using scraps, or like how I made this one, use one "busy" print for all of the 4.5" squares.


The pattern consist of 42 (forty-two) 4.5 inch squares and 42 strips 4.5 X 2.5 inches and 42 strips 6.5 X 2.5 inches. To make the quilt 42 X 48 inches, I added a 3 inch border.

I used a solid for the strips that went well with the print I used for squares. I cut a strip the width of the fabric and 4.5 inches wide and a strip the width of the fabric and 6.5 inches wide. Then I cut the two strips into 2.5 inch wide pieces to make the rectangles.

From the busy print I chose, I cut strips 4.5 inch across the WOF. From each one I cut  9 (nine) 4.5 inch squares. Doing the math, that means I cut 5 (five) strips.

If you are using a charm pack, you will have to trim the squares down to 4.5 inches for this size quilt. *

Since my busy print was non-directional (didn't have a pattern that had prints going one-way), I could speed up the time to make the blocks by "chain-sewing". I took all of the squares in a pile and first sewed the shorter rectangle to one side of the square without stopping to cut the thread. I  pressed the seams first to seal the stitches and then pressed the seam on both sides to one direction.  Then I stitched the longer strip down the perpendicular side with the first seam. Repeated the pressing. AND the blocks were made. 


All I had to do was arrange them on my design wall so that I distributed the print out over the top.


Did you notice how I arranged them? I alternated the rows so that the squares were completely surrounded by the solid color. Now that meant sometimes corners were touching with the squares and sometimes they weren't. I'm not sure which were the "patient" corners - the ones meeting or the ones not. What do you think?

I sew the blocks together to make strips (rows or columns) depending on which would be the less. In this case, the top is 6 columns by 7 rows so I will sew the vertical blocks together to make 6 columns because that will be one less strips to sew to complete the panel. 
When I have the columns made, I seal the seam and then press the seams in each column going the same directions for the column. So that the seams will "nest" when I sew the columns together, I press the odd numbered columns going back toward the first block and the even numbered columns going away. Now you can do which ever way you prefer. It is easy for me to remember this way. You just want to be consistent so your seams will match up when you sew them.

Once you sew the columns together, you can press the seams any direction you wish, I just think it looks nicer if you do all of the columns the same direction.

Now I added the 3 (three) inch border by cutting 5 (five) strips 3.5 inches wide (remember the two quarter inch seams) across the width of the fabric. You need five because the "length" of the quilt will be 48 inches and your fabric is probably 42 inches at the most. The fifth strip will be pieced with two of the other strips for the sides. Sew the top and bottom strip on first and press it toward the border unless it is a white fabric. Cut off any access that you might have. Then sew two of the other strips together pressing the seam to one direction and sew it to one side of the top. Cut off the excess and then sew the excess to the last strip you cut and sew it down the last side.


To finish the quilt, I went back to the pink that I had used for the rectangles in the blocks to cut for my binding. I cut the strips 2.5 inches wide across the width of the fabric for the binding. I usually cut five strips but this pink fabric was wider and I only used three and part of a fourth one to make the binding. I sewed the binding on the back and then brought it over to the front and machine stitched a fancy decorative stitch to sew it back down. If you are sewing the binding down by hand, you will machine stitch it to the front of the quilt and bring it over to the back to slip stitch down. I have only started doing the fancy stitch because sometimes my arthritis in my hands does not want to corporate with me. 


I "turned in" the Blanket of Hope yesterday when our quilting group met.


Let me know if you have any questions. I would love to see your finished quilts in the comment section. Enjoy.

Monday, April 7, 2025

A SOFT AND CHEWY COOKIE

 Versatile, according to the dictionary, is "able to change easily or to be used for different purposes". As it deals with people, I like to think I am versatile or able to change easily when I see something isn't working or try a different approach when I see my approach isn't working. I also think of it as being open and willing to change my approach when someone offers a better way. 

As far as baking goes, I like recipes that are versatile - able to produce a different product with slight changes to the recipe. If you are able to do this, you can be successful in developing some amazing creations for different occasions. Or if this is too "dramatic" for you, you can just have fun.

The recipe I found in one of my Amish Cookbooks is simply titled "Hershey's Soft & Chewy Cookies". The picture on the next page shows four yummy chocolate chip cookies. They didn't call the recipe "Soft & Chewy Chocolate Chip Cookies" because you can make them whatever kind of special cookies you like. The recipe's last ingredient is "1 package (10 to 12) ounces) Hershey's Chips or Baking Bits (any flavor). I had a packages of Andes Peppermint Crunch Baking Bits from Christmas and decided to use them. I almost chose some toffee bits - I bet that would make a good cookie.

You can also make chocolate chocolate cookies by reducing the flour to 2-1/4 cups flour and 1/4 cup cocoa. See I told you the recipe is "versatile".

The recipe made a generous 5 or 6 dozens and there were none left at the end of the second service at church yesterday when the Cafe closed. I personally enjoy peppermint and it also made a really pretty cookie.

PRINT RECIPE.


SOFT & CHEWY COOKIES

1         cup (2 sticks) butter (no substitutes and not melted)

3/4    cup packed light brown sugar

1/2     cup granulated sugar

1/4     cup light corn syrup

1         egg

2        teaspoons vanilla

2-1/2  cups flour

1         teaspoon baking soda

1/4      teaspoon salt

(1        package - 10 to 12 ounces chips or baking bits - any flavor)

Optional -  1/4  cup cocoa for chocolate chocolate cookies. Decrease flour to 2-1/4 cups for chocolate cookies


Preheat the oven to 350 degrees. Line two cookie sheets with parchment paper or use ungreased cookie sheets. Set aside.


Beat the butter and sugars in a large mixing bowl

until fluffy. (Start off slower and then increase the speed once most of the butter is broken up. This will take several minutes.) Scrape the sides of the bowl.


Add the corn syrup, egg, and vanilla. Beat well.

Scrape the sides of the bowl again.


Measure the dry ingredients and combine them with a whisk in a smaller bowl.

Add the flour to the creamed mixture in smaller amounts beating with the mixer until creamy.


Stir in the chips or bits.

(I make this easier by using the mixer on the lowest speed for just a few seconds.)


Drop by rounded teaspoons onto the cookie sheets.

(I have a smaller cookie scoop that is a scant tablespoon that I use.) The cookies will spread as they bake so make sure you space the dough at least 2 inches apart.


Bake for 8 to 10 minutes or until lightly browned and almost set. (Using parchment paper-lined cookie sheets, I baked them the full time.) Cookies will be slightly puffed.


Cool slightly before removing the cookies to finish cooling on a wire rack. Cookies will flatten quickly.

Cookies will be softer the second day.


Monday, March 17, 2025

CHOCOLATE CHIP BUTTER COOKIES

 I loved how the teenage boys responded to these cookies yesterday at the Cafe Treats at church. One came back with a friend and said they were good as he pointed them out to his friend. I would tell people they were like a butter cookie but with chocolate chips thinking they might be disappointed that it wasn't a chocolate chip cookie, but they weren't. That seemed to entice them to choose one.

The recipe is also a good one right now because it is egg-free. Even though I didn't use it, I could have used my powdered sugar made with stevia I bought and then use sugar-free chocolate chips to have a sugar-free cookie.

There were a number of reasons I especially liked the recipe besides what I just mentioned. Since the butter was melted in the microwave, I didn't need to use my electric mixer so that saved some clean-up time. I always use parchment paper when I bake cookies because it makes clean-up so much easier. I used to change out my parchment paper with new paper after each pan, but then a friend told me you could use parchment paper three times before having to get  a new piece. Worked for me! Thanks, Judy.

The easiness of this recipe is just an extra treat. Even if it were more difficult, it would still be worth the effort. This recipe is definitely a keeper.


PRINT RECIPE.

CHOCOLATE CHIP BUTTER COOKIES

1     cup (2 sticks) butter

1     teaspoon vanilla extract

2     cups flour

1     cup powdered sugar

1     cup mini chocolate chips

Chocolate or white chocolate chips for drizzling or icing.

Preheat the oven to 375 degrees F. Have two ungreased cookie sheets available to use to bake the cookies. Set aside. (I always line my cookie sheets with parchment paper.)


Cut the butter in cubes and

melt in a microwavable bowl.

Add the vanilla and stir. Set aside to cool.


Measure the flour and powdered sugar and combine with a whisk in a mixing bowl.


Add the butter/vanilla mixture to the flour mixture and stir until all of the flour mixture is wet.


Add the chocolate chips and

stir to distribute the chips. Mixture will be crumbly.


Using a tablespoon cookie scoop, measure a flat scoop of dough and

drop the dough on the cookie sheet about 2 inches apart. Flatten with your fingers.


Bake for 12 minutes.

Cool slightly before removing to a wire rack to cool.


Melt about 1/4 cup of chocolate chips in a small bowl following the directions on the package.

Drizzle or ice the cooled cookies. (I drizzled and then just used the back of the spoon to spread the melted chocolate over the cookie.)

May enjoy plain or drizzle/ice with melted chocolate chips.


I stored the cookies in the refrigerator and then separated the layers with wax paper to transport to the church.


Thursday, March 13, 2025

SIRAPSKAKOR (SWEDISH SYRUP COOKIES)

 You think this cookie is going to taste like a plain sugar cookie, but it doesn't. I couldn't really decide what it tasted like until I looked at the recipe and saw the different ingredient. Molasses. 

The molasses definitely lets you know it is not a "plain" sugar cookie. It was different and I really liked it. Thanks to Cafe Treats Baker Dorene again for this unique cookie. 


PRINT RECIPE.

SIRAPSKAKOR (SWEDISH SYRUP COOKIES)

2-1/2   cups flour

2          teaspoons baking soda

1           cup sugar

1/2       cup (1 stick) + 6 tablespoons butter (cut into tablespoons)

2          teaspoons molasses

Preheat the oven to 350 degrees F. Lightly grease or line with parchment paper two cookie sheets. Set aside.

Sift together the flour and baking soda. Set aside.

Using a mixer on medium speed, cream together the sugar, butter, and molasses. Scrape the sides of the bowl as needed.

Slowly add the flour mixture on a lower speed until all is blended.

Roll the dough 1/8 " thick on a lightly floured surface.

Tradition calls for the dough to be cut into strips 1-1/4 " by 3-1/2 ", but you can cut them into round shapes or special shapes using cookie cutters.

Place on cookie sheets. The cookies do not spread when baking so you can place them close together.

Bake until light brown, about 10 minutes. 

Remove to cool on racks.


Thursday, February 27, 2025

BRENDA'S DROP SUGAR COOKIES

 What a beautiful week so far! It is so warm (mid 50s to 60) that it didn't take long for the snow to melt everywhere. The car wash places are making a killing this week. I had about 10 cars ahead of me when I got it washed yesterday. I had planned to do it on Sunday but the lines were so long it would have taken me quite a while to finally get up to the building. 

But my car is clean now and I am even out with Friend Janice today. I think this is our first outing this year. There were no estate sales in the Northland so we are heading 21 miles in the Southland to the nearest one.

I also got my new glasses yesterday - the first in three years at least and am dealing with getting them properly adjusted to fit comfortably. Fun to look at a different person in the mirror.

Today I am sharing another recipe from the Cafe Treats that I especially enjoy. It is for a sugar cookie but one that doesn't have to be rolled out. The dough is dropped and then pressed down with a glass, etc. Baker Brenda makes good cookies for us and they are always well received at the "Cafe". She dropped the scoops of dough into a bowl of red sugar to make them festive for the month.

PRINT RECIPE.


SUGAR COOKIES

2     sticks of butter or margarine, softened

1      cup white sugar

1      cup powdered sugar

1      cup oil

2     eggs

4     cups + 4 tablespoons flour

1      teaspoon cream of tartar

1      teaspoon baking soda

1      teaspoon vanilla

Preheat the oven to 375 degrees F. Line the cookie sheets with parchment paper. Set aside.

Cream together the butter, sugars and oil.

Add the eggs, one at a time beating well.

Combine the dry ingredients in a bowl and then add to the wet mixture, mixing well to blend.

Drop by a tablespoon measure (cookie scoop works well) onto cookie sheet and press down with a sugared glass bottom. (You can roll the scoop in decorative sugar if you like for the occasion first if you like and then place them on the cookie sheet to flatten.)

Bake 10 to 12 minutes. Cool slightly on pan before removing to a wire rack to cool completely.

These cookies freeze very nicely.


Monday, January 6, 2025

BUTTERMILK WAFFLES FOR TWO

Some people might just think this post is a bunch of fluff. If the result wasn't so delicious and attractive, I might agree with them, but it is both so I don't.

When I bought this darling little personal - sized waffle maker at an estate sale months ago, maybe even a year ago, I never imagined it would produce such a delightful treat for Wayne and me. 

I just thought it would make a smaller waffle that I might cook for my MO grandchildren sometime.  That was more of a dream that I have about my time with my grandkids than reality since I dream more about doing things with them than I actually do.

The other day I saw the little maker when I was looking for something else, of course. Isn't that the way it always is. Anyway, I brought it up to the kitchen and it has sat on my counter for several days waiting for me to inspired.

Yesterday was that day. We woke up to snow on the ground with more coming down...a fine mist of snow. Saturday evening it started sleeting first leaving a thin sheet of ice on everything outside. 

It was supposed to change to snow during the night or at least that was the forecast. I woke up around 3:30 and thought I would check out the window, but there was no snow, just the layer of ice. The next time that I woke up and looked out the window, I saw the snow. (It continued the fine mist of snow the rest of the day as forecasted but I don't think we got the 5 to 12 inches they were calling for. Maybe 5 though. Considering how difficult it is to forecast the weather here in Kansas City, I guess they did pretty good.)

When I got up I decided I wanted something different than my usual Greek yogurt and decided it was time to try out the little personal-sized waffle maker. I was going to use some boxed pancake and waffle mix, but didn't have any. That meant I had to look for a recipe. 

Most of the recipe called for milk, but we haven't started buying milk in a 2 - quart size because it doesn't take up as much room in our refrigerator. (When we replaced our fridge we downsized slightly and so I have less room in it.) I found one that used buttermilk but not quite enough so I just finished the cup with skim milk. It was fine.

When I finished making the little waffles, I remembered  a tradition that our dil Sara brought to the family when she and Jeffrey were married. In our family we have a New Year's Day tradition of eating blacked-eyed-peas to bring us good luck for the year. In Sara's family, they had waffles with cherry pie filling on top. We learned about her tradition one year when we were with them on New Year's Day. Well, I love cherry pie filling so enjoyed my waffle that day. I don't think we have repeated her family tradition again and yesterday wasn't New Year's Day, but since I had some leftover cherry pie filling in the fridge, I topped our little waffles with some on mine and some strawberry pie filling on Wayne's since he loves strawberries, to surprise him.

I cut the recipe in half so if you want more waffles or use a larger waffle maker, just double the recipe. After we finished eating, I went on and made up the rest of the batter and made 5 more waffles. I quick froze them in the freezer. When we want to eat them, we will just pop them in the toaster to heat up. 

PRINT RECIPE.


BUTTERMILK WAFFLES

1      cup flour

1/2  teaspoon salt

1      teaspoon baking powder

1/2  teaspoon baking soda

1      tablespoon sugar

1      large egg.

1      cup buttermilk

1      tablespoon oil

Whisk together the dry ingredients together in a bowl. Set aside.

In another bowl, whisk together the egg, buttermilk, and oil.

Pour the wet mixture into the bowl of dry ingredients.
Stir gently just until combined.

Cover the batter and let it rest for 5 minutes while you preheat the waffle iron.

For my personal sized waffle maker, I measured two level scoops of batter or about 3 tablespoons. If you are using a larger waffle iron, you will use more.

Close the lid and bake until the light on the iron signals the waffle is ready.

Remove and keep warm until you are ready to eat.

I made two for each of us and after buttering them, I spooned some pie filling on each.

So pretty and very delicious!

I cooked the rest of the batter, quick froze them, and

then put them in a freezer bag until we are ready to eat the rest. Will pop them in the toaster to warm up. 


Here is  my cute little waffle iron...