Wednesday, February 20, 2013

LOW FAT HAWAIIAN BREAD

This Hawaiian Bread has to be one of my new favorite recipes.  It is so moist and delicious, but I have to warn you, it is hard to eat just one slice.  

I found the recipe in that cookbook that Auntie gave me--Eat What You Love!  There are so many good recipes in it that I want to try.  The cookbook was written  by Stacey Browning Pardue, LDN, RD. I don't know if she still has the show, "Just Ask Stacey", but in 2001 when the cookbook was published, her show was the number one source of information on heart-healthy, low-fat cooking and eating in the ArkLaMiss.  I know I am glad I saw the cookbook at my Auntie's and that she said I could have it.


LOW FAT HAWAIIAN BREAD


1       (14-oz) box banana quick bread mix
1       (15.6-oz) box cranberry quick bread mix
2      cups skim milk
5      tablespoons light applesauce (I used unsweetened applesauce)
3/4  cup fat free Egg Beaters
2      mashed ripe bananas (1 cup)
1       cup thin flaked coconut (I used unsweetened coconut)
1/3  cup sliced almonds (optional)

Preheat oven to 350 degrees F.  Spray 2 loaf pans with nonstick spray and set aside or 5 mini loaf pans.

Combine mixes, milk, applesauce, and Egg Beaters in large mixing bowl.  Stir until mixture is moistened.

Fold in bananas, coconut, and almonds.

Pour batter into prepared pans.

Bake for 45-60 minutes.  Check doneness with the toothpick test.  Cool on wire racks in pans for 10 minutes before removing. Bake 35 minutes for the mini loaves.

Remove from pans and continue cooling on wire racks.


Tuesday, February 19, 2013

PECAN CRUSTED BAKED CHICKEN TENDERS

I like cooking chicken tenders because they are smaller than a chicken breast....even eating two tenders. I have found several different ways to cook them over the last several weeks.  

The first time I tried this recipe, my husband and I weren't real happy with the results. Not giving up on the basic recipe though, I thought I would work on it until it tasted "tasty".  

Last night I tried my revised recipe and it was so much better. Just walking into the kitchen after I had taken them out of the oven, my husband said, "The smell is much better (than the first time I tried the recipe)." The pecans are a nice addition to the "coating" mixture.

I don't do spicy, but if you do, I would recommend increasing the amount of Emeril's Original ESSENCE to 1-1/2 to 2 teaspoons.


PECAN CRUSTED BAKED CHICKEN TENDERS

1     cup all-purpose baking mix (I use Jiffy baking mix)
1/2  teaspoon salt
1     teaspoon Emeril's Original ESSENCE 
1     teaspoon paprika
1/2  teaspoon pepper
1/2  cup finely chopped pecans
1/2  cup buttermilk
4     tablespoon canola oil
4 - 8 chicken tenders

Preheat oven to 400 degrees F. Will use an ungreased cookie sheet or covered with parchment paper.

Combine baking mix, salt, seasonings and pecans. Place in a shallow pan.

Pour buttermilk in a different shallow pan.

Place the dishes in an assembly-line arrangement for easy transfers.

Dip the chicken tender in the buttermilk, turning over to coat both sides.


Then in the baking mix, turning over to coat both sides well with mix.


Place the tenders in a skillet with 2-4 tablespoons canola oil. 


Fry 1 minute on each side.


Place on cookie sheet.


Bake for 18-20 minutes, til done.


Monday, February 18, 2013

CAROL'S PROTEIN BREAKFAST COOKIES

Several months ago I posted a recipe for Multi-grain Banana Breakfast Cookies (See HERE). 

My friend Carol always eats a light lunch if she is eating a big dinner.  Her light lunch always consisted of a granola bar and a banana.  When she saw my recipe for the breakfast cookies, she decided to give it a try.  

Well, she loved the recipe.  Enough that she no longer buys granola bars but has two cookies and a banana.  Soon after she made them, she told me that she had added chocolate soy protein to my recipe for added protein.  

The other day she told me she finally had the recipe where she liked it.  She sent me the recipe and I made them today.  I like the chocolate.  Who wouldn't?!  

Anyway, if you are counting calories (65 calories/cookie) and want a light lunch, I hope you will give Carol's recipe or my original one a try.  You know they would also be a good choice for a snack for your kids.  They would love you for it. AND of course, they still work really well to grab two on your way out the door for breakfast when your schedule doesn't allow more.


CAROL'S PROTEIN BREAKFAST COOKIES


¼ cup light margarine
½ cup Splenda brown sugar blend
1 teaspoon vanilla
3 mashed bananas
1 egg
½ cup natural peanutbutter ( I used soybutter)
1 cup flour                                                                         
1 cup whole wheat pastry flour
1 ½  cup quick oats
2 tablespoon flaxseed meal
1 teaspoon salt
1 teaspoon baking soda
5 scoops chocolate Soy protein
1-1/2 cup dark chocolate chips


Preheat oven to 350 degrees F.  Line cookie sheets with parchment paper.

Cream butter & sugar.  

Add vanilla, bananas, peanut butter and egg and mix until smooth.  

Mix dry ingredients together and gradually add to creamed mixture by hand. (The batter is thick--sorry Carol, I mixed the dry ingredients in using my mixture on low.) 

Stir in chips. 

Use a cookie scoop to form cookies. (After the first pan, I flattened the cookies slightly with my fingers.)   

Bake 9 minutes. 
These are from the first pan and I left the "cookies" as they came out of the scoop.  It doesn't really matter as they taste the same.

STORE in the freezer in a ziplock bag.

Saturday, February 16, 2013

JUDY'S BERRY LITE MOUSSE


Today I am sharing the dessert that Judy brought to John and Bernie's the other night when the Tasty Bunch gathered at their house.  It was so light tasting and the perfect ending of our dinner.

Judy added the note at the end of the recipe that you could use sugar-free Jello to reduce calories.  I would certainly do this, but then that is what I usually do....revise recipes to reduce calories.


Berry Lite Mousse

1 (4 serving size) package strawberry jello
¾ cup boiling water
1 cup ice cubes
1 ½ cups sliced strawberries
¾ cup cool whip

Mix boiling water and jello in blender for 30 seconds.  

Add ice and then strawberries while blending.  

Blend in cool whip. 

Pour into dessert dishes.  

Chill at least 2 hours.  

Garnish before serving with whipped topping and a strawberry.

Makes 5-6 servings. 
        
To make it even lighter, use sugar-free jello. 


Friday, February 15, 2013

ZUCCHINI PINEAPPLE BREAD

I had a recipe for zucchini pineapple bread that I was going to make on Monday. Before I got to start on it though,  I decided to get the freezer side of my side-by-side refrigerator organized. Remember my Get Organized 2013 plan?  (HERE)

In the process of removing everything in the freezer, I found a gallon ziplock bag full of frozen blueberries that I didn't know I had. I have two pint containers of fresh blueberries in the crisper waiting to be eaten.  

So I got sidetracked looking for recipes that called for blueberries. On my harvest table in the kitchen was a stack of a couple of cookbooks that I had been looking through recently. One of them was a cookbook I got from my Auntie. She doesn't cook anymore and the last time we went to visit her, I was looking in the cookbook and she told me I could have it. It is called Each What You Want. It is full of low fat, reduced calories recipes.  

I found a couple of recipes using blueberries, but my greatest find was a recipe Auntie had cut from the newspaper and left in the cookbook....and guess what it was for........Zucchini Pineapple Bread.  

The recipe had come from Carol Walters of North Little Rock, AR.  "This is really delicious probably because of the pineapple," she wrote. "It is the first I have seen that includes instant pudding mix."

The recipe was different from the one I had planned to make, but I decided I would try Carol's recipe.  I made a few changes in her recipe, but what else is new?  Even with my changes, I agree with Carol....it is really delicious.


ZUCCHINI PINEAPPLE BREAD

3        eggs
2        cups sugar (I used 1 cup truvia blend)
1/2     cup canola oil
1/2     cup unsweetened applesauce
3        cups all-purpose flour (I used whole wheat pastry flour)
1/2     teaspoon baking powder
2        teaspoons baking soda
1         teaspoon salt
1-1/2  teaspoons ground cinnamon
1-1/2  cups grated unpeeled zucchini
2/3     cup crushed drained pineapple (the recipe called for a 9-oz can and I used a 15-oz, drained it, and then measured out 2/3 cup)
1/2    cup dried cranberries
1       cup chopped pecans
1       Small package (4 servings) instant vanilla pudding mix (I didn't have a vanilla mix, so used a lemon instant pudding mix.)

Preheat oven to 350 degrees F.  Grease and flour two 9-by-5-by-4-inch loaf pans. (I used 3 pyrex loaf pans that measure 6-1/2-by-4-inches.)

In a large bowl, beat eggs, sugar, oil, applesauce, and vanilla until foamy-a couple of minutes.

Sift flour, baking powder, baking soda, salt, and cinnamon together in a medium bowl. Stir into egg mixture, scraping sides of bowl as necessary.

Then stir in zucchini, pineapple, dried cranberries, pecans.

Then slowly mix in dry pudding mix.

Pour batter into prepared pans 

Bake for 1 hour or until toothpick comes out clean.  (I cooked my mini loaves about 45 minutes.)  Cool 10 minutes in pans on wire rack.

Remove from pans and continue cooling on racks.


Thursday, February 14, 2013

DROP BLUEBERRY BISCUITS

I have been on a blueberry kick lately.  The price is good in the grocery store, but I also found a gallon bag of blueberries that I had frozen when I organized my freezer the other day.  This recipe for Drop Blueberry Biscuits works best with frozen blueberries.  They don't break down and "bleed" when you add them to the batter.  If you have fresh ones, just remember to measure out about 2/3 cup the night before and place them in the freezer.

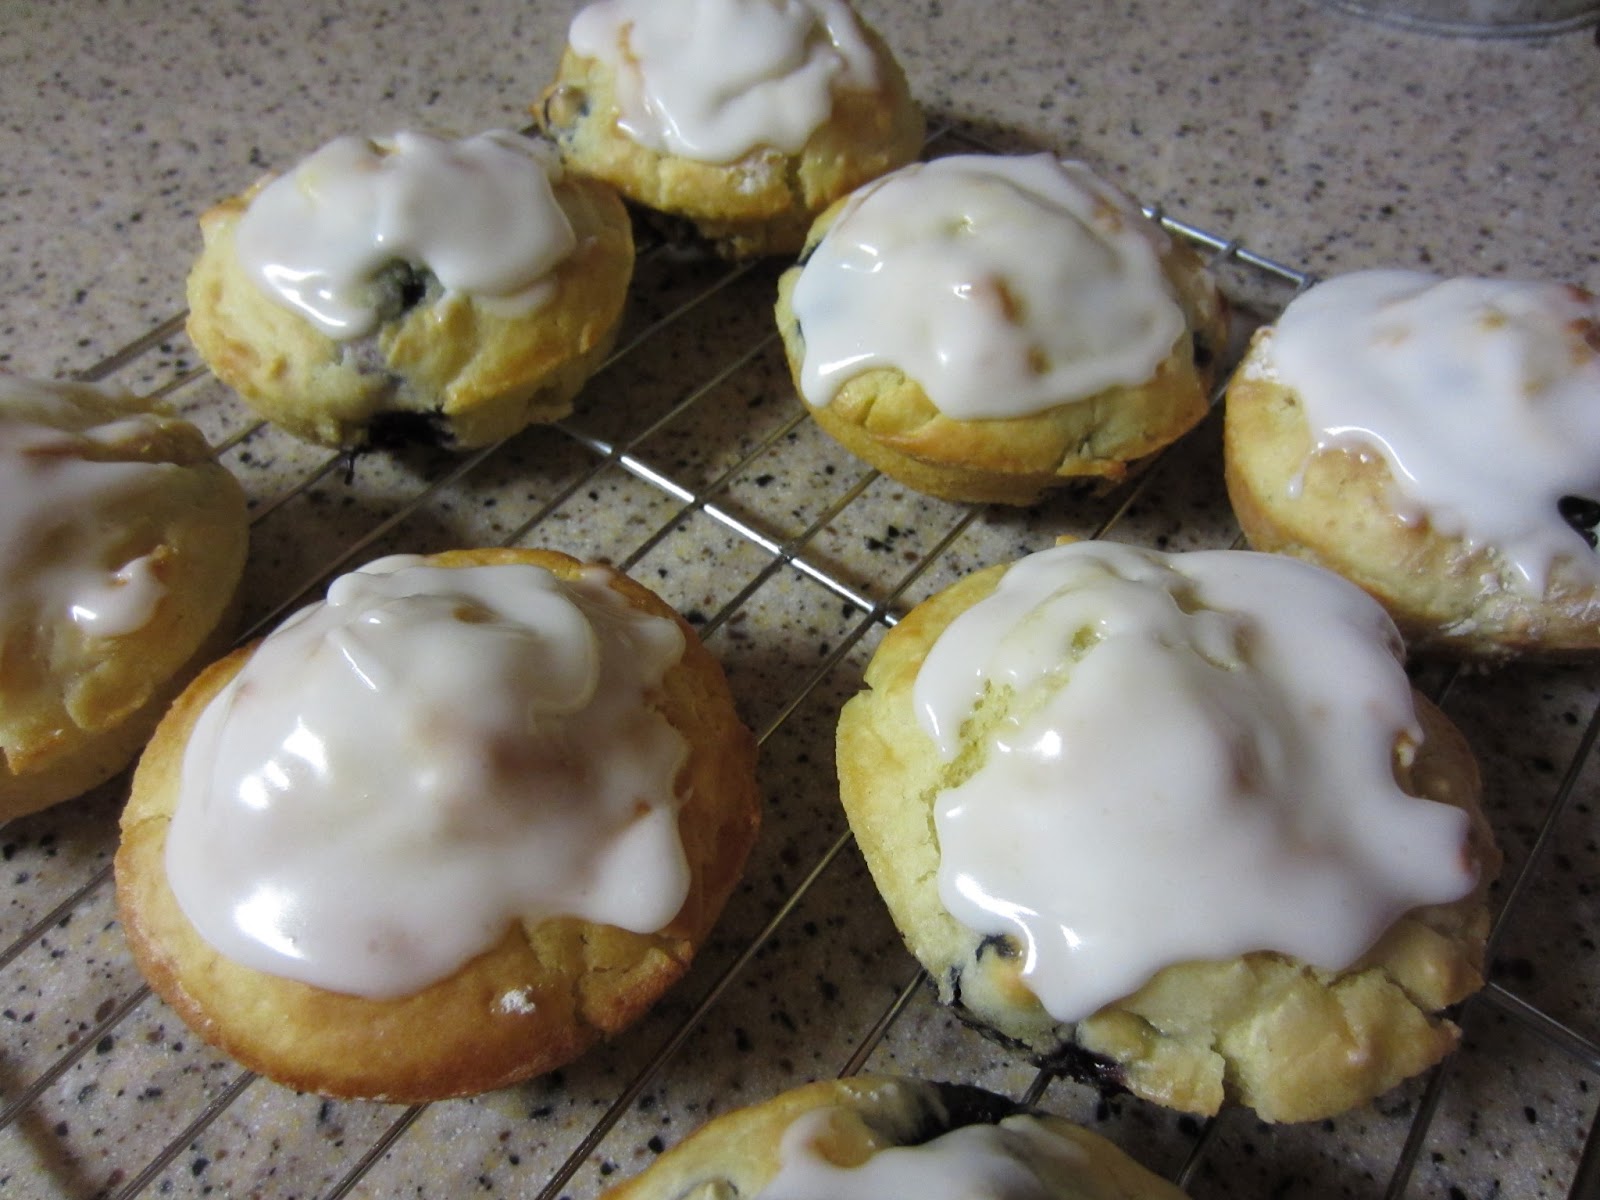
I love the way these baked in my shallow muffin pan.  And they were so nice and brown.  I didn't put anything on top of them before I baked them to help them brown (like melted margarine or oil).

I decided to show this picture so you could see how nicely they turned out.  I did put the powdered sugar icing on top (see lower picture) but you don't have to if you don't want to.


DROP BLUEBERRY BISCUITS


Biscuit:
2     cups flour (I used soft wheat pastry flour)
4     teaspoons baking powder
1     teaspoon salt
1/4  cup sugar
5     tablespoons light margarine
1     cup skim milk
2/3  cup frozen blueberries (If using fresh berries, plan ahead and freeze them overnight)

Icing:
3/4  cup powdered sugar, sifted
1     tablespoon of milk 
1     teaspoon lemon juice (I used 1 packet of TRUE lemon equal to 1 large wedge of lemon)

Preheat oven to 450 degrees F.  Spray shallow muffin pan with cooking spray.

(This is the shallow muffin pan I use.)


Sift flour, baking powder, salt, and sugar.  

Cut the margarine into thin slices.  (It is easier to "cut" in the margarine this way.)

Cut the margarine into the flour mixture in a large mixing bowl.  (I use my fingers to do this.)

Stir in the milk.

Add the frozen berries.(If the berries are frozen, you can stir them in and the berries won't break down.)

Spoon the batter into the muffin pan spreading the batter out to the edges.

Bake for 12-15 minutes in the oven.

Meanwhile, prepare the icing by sifting the powdered sugar and add the milk and lemon juice to desired consistency.  (I used the packet of TRUE lemon so I added just a little bit more milk.)  Set aside.

Remove the biscuits to a wire rack or plate.

Spread a small spoonful of the icing over the top of each biscuit.  (If you like.)

Wednesday, February 13, 2013

BLUEBERRY POUND CAKE

This is the recipe for a blueberries pound cake that I found a couple of days ago in my recipe book called Eat What You Love! My husband had gotten some Egg Beaters the last time we went to the grocery store so I decided to follow the recipe.....well, almost. The recipe called for Butter Buds (?) and in the front of the cookbook on their substitution list, they showed oil or applesauce. Since I was going "Totally Good for You", I decided to use only applesauce.  

NOTE:  If you aren't concerned about calories and cholesterol, use a regular yellow cake mix, 3 eggs, 1/2 cup oil, and regular cream cheese. The reduced calorie version tastes great though.


BLUEBERRY POUND CAKE

1       box sugar-free yellow cake mix
1       cup water
3/4  cup Egg Beaters
1/2   cup unsweetened applesauce
8      ounces fat free cream cheese
1/4   cup sugar
2     cups fresh blueberries

Preheat oven to 350 degrees F.  Spray a 12-cup Bundt pan with cooking spray. 

Combine cake mix, water, Egg Beaters, and applesauce in mixing bowl on low speed until moistened. Then beat for 2 minutes on medium speed.

In a separate bowl, combine cream cheese and sugar; blend well.


Add cream cheese mixture to cake batter and mix well.
Fold in 2 cups blueberries.


Pour into prepared pan.


Bake for 1 hour.

Cool on wire rack for 10 minutes before removing it to continue cooling.


This picture reminds me of the commercial for blueberry muffins "full of blueberry stuffing".


Yesterday I took the cake to Hope Circle Quilters meeting at the church before I took it to Hillcrest Thrift Shop where I volunteer. (I didn't want to leave it in the car)  Before I left home, I dusted the top with powdered sugar but it didn't stay too long.  The cake is so moist (even though I had made it the night before) that the powdered sugar just soaked right in.


I had to offer my friends at Hope Circle some of it -- can't be rude. Well, Fran, Teresa and I ate this much of the cake. (Good thing we had such a small turnout for the meeting.)

So I didn't have the whole cake then to take to Hillcrest. 

I "bake-and-take" often to Hillcrest and the volunteers always like what I bring, but I received so many compliments yesterday for this cake.  I don't like when people rename their dishes "Better than sex" or "Crack", but if I did, I would certainly label this Blueberry Pound Cake that. And to top it off, it has no oil and only 1/4 cup added sugar. It is just so hard to believe that it tastes so good....like a pound cake. You must give it a try.

Tuesday, February 12, 2013

A HUG FROM GRANDMOTHER

This year for Valentine's Day instead of sending Valentine Day cards to my grandchildren in CO, I decided I would send them a hug.  I had seen pins on Pinterest for children to give hugs to adults, but I thought...."Why couldn't I send my grandchildren a hug?" 

I have been "toying" with different ideas for several days for accomplishing this and didn't completely finalize those ideas until yesterday.  I had decided I would use "Valentine" ribbon for sure, but kept coming up with different ideas for the "hands".  

I got the ribbon Sunday at Michael's on sale.  I wanted to use the wider ribbon, but it all had the wire on the edges.  So I had to settle for the 3/4 inch ribbon.  Since I have 3 grandchildren in CO, I got three different designs of ribbon.

There was so much for me to decide.  I considered making the hands with felt, card stock, but wasn't really happy with either idea.  I also was trying to decide how long to cut the ribbon.  I wanted it to be as long as my arms, but then it might/probably would be too difficult for them to handle.  Then I had to decide what I wanted to say.  I wanted to write a poem, but that isn't always easy.

Everything sorta fell in place when I decided to use gloves for my "hands".  The idea just popped in my head coming home from book club yesterday.  With the gloves, the kids could just put their hands in the gloves, throw the ribbon over their heads to their backside and then "hug" themselves.

Once I knew how I was going to do it and how it would work, the "poem" came fairly easy.  

A HUG FROM GRANDMOTHER

36 inches of ribbon

a pair of gloves (I bought the one-size fits all)

needle and thread


Cut the ribbon 36 inches long (or the length that will work best for your situation)

I turned down the ends the ribbon so the ends wouldn't rival.

Then with thread that matched the color of the gloves, I stitched the end just on the inside of the glove.  I just went through the inside layer.  I stitched twice in each place.


I laid the gloves and ribbon down to make sure the ribbon was straight and the gloves were going the correct way before I sewed the ribbon in the other glove.

When it was all finished....

I printed the "poem" and added my name.  Put the gloves/ribbon in the envelope and taped the poem on the outside.

I placed the 3 envelopes in a large padded one and took off for the post office. I had to stand in line for 35 minutes at the post office but they got mailed and are supposed to be there tomorrow.  

Hope my CO grandchildren love their "hugs from Grandmother" as much as I enjoyed making them.

UPDATE!  Here is a picture of the "Hug" I made for my granddaughter Madison.  She is 2-1/2 so I made her smaller.