Wednesday, September 12, 2012

HOW TO MAKE PERFECT MITERED CORNERS & INVISIBLE JOINTS


I am going to try to show you with lots of pictures and briefer written explanation how to make perfect mitered corners when you are sewing binding on your work.  Also how to join the end binding together with the beginning with the diagonal seam also called an invisible seam.  I should apologize for using a binding that the right and wrong sides of the fabric aren't obvious.  It just happened to be what I was sewing when I decided to make the tutorial.  It is also hard to show the steps with photos instead of a video.  That's why I have so many pictures.  I hope these tutorials will help you.  If you have any questions, please leave them in the comments and I will try to answer them.


1)  Measure and mark a quarter of an inch from corner with a pin.


 2)  Sew to the pin and stitch in place a couple of stitches or backstitch a few stitches.
Cut the threads.


My machine will stitch-in-place.


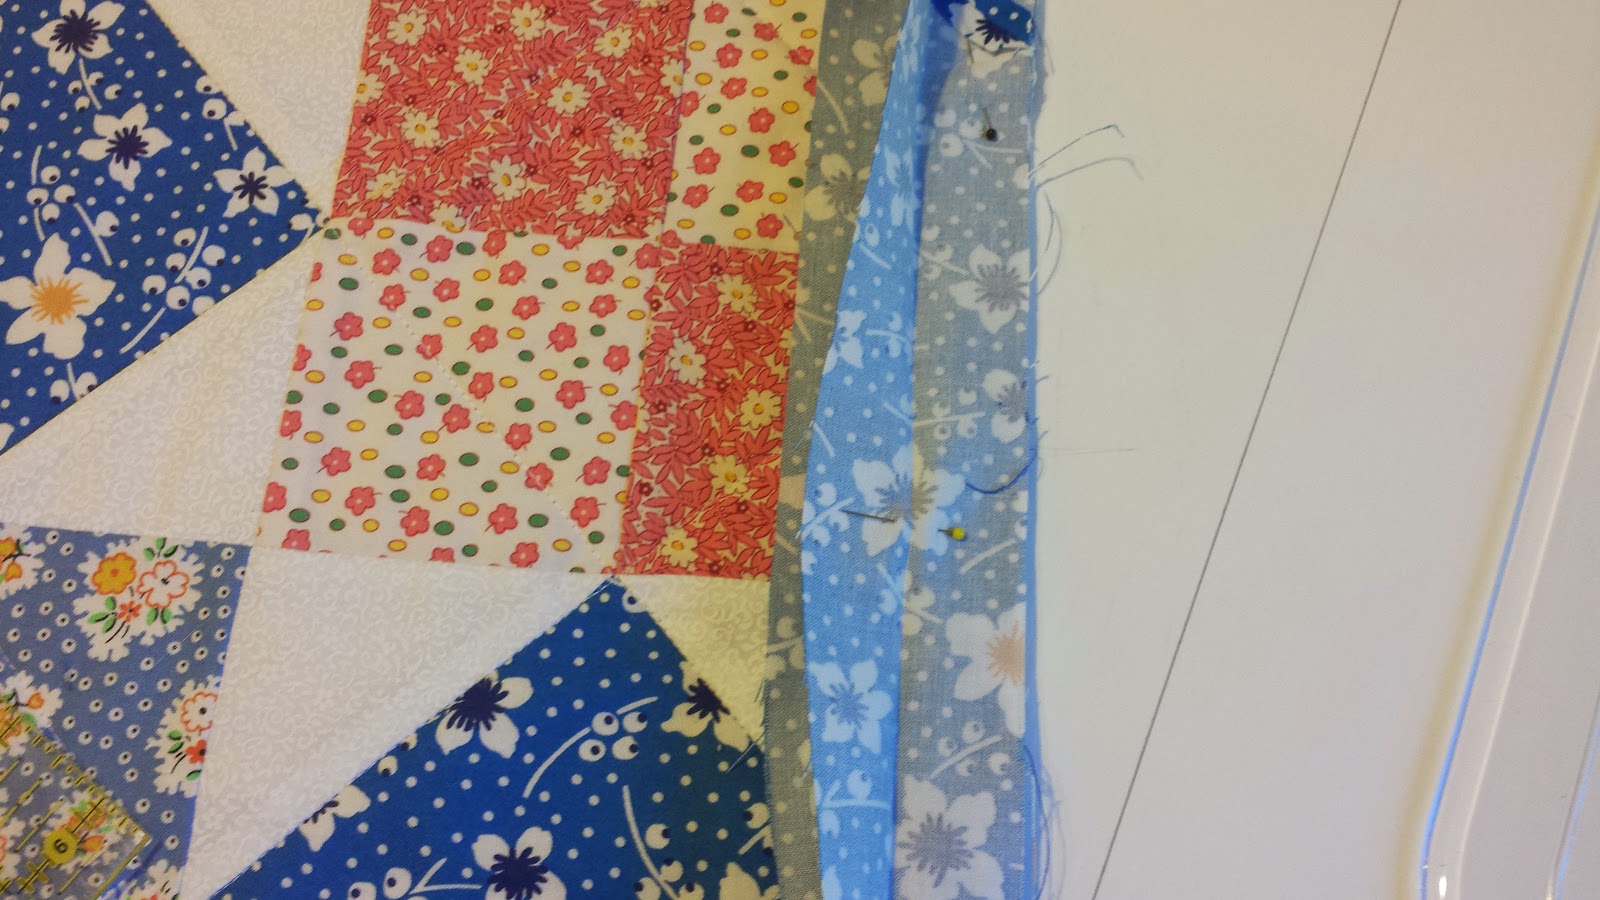
3)  Fold the end of the binding up so that it forms a 45 degree angle to corner.


4)  Holding the sewed binding in place with your finger, bring the binding down along the side making a fold even with the sewed side.


5) Holding the binding in place with your fingers, lift up the "foot" and carefully move the piece so that you will start sewing from the end.  Sew a couple of stitches, then backstitch a couple and then sew down side.


This is what it will look like when you are finished.


6)  When you have finished sewing the binding on and are ready to blind stitch it to the back, flip the binding around to the back as shown in the picture.  You can see that the corner is a folded miter on the front.


 7)  As you are sewing the binding down on the back side, as you get close to the corner, pull the binding over along the side you are sewing.  You can see at the corner, the binding makes a diagonal.


8)  I press the binding down with my finger at the end


9)  And bring the other side over with my other hand so that the binding makes a perfect miter.  If it doesn't, I go back and start over with step 9 and make sure my finger is making a "break" at the edge of the other side.


10)  I pin the two sides to hold in place while sewing.


I just realized that I didn't take a picture after I finished slip-stitching the binding down.  Here is a picture of my SEW & QUILT-IN-ONE PLACEMATS that I made.  


The front....
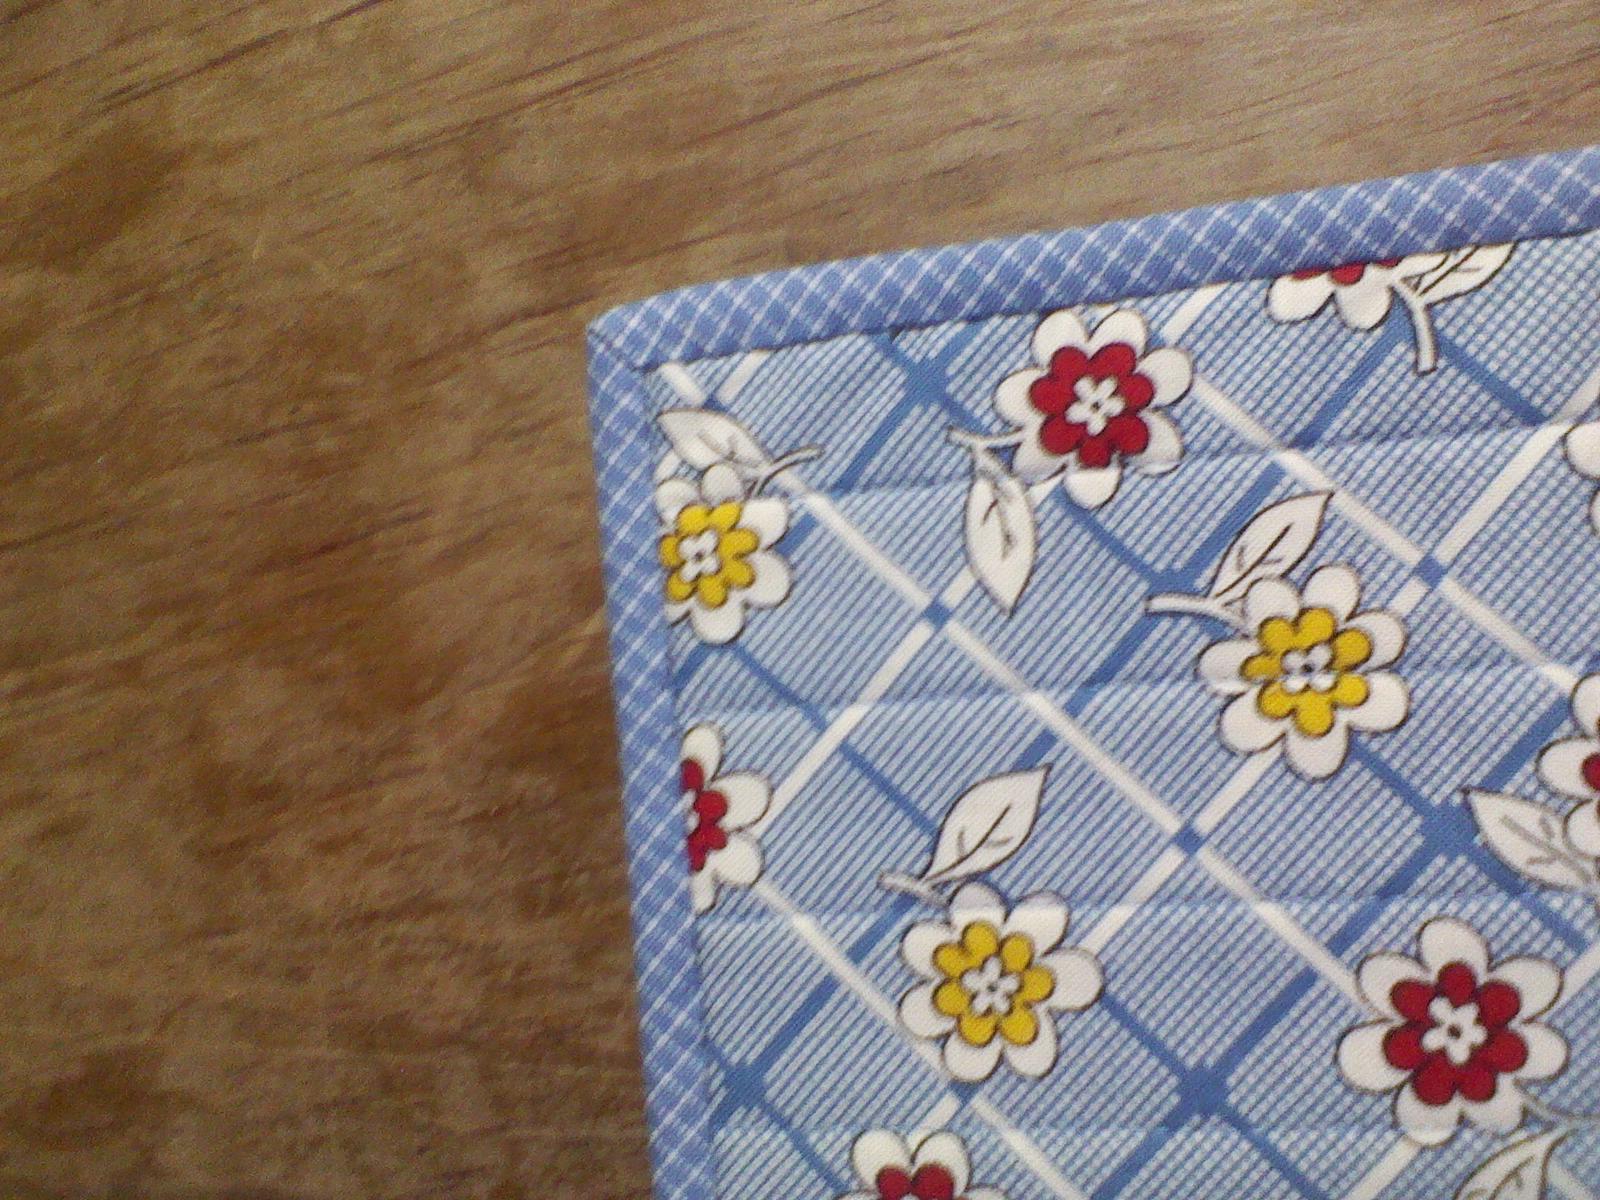


and the back.


When I am sewing the binding on, I lay the binding down one side of the piece and then move down as far as I can to start sewing the binding on. I highly recommend that you lay the entire binding around your work to make sure that where you start won't have a seam (of the binding) near a corner. If this happens, it is very difficult to make a nice clean corner with the added bulk. For example, with these placemats, I would move down and start sewing about 3 inches from the corner.  I do this so that I have plenty to work with when I get back around to finish.   I also will stop after rounding the last corner about 3 inches from the corner.  Since I have joined the strips for the binding with diagonal seams or "invisible" seams, I want to join the beginning and the end with a diagonal seam.

UPDATE!   MAKING INVISIBLE BINDING JOINTS EVEN EASIER! 

I wrote this tutorial two years ago and have since learned a much easier way to join the binding with invisible joints.  I have removed the original tutorial and am sharing with you this easier way to join them.  

It is always good to know we are never too old to learn a better and easier way to do things.

I always leave a generous amount to work with.  The actual amount depends on the length of the project.  I have at least several inches at the beginning when I start before the corner and then at least several inches after I "round" the last corner.

These pictures are from a table runner I made and had about 15 to 20 inches free to work with.


I started by overlapping the two ends to decide where I will make my seam.


I pinned the two pieces together to just recheck that they were flat and there was no excess.

Then I moved the top piece over to the side and matched up the diagonal line on my template with the left edge of the stripe
and drew a line with a fine line washable marker.


With my scissors, I cut along that line.


Now I relaid the top strip onto the bottom one making sure they were flat with no excess. I pinned it down at the top to make sure.


Then I  made dashes with the marker on the bottom piece exactly where they overlapped. I moved the top piece slightly so you could see the dashes.


I matched up my dashed line with the 1/2 inch line on the template. (I moved it down so you could see it in the picture.


I then drew a solid line 1/2 inch above the dashed line.


Next I cut along this solid line.


Without twisting the ends, simply bring the two ends up to match the diagonal cuts overlapping the ends 1/4 inch. I pinned the two pieces together to hold in place.


I sewed the two pieces together in a 1/4 inch seam and then trimmed the seam down to 1/4 inch.


I have joined the binding perfectly.


I pressed open the seam with my fingers and refolded the binding along the fold line, cut off the "dog ears" and then pinned it down to the project making sure it fit perfectly.


Stitching in place where I had stopped sewing on the binding, I continued to stitch the binding down once again stitching in place when I got back to where I had originally started sewing on the binding.
  
I really have to thank my friend Kay who taught me this method. It is so easy.  It makes all those other methods seen confusing to me.


As always with my tutorials, if you have any questions or comments you would like to leave, I will get back to you as soon as I see them.

Would love for you to let me know if this was helpful.

Tuesday, September 11, 2012

KEEP YOUR DIP COLD + ICE PACK BAG


My friend Fran was serving a guacamole dip with chips recently at a gathering.  She wanted to share with us her idea for keeping the bowl and dip cold.  She had placed a frozen Blue Ice bag and had scrunched a kitchen towel over and around it.  Then she had the bowl with the dip sitting on top of the towel.

She then had the chips in a bowl next to it.  I suggested pushing down the towel as best as possible and then laying the chips on top to hide the towel.  

When we finished playing cards a couple of hours later, the dish was still cold and the dip looked fresh.

I had taken pictures that day so that I could share her clever idea here on my blog, but I got to thinking about it and decided she needed a little bag to put the ice pack in instead of using a towel.  This way it would give her more room in the dish for the chips and it would look better, too.  That's when I came up with the idea to make her a little ice pack bag from a dish towel.


I asked Fran for the size of the bag so I could decide what size to make the bag.  She told me the bag was 6-1/2 inches square but to allow for the thickness of the bag (which she didn't tell me, btw).  I decided to make the bag  8-inches finished. 

I had this really cute dish towel with the penguin.  I thought that was the perfect design since it was going to a cold pack bag.

I folded the towel so that it measured 8 inches from the fold line to the bottom of the towel.  Then I measured 2 - 3/4 inches longer on the back piece and cut the towel off there.  This was to allow for a  1/2-inch hem to be made and leaving a 2-inch flap.


Since the bag was going to be an 8-inch square, I would be cutting the bag 9 inches wide to allow for a half-inch seam on each side.  Centering the penguin, I cut 4-1/2 inches from this center on each side.

Refolding so that the right sides of the towel are facing and the folded down side still measures 8 inches,  I sewed the side seams with a half-inch seam, back stitching at beginning and end of the seam.  (The blue painter's tape is marking the 1/2-inch seam since I don't have a "foot" for my sewing machine that indicates a 1/2-inch wide.)

On the flap, I pressed from the side seams to the end a half inch, the width of the seam.  Turning under about half way, I sewed a narrow hem.  

Then I pressed the end of the flap back 3/4-inch toward wrong side of towel.  I turned under a fourth of an inch, pinned it down, and then sewed a 1/2-inch hem.

The finished flap from the inside.


I cut diagonally across the corners at the bottom fold to reduce bulk when turned.


After turning it right side out, the cute little ice-pack bag was finished.

The next time we were getting together, Fran decided to bring dip and chips again just so she could use the ice-pack bag.

It was a perfect fit.

Here is the bag with the ice pack inside and flap closed to keep the cold in.

Setting it up.....she placed the bag in first and then laid the chips around the sides.

I took the picture before Fran had completely arranged the chips around the dish, but she covered the ice pack/bag so that it wasn't visible.

It worked like a charm.  The bowl and dip stayed cold but the chips didn't get soggy.

REMINDER:  Make sure when you place the ice pack in the freezer, that you lay it flat so that is will be flat when it freezes.

Monday, September 10, 2012

PEACHES 'N' CREAM CUPS (FOR 2)

 I am always on the look-out for simple and easy recipes that either will make enough just for two or I can make in smaller portions and freeze  much of it.  This recipe for Peaches 'n' Cream Cups especially appealed to me for several reasons.  

The first ingredient, the gingersnap cookies, was perfect for my recipe for whole wheat gingersnaps that I like to make.  (Check it out HERE.)  


I omitted the ginger as I used cookies that I had made from my recipe for gingersnaps.  The original recipe didn't call for Greek yogurt, but I changed it.  If you don't like Greek yogurt, feel free to use regular peach yogurt. I used 1/3 less fat cream cheese.  I would have used fat free, but I didn't have any.  I think it would work in the recipe without any problem.  I used a fresh peach, but you could use a canned peach...it will taste differently, just like the Greek yogurt makes it taste different.  

PEACHES 'N' CREAM CUPS

2 - 3 gingersnap cookies, crumbled
1/4  teaspoon ground ginger
1  carton (6 - oz) peach greek yogurt
3 - oz cream cheese, softened (I used 1/3 less fat)
1/4  teaspoon vanilla extract
1  large peach, sliced and chopped

In a small bowl, combine the gingersnap cookie crumbs and ginger; set aside.

In a small mixing bowl, whip the yogurt, cream cheese, and vanilla until smooth with a whisk.

Slice and chop the peach.  (I used a large peach and it was almost a whole cup chopped.)

Fold in the peaches.

Spoon a layer of the cookie crumbs in the bottom of the custard dish.

Spoon in half of the peach mixture.
and
Top with additional cookie crumbs.

I also made one up in some new "glasses" I got at Hillcrest Thrift Shop.  It was the first time I have used the glasses and I didn't do a very good job of layering.