Tuesday, July 24, 2012

FROM A NINE PATCH TO A.....

I recently shared a Disappearing Nine Patch block with some of my quilting friends that I had seen at sew-fantastic   We are going to be making a quilt of valour and thought about this technique for our pattern.  We met last week to start on our quilt (Be looking for future posts on our process).
 

 Kay had made a simple nine patch square (imagine you can't see the cuts she made)


and had cut it vertically and horizonally in the 
middle. The large darker red in the center will become small squares and the medium red squares will be the same size or two together to form a rectangle.


We played around with the four pieces a little, but Rita, another member of the group, had bought the recent copy of Fons and Porter quilting magazine as it had a feature article on quilts of valour and we decided we would make one of them. 

The next day several of us were together again and I suggested that we see how many different ways we could rearrange the four pieces to make a quilt square.  Here are some pictures of what we came up with, our Disappearing Nine Patch Blocks.  The thing is you can see some cute possibilities for some quilt squares.

This is one of my favorite designs.  It is also one of the easiest as you only have the one intersecting seam in the center to make sure you meet.


I also really like the looks of this one.
 
These next two examples would be interesting if you made the original nine-patch with the four corners different prints that were close to the same color.  This one to the right is two halves of the next picture.  Thus when you add another block on either side, you will create the look of the block in the next picture.


  It might be easier to visualize the look I am talking about with the four corners being different prints of the same color in this picture. As the block is formed with the four corners of the nine-patch as the center four of this block.

Here is another look that would be pretty in a quilt.


This pattern would be really interesting in a quilt, too.  You would have single small squares and then two diagonally from each other.


This one is a smaller version of an earlier one.  I think I like this look better.  This one would look cute with a child's novelity print for the larger red square.  You would have to "fussy cut" it for the framed look, but worth the effort.

This too is a smaller version of an earlier one I showed.


I will definitely be using one or two of these in a quilt.  It was fun just moving the pieces around and seeing the possibilities with a Disappearing Nine-Patch Block.  Maybe you will, too.  Let me know if you do.

UPDATE: I recently made a baby quilt using the disappearing nine patch. You can see it HERE.

UPDATE: Here is another lap-size quilt I made using the pattern.


Monday, July 23, 2012

FROZEN PINK LEMONADE PIE

We continue to have triple digit temperatures this summer.(bad thing).  But (good thing) that means that I am getting to try out some new recipes and discovering some really good ones.  I decided to try the recipe below to serve for my bunco group.  Since it is summer and so many are out of town, we only had 2 tables.  The last time I had friends over for Mexican Train, I fixed a LIGHT KEY LIME PIE and my husband was disappointed that I cut the pie into 6 pieces (number playing) and he didn't get any.  I decided to make two pies this time so I wouldn't have to cut the pieces so little and then that means he will get a piece.  I already had the ingredients and since the frozen pink lemonade I had was 12-oz, it was easy to do.
 

FROZEN PINK LEMONADE PIE
 
GRAHAM CRACKER CRUST:
2   cups low-fat graham cracker crumbs
1/4   cup sugar ( 2 T truvia)
7   Tablespoons light margarine

Combine and spread in a pie plate and bake for 7 - 8 min in a oven preheated to 350 degrees.  Cool completely.

FILLING:
1   14-oz  fat free sweetened condensed milk
1   8-oz  no-sugar-added Cool Whip
1   6-fluid oz. frozen pink lemonade concentrate, unthawed

Add sweetened condensed milk and Cool Whip together by gently folding until combined being careful to keep the mixture light & fluffy.
Add the frozen pink lemonade concentrate and continue to fold til combined.  Avoid letting the mixture get too liquid-y.
Spoon into pie crust and place in freezer to chill overnight.
Remove 10 minutes before you are ready to serve.

(In my haste to get this pie made for the gathering, I used a 6-oz purchased graham cracker crust.  Next time I will make sure I allow enough time so that I can make my own crust and control the ingredients I put in it.  I have recently seen a pin on Pinterest for making your own sweetened condensed milk.  I am anxious to try it.  If it works, I will finally have my fat-free, sugar-free sweetened condensed milk because I will substitute truvia for the sugar.  Will let you know if it works.)


TIP ALERT!

When I was doing some last minute cleaning this morning before my friends came over, one of the things I had to do was clean the chair seats of cat hair.  Miss Sara, our rescue cat, likes to lay everywhere and anywhere.  As I was cleaning the dining room chairs, I realized I should get my camera and take a picture.  I forget where I learned this tip, I think on TV, but it works so well.  No more buying fancy gadgets to clean pet hair from furniture.  It just takes a yellow rubber glove (Rubbermaid makes them but other brands will work fine, too.....Yeah, it has to be yellow.....just kidding).  Once you have the glove on your hand, it will work whether you wet the glove or not....I usually do wet it.  Simply wear the glove on your hand, then rub your hand over the fabric.  The pet hair will just ball up.  I usually pick any big balls of fur from the glove, and then just wash the rest of the hair off and I am ready for the next piece of furniture.  That easy!


Sunday, July 22, 2012

IMAGES OF MADISON

Several weeks ago when we dropped by for a short visit with Madison and Tyler, (ok, and her parents), Lori (aka "Mommy"), Madison, Tyler, and I were sitting in the shade on the grass.  Madison started taking things from my purse and I was explaining to her what everything was. 

 
 When we got ready to leave, she tried to "carry" the purse on her shoulder but it was just too heavy. BUT that didn't stop her.

Last week when we went to get Dakota, the "granddog", to keep while they were on vacation, Madison decided to explore my purse again.  She has a very inquisitive mind.  Here are some pictures I took of her before Mommy made her stop.


Oh, boy,  I wonder what is in here?  Let me see......


This print is too small to read.


Now, I wonder what Grandmother's plans are for this week?


Is this the house key or the car key?


If I could just get this cap off, I could put some lotion on my hands.


I wonder what else is in here that might be interesting? 


She spent how much?


Time out....I have to give my little brother a hug....I love him so.


Here is how he looks now.  He's growing so fast.


Here are a couple of pictures my son, Patrick (aka "Daddy") took of Madison that I saved from Facebook and he said I could add them to my blog.  


I love this picture of her "laid back".  He said she wasn't even 2 and already she knew how to take it easy.


On their recent vacation they visited with friends who live in Duluth.


Here is Madison with her daddy on her first boat ride.  Isn't she darling?


Hope these pictures have brought a smile to your face as they have to mine.


Saturday, July 21, 2012

RAISIN BRAN MULTI-GRAIN MUFFINS

My friend Betty recently asked me if I had a recipe for a breakfast bran muffin.  I told her I had several and I would retry them to see which one I liked the best.  The recipe I am sharing today is the first one I tried and my husband and I really liked it.  I cut one in half for us to share after letting them cool a little bit, and the next thing I knew he was getting a whole one.  They are that good.

The original recipe came from a cookbook I have had since 1978 called Good Home Cookin'.  That's enough to sell you right there, isn't it?  Anyway the cookbook was one of those compiled by a group of women from Central Arkansas.  I love those kind of cookbooks.  I have a whole bunch of them.  Anyway the recipe was called "Six-week muffins".  According to the instructions, the mix would keep for 6 weeks in the refrigerator.  I remember making these "back then" but don't think they lasted long enough for me to see if they actually would keep for six weeks.  Now, I don't think I would be brave enough to try it.

So, when Betty wrote me on Facebook and asked me if I had a recipe for a breakfast bran muffin, this cookbook was one of the first I opened.  I worked with the recipe, made one or two changes but mainly got it down to a 12-muffin size recipe.  I also changed the name of the recipe to fit my changes.


RAISIN BRAN MULTI-GRAIN MUFFINS

2   cups Raisin Bran Cereal
1/2  cup sugar
3/4   cup all-purpose flour
1/2   cup whole wheat pastry flour
1  1/4  tsp baking soda
1/2   tsp salt
1   egg
1   cup buttermilk
1/4   cup no-sugar added applesauce
1/2   tsp cinnamon

      Preheat oven to 400 degress F.

      Sift flours, soda, and salt into a large bowl.  (Can also mix with a whisk).  Add Raisin Bran cereal and sugar.  Break up the cereal a little with the whisk.  

     Mix the egg, buttermilk, and applesauce together in a separate bowl.  

     Add the egg mixture to the cereal mixture.  Mix well.

     Spray a 12- cup muffin tin with cooking oil.  Fill muffin cup 2/3 full.

     Bake for 12 minutes.   Check a center muffin with a toothpick for doneness.


    Cool on rack for 10 minutes before removing muffins to finish cooling on rack.

     Can freeze leftovers for later use.  Place muffins on flat dish without touching in freezer for 30 minutes.  Then remove and place in a freezer bag.  To use later, heat in microwave for about 15 seconds.  No need to thaw.

TIP ALERT!
(I used Great Value Raisin Bran.  They also had one with extra raisin.  If you like more raisins in your baked goods, get it.  It was the same price.  You probably know that you don't have to make them multi-grain if you don't want to.  Just use 1  1/4 cups all-purpose flour.  Also if you don't have buttermilk, put 1 tablespoon of lemon juice in a measuring cup and add milk to make 1 cup.  Let it sit for 5 minutes before using.)

I have another healthier bran muffin recipe I want to try, but it calls for oat bran and I haven't had a chance to go to a different grocery store to get some.  Our closest Wal-Mart didn't have any.  When I get it and make them,  I will let you know how they taste.  I am sure they are going to be really good too, because the recipe is one from a friend in Ventura who was a home economist.  She is the first person to introduce me to substituting applesauce for oil in recipes.  Thanks, Marilyn.     


Friday, July 20, 2012

CINNAMON-RAISIN BISCUITS


This is another favorite recipe that I'm not sure where I got, but I do enjoy making. I can look at my recipe and tell that I "fiddled" with the original one.  

During a recent visit with the COS grandkids and their parents (aka our son, Jeffrey, and our dil, Sara), Sara asked me to make them, but that she didn't have any whole wheat flour. I told her I would make them the original way so we wouldn't have to go to the grocery store to buy some whole wheat flour.  She had never eaten them without using all whole wheat flour. (That's the way I was making them when she met Jeffrey and that was the way I gave her the recipe.)  

Well, she liked the "original recipe" so much that when we left to come back home, she wouldn't even let us take with us two biscuits to eat on the way. (I wonder if she has made them again using only whole wheat flour?) I have to admit that they taste the best using all-purpose flour and I have quit totally substituting whole wheat pastry flour for the all-purpose flour.  I do half and half now. You have my permission (if you need it????) to use whichever you want. I also really like using craisins in them too instead of raisins. (Do I need to mention that I use light butter, truvia, and skim milk when I make them at home? Didn't think so.)The recipe makes about 15 biscuits.

CINNAMON-RAISIN BISCUITS

3  cups all-purpose flour (I use half all-purpose flour and half whole wheat pastry flour)
1   tablespoon baking powder
1   teaspoon salt
1/4   cup sugar
1 1/2  teaspoon ground cinnamon
1/2  cup butter
1/4   cup shortening
1   cup raisins or craisins or chopped dates
1   cup milk

GLAZE: 
 
1   cup sifted powdered sugar
1  1/2   tablespoon milk


Preheat oven to 400 degrees F.

Combine first 6 ingredients in a large bowl with a whisk. 

Cut in butter and shortening until mixture is crumbly. (I cut the butter in 1/4 inch slices and then use my hand instead of a pastry cutter to cut in margarine and shortening.)

Add raisins or craisins or chopped dates and 1 cup of milk, stirring until dry ingredients are moistened. (Once again I use my hands.)

Turn dough out onto a lightly floured surface and knead 4 or 5 times. Add additional flour as needed so dough is smooth and not sticky.

Pat dough out to 1-inch thickness and cut with a 2-inch biscuit cutter. (I have a glass that I like to use.)

Pat biscuit on both sides in a little oil that you have in a plate and place biscuit on a baking sheet.

Bake at 400 degrees F. for 15 minutes or until lightly browned.

While they are baking, prepare the glaze by combining the powdered sugar and milk, stirring until smooth. Drizzle over warm biscuits. 

I hope you will try my recipe.  The COS grandkids used to eat just the icing off, but the last time I made them, they ate the whole biscuit.  
 

Thursday, July 19, 2012

AMISH OATMEAL

1/3   cup butter
2  large eggs
3/4   cup brown sugar
1 1/2   teaspoon baking   powder 
1  1/2  teaspoon vanilla
1 - 2  teaspoon nutmeg OR cinnamon
1/4   teaspoon salt
1   cup +  2  tablespoons milk
3   cups oats (regular or quick)


1)  Melt butter.
2)  In a small bowl, beat eggs well.  Add vanilla.
3)  In a large mixing bowl, combine brown sugar, baking powder, nutmeg or cinnamon, and salt with a whisk.
4)  Add egg mixture and mix well, no lumps.
5)  Whisk in butter and milk.
6)  Add oats and stir well.
7)  Pour mixture into an 8 x 8-inch pyrex glass baking dish that has been sprayed with cooking oil.
8)  Cover with plastic wrap and refrigerate overnight.
9)  The next morning, remove dish from refrigerator.
10)  Preheat oven to 350 degrees; 325 degrees if using glass baking dish. 
11)  Bake, uncovered for 35 - 45 min, or until set in the middle.  (I checked after 35 min and it was ready)
12)  Serve hot with warm milk poured over. 


My dil Sara at Our Heartspun Homeschool introduced me to Amish Oatmeal.  She said that the kids really liked it and then told me how she warmed it up the second day.  This caught my attention because I knew when I make it, I will be making it just for myself.  My husband has his Kashi Go Lean w/Grapenuts that he eats just about every morning.  I usually eat oatmeal but must admit I do get bored with it.  The Amish Oatmeal allows me to eat my oatmeal every morning, but it is no longer boring.  Why?  Because I have a special way I warm it up each morning. More about this later.

Sara found the recipe on food.com by Aurora who said she had found the recipe from an old Amish cookbook that she had. (I reduced the amount of brown sugar and increased the cinnamon or nutmeg.)

You have to make the recipe the night before and leave it in the refrigerator overnight.  Then bake for 35 - 45 min the next morning and store the leftovers in the refrigerator.  After I ate it the first morning, I cut it into serving sizes (it will come out like a brownie when you do this) and placed them in a plastic container with a tight lid to store in the refrigerator.  They will keep for 7 days in the refrigerator. 

Amish Oatmeal isn't like what you normally think of as eating oatmeal. I think it is better.  Aurora describes it as tasting like an oatmeal cookie.  She might have added it looks like an oatmeal cookie.  Unlike most people, I don't add milk to oatmeal that I usually make in the microwave with quick oats.  BUT with this, you have to add some milk or it is toooooo dry. 

When Sara makes the recipe, she sometimes add raisins to the recipe.  The recipe doesn't suggest this and so when I made it earlier this week, I forgot to do so.  I'm so glad I did, because that is how I came up with my special way to warm it up each morning and thus have some variety. 

To warm Amish Oatmeal to eat another day, you put your serving size in a bowl, break it up with your spoon, and microwave on high for 1 minute.  Then add as much milk as you want and stir the oatmeal to absorb some of the milk.  Return to the microwave and heat it on high for 30 more seconds.  Remove, stir, and enjoy. 

With raisins before I warmed it up.
 What I decided to do the second morning since I had made it plain, was to add some raisins to the top after I broke the oatmeal up with my spoon.  I followed Sara's directions for warming it up, and was pleasantly surprised.  The raisins were soft just like they would have been if I had  originally cooked the oatmeal with them.  

With dried cranberries before I warmed it.


The next morning, I decided to try dried cranberries. (This is the only time I took a before and after picture)


After warming it up with the dried cranberries.


Dried apples before I warmed it up.


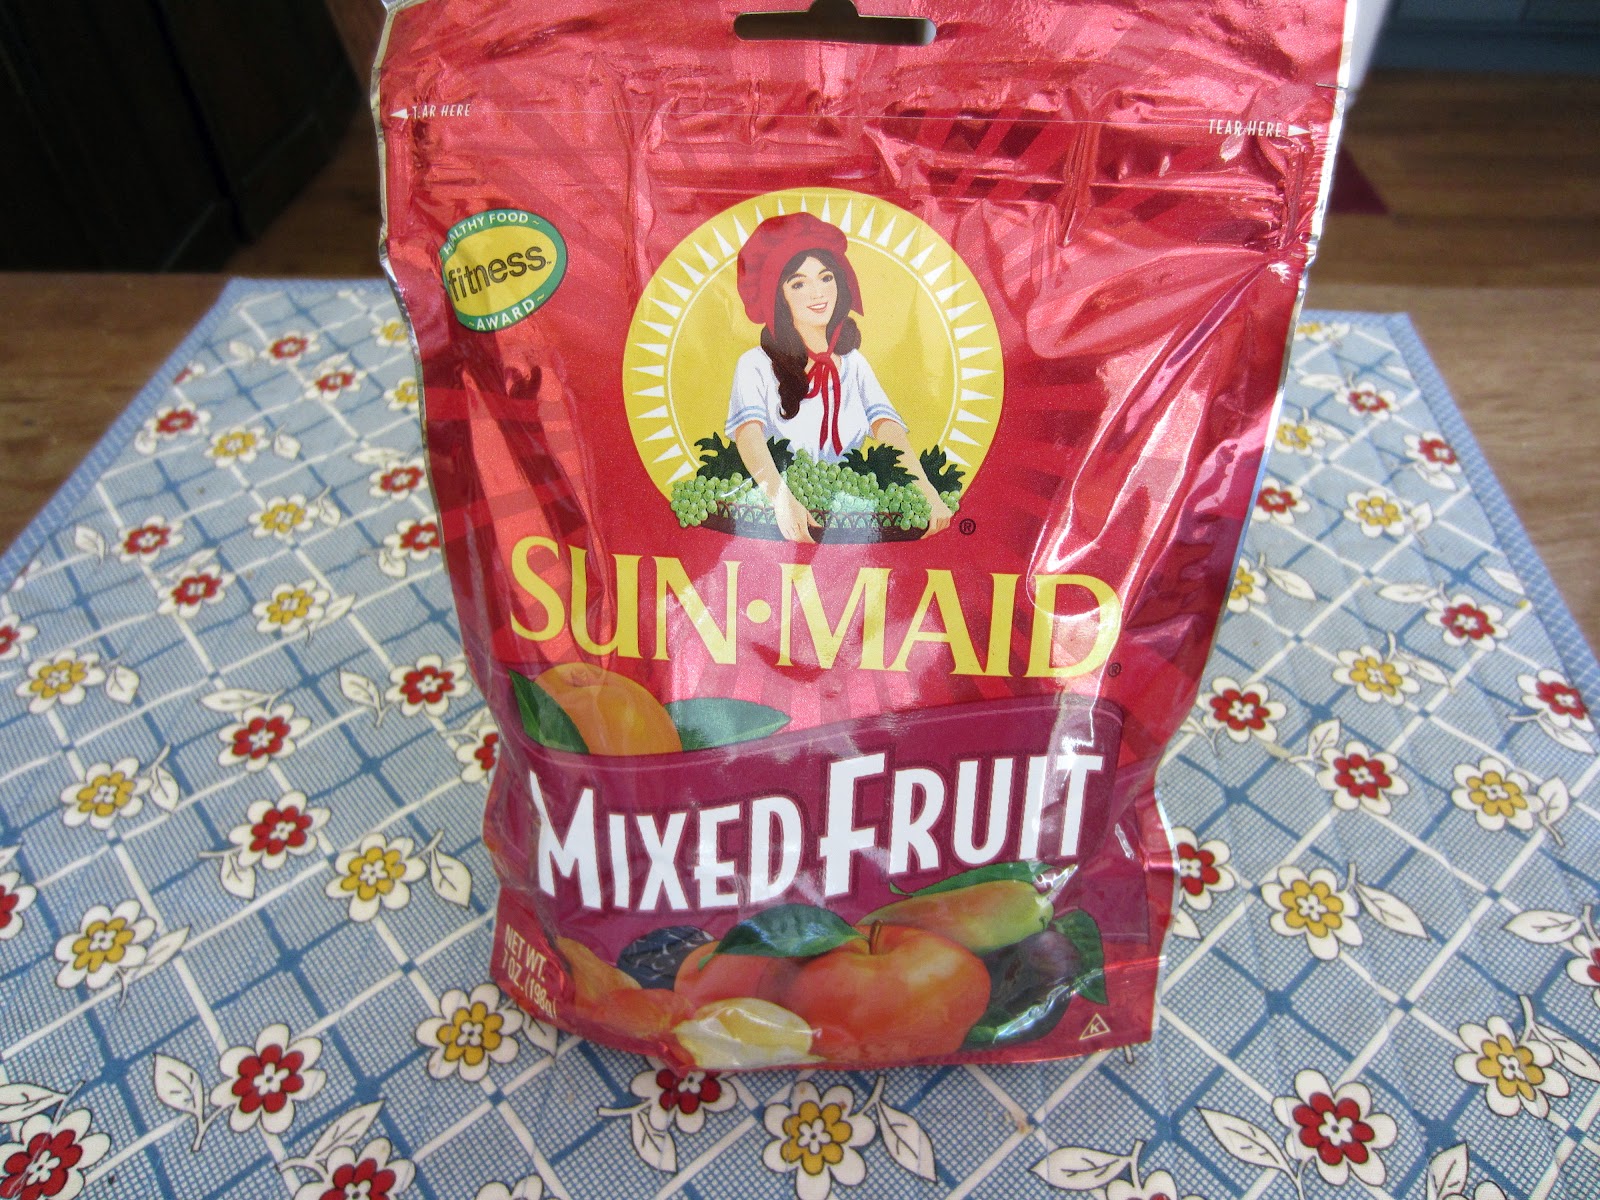
 The third morning, I decided to use some dried mixed fruit that I had and cut up some of the dried apple.  


This dried mixed fruit has apricots, plums, pears, and apples.  I can have a little of it all or just pick out which fruit I want to add that morning. This would be great to use with children who may have different preferences for fruit. 

This morning I cut up half of a dried apricot from the mixed fruit.


 From now on I will make it plain everytime. 
 

Wednesday, July 18, 2012

DOUBLE RICH CHOCOLATE BANANA NUT BREAD

One day while on Pinterest I saw a pin from Lindsay at artsy fartsy mama.  It was for banana bread using a cake mix.  I looked at the recipe...it looked really easy and simple.  I LIKE really easy and simple.  I repinned it thinking I would try it some day when I had bananas. 

The day finally came when I decided that I would give it a try.  The only problem was I didn't have a yellow cake mix....plenty of Devil's Food but no yellow.  So that is how I came up with Double Rich Chocolate Banana Nut Bread.  I also changed from semi-sweet chocolate chips, because I LOVE dark chocolate and know it is better for you.  Aren't women supposed to eat 1-oz of dark chocolate a day?  I also use Sugar Free cake mixes whenever possible, but you could use a regular cake mix as Lindsay did.  I had some black walnuts that I had gotten through a fundraiser at church by the Miracle Ringers, the handbell choir I belong to, so I used those for the nuts.  Any nut would do OR leave them out if you don't want them.  I also like to make breads using the mini loaf pans.  That way we can eat one and freeze the other two to enjoy at a later date. It allows me to spread around my goodies and have more variety.  We can simply take whichever variety we are in the mood for out of the freezer and enjoy it for 2 or 3 days.


Did I mention it only calls for 5 ingredients?


DOUBLE RICH CHOCOLATE BANANA NUT BREAD

1   CUP MASHED BANANAS (2 LARGE BANANAS)
2   LARGE EGGS
 1  PILLSBURY SUGAR-FREE DEVIL'S FOOD CAKE MIX
3/4   CUP GHIRARDELLI 60% CACAO BITTERSWEET CHOCOLATE CHIPS
1/2   CUP CHOPPED BLACK WALNUTS (OPTIONAL
1)  Preheat oven to 350 degrees F.    

2)  Prepare one 9 x 5-in loaf pan OR  3  mini-loaf pans by spraying bottom and sides with spray cooking oil

3)  With your mixer on low speed, mash the two bananas and then mix in the eggs.   Add the cake mix, chips, and nuts and mix til completely combined.

4)  Spoon batter into pan(s) and bake.  60 minutes for 9 x 5-in loaf pan and 45 minutes if making 3 mini loaves.  Test doneness with a toothpick in the center.


5)  Cool in pan(s) on rack for 10 minutes.  


6)  Remove and let cool completely. 

You know you could use any flavor of cake mix and come up with all sorts of different varieties.  I will have to give some a try.  Let me know if you try a different one and how it turns out.

TIP ALERT!

To  keep your bananas from ripening so quickly, separate them from the bunch when you get them home.  I don't know why this works, but it does.

Tuesday, July 17, 2012

PLASTIC BAG HOLDER

I decided since it is July, I needed to make a new plastic bag holder and take down the Christmas one.  They are so easy to make and fortunately I had all the materials I needed so I could get started right on it.  I try to use the fabric reusable bags, but I don't always manage to do so.  I do try to recycle the plastic ones when I get them so I need some place that looks attractive in my kitchen for them.  

1.  I started with a kitchen towel that has a one-way design. I also liked that it had the brown band at the top and bottom which will make an excellent hem. (If your towel doesn't have the band, make a 1-inch hem.)


2.  I cut off the top band about 1/4 of an inch below the band.


3.  I made the bag a finished 17 inches so I cut 17 1/4 inches from the bottom of the towel.  Since the bottom of the towel wasn't straight, I used the design band as my guide and cut 10 inches above it.


4.  I cut the end hems off both ends of the top band so it would fit across the top of the towel. Then I pinned the band to the towel and sewed the two together with a quarter inch seam.


5.  Next, I folded the towel in half lengthwise (right sides together), pinned the edges together, and sewed them together starting at the top and stopping at the top of the bottom band.  You want to leave the bottom band open to insert the elastic later.


6.  For the hanger:  I cut a strip from the leftover piece of towel 2 inches wide.


7.  I finished all four raw edges with a zig zag stitch. 


8.  I folded in one of the long sides toward the center on the wrong side about 5/8 inch.  Then I brought the other long side toward the center of the strip til the hanger measured 7/8 inch.  I sewed down the center of the hanger with a zig zag stitch catching the overlapped edges.

 
9.  I attached one end of the hanger to the top of the bag at the seam on the inside, with the right side of the hanger facing the wrong side/inside of the bag, by sewing close to the edge of the hanger and then again close to the top of the bag.  This covered up the side seam at the top of the bag.  Then I brought the other end of the hanger over and matching the ends stitched it on the bottom edge of the hanger only.  In the picture (9) I have made a loop in the hanger to show how it is attached to the bag.


10.  I decided to leave the top of the bag open but have elastic in the bottom.  You can also thread a piece of ribbon or bias tape through the bottom hem and have a bow.  For the elastic option, I cut a piece of 3/8 inch elastic one inch longer than the measurement around the bottom of the bag.  With a large safety pin in one end of the elastic, I inserted the safety pin end into the hem of the towel. 

11. Then I moved the elastic through the hem until I had pulled most of the elastic through. I stitched across the end and 

12 then cut the excess elastic off.

13.  I pulled the safety pin end tightening to the desired size for opening to be able to pull bags out, pinned the elastic in place, and

14 sewed across the end and cut the excess elastic off.


15.  I turned the bag inside out and now stitched through the band/hem at the bottom of the bag.


And here it is finished.


Here is my Christmas one that has been retired until later in the year.

I crocheted the hanger for it. 


Here is a picture of one I made my dil Sara.  I used the whole length of the towel.  Instead of elastic in the bottom, she has a drawstring from ribbon that secures the bottom and she ties a bow with it.